2009 arctic cat crossfire power valve problems

ridehard

New member
660 brass clutch bearing failure STM power valve oil

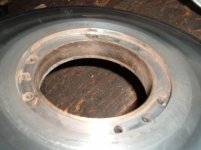
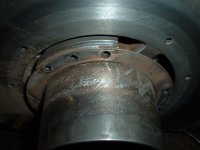
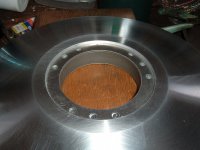
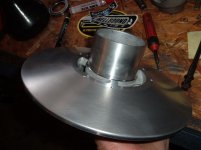
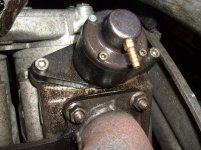
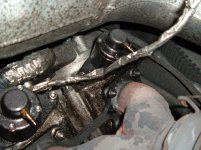
I installed a 660 brass bushing in my moveable sheave on my secondary clutch because it was worn paste the .020 wear limit. I went out west for 5 days and it held up for them five days but it is toast now. I had to purchase a new secondary clutch and went with the BDX extreme heavy duty clutch. The bearing in the secondary moveable sheave has 80% more bearing surface and so far with about 300 miles on it is performing excellent. As you can see in the picture the bearing goes all the way thru but on the stock clutch the bearing is less than half the width of the sheave.The STM power valves have about 650 miles on them in this picture and I am showing how much oil comes out of the vent tube onto the engine if no tube is installed. I did not install a hose on the vent because I thought it would melt and then close off the vent. As soon as the snow melts I will have pictures of the valves disassembled. 1st picture worn out brass bushing in clutch 2nd pic worn secondary stationary sheave, picutures 3 and 4 are the new BDX clutch, last picture is the STM power valves showing the oil that will come out over 650 miles.
 

Attachments

  • crossfire power vavles 056.jpg
    crossfire power vavles 056.jpg
    81.9 KB · Views: 26
  • crossfire power vavles 057.jpg
    crossfire power vavles 057.jpg
    95.9 KB · Views: 19
  • crossfire power vavles 059.jpg
    crossfire power vavles 059.jpg
    93.1 KB · Views: 24
  • crossfire power vavles 060.jpg
    crossfire power vavles 060.jpg
    90 KB · Views: 22
  • crossfire power vavles 064.jpg
    crossfire power vavles 064.jpg
    98 KB · Views: 24
Last edited:

ridehard

New member
STM power valve

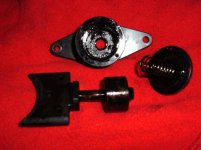
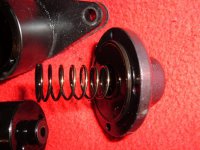
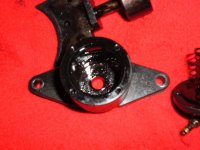
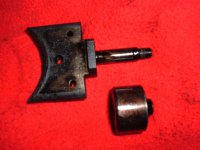
Removed my STM power valves for disassembly and cleaning. I got 105hrs. on these valves this year and 6 gallons of oil run thru them. They have performed very well for me all year and I have cleaned the valve vane only once before this. The valve was gummed up good and pulled out hard once passed the normal movement position. Once the valves were on the bench I remove the four cap screws holding on the piston housing cap on, then I removed the left handed threaded screw that holds the piston on the power valve rod end, then the piston unscrews from the power valve with the supplied spanner wrench, the piston comes out of the bore and the valve goes out the other way. There is a small o-ring between the piston and the inside bottom of the piston housing this keeps the piston from slamming into the housing when the valve closes. This o-ring was compressed and showed signs of deterioration so it will be replaced. The bore in the piston housing also showed signs of wear and was out of round .005 from the shaft sliding in and out. The piston bore was in great shape and showed no signs of wear. The piston did show some wear but was smooth. They cleaned up fine. So other than the small o-ring they were a great item and I would recommend them to anyone replacing there stock system.
 

Attachments

  • exhaust valve review 002.jpg
    exhaust valve review 002.jpg
    93.4 KB · Views: 14
  • exhaust valve review 005.jpg
    exhaust valve review 005.jpg
    84.1 KB · Views: 11
  • exhaust valve review 008.jpg
    exhaust valve review 008.jpg
    95.6 KB · Views: 11
  • exhaust valve review 013.jpg
    exhaust valve review 013.jpg
    84.4 KB · Views: 11
  • exhaust valve review 014.jpg
    exhaust valve review 014.jpg
    84.9 KB · Views: 15

snoluver1

Active member
Me thinks you might benefit from turning your oil pump down a bit! Holy cow, six gallons? Have you ever measured your oil consumption? These things are set up pig rich from the factory!
 

snoluver1

Active member
It does seem a bit rich and does load up at times. I will be looking at that over the summer. thanks

FYI, I took two full turns out of my pump and I'm still a tad rich. Running right around 36:1. Shoot for 40:1 ratio and all is good. Much less build up on the valves, a lot less consumption, and it takes care of that loading up after idling a bit.
 

ridehard

New member
What do they have for adjustment on these, a screw with a lock nut? I thought with a solid link from the carb to the oiler there would be no adjustment. 36:1 or 40:1 both still sound rich what do they set them at the factory? 20:1? My plugs have a good build up on them also usually.
 

ridehard

New member
finally have diamond drive fixed.

I took my diamond drive apart today and finally the 5203 bearing was in great condition after replacing it twice. The oil was somewhat clear and had some normal black stuff but nothing like before where the oil was all black with metal flakes in it. Taking the material off the end of the drive shaft shortening it up did the trick. I have no side load pressure on the drive shaft assembly anymore.
 

snoluver1

Active member
What do they have for adjustment on these, a screw with a lock nut? I thought with a solid link from the carb to the oiler there would be no adjustment. 36:1 or 40:1 both still sound rich what do they set them at the factory? 20:1? My plugs have a good build up on them also usually.

The linkage is adjustable. Its threaded with a jam nut. They are probably around 25:1 from the factory. 40:1 is what you want. Some guys say you can go as high as 50:1, but I think thats pushing it a bit.
 

ridehard

New member
So I take it you have to keep track of the amount of oil you use to the amount of gas to figure this out? You went 2 turns on your linkage so a guy could start there and keep checking and adjusting til he had it at 40:1 ratio. Sounds like something to fine tune next year but I will start out with 2 turns. I have never worked on that part of the motor is the linkage easy to get to? Thanks for the info snoluver1
.
 
Top