My Third (and Fourth) vintage sled projects..... 1979 Polaris TXL 340 @ Centurion 500

kirk600

Active member
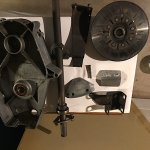
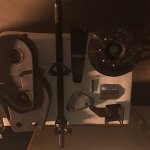
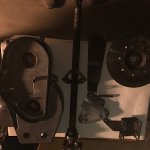
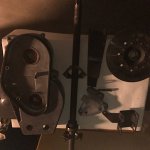
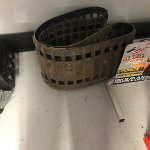
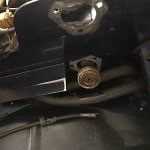
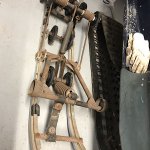
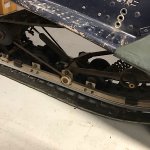
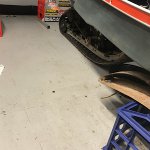
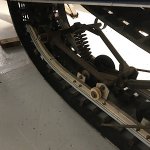
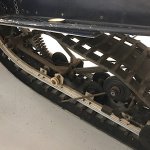
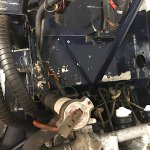
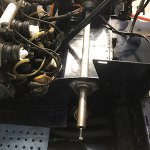
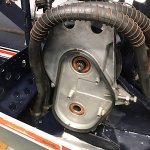
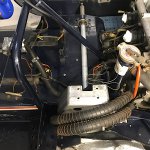
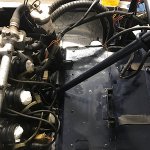
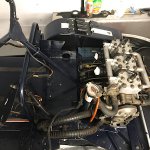
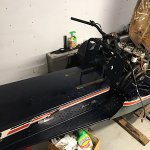
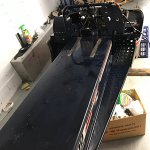
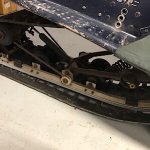
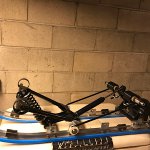
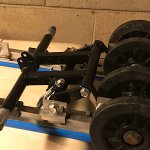
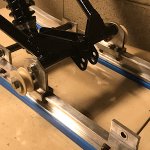
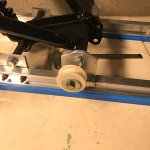
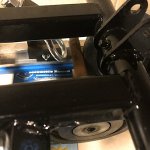
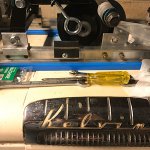
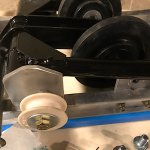
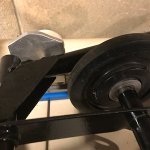
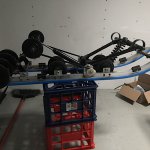
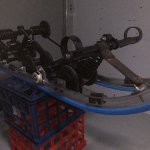
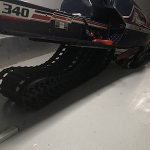
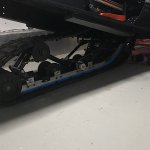
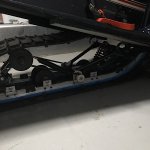
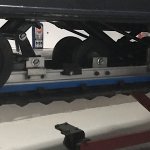
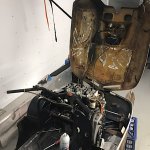
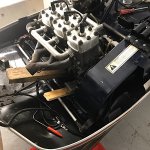
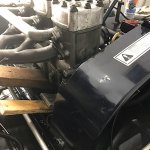
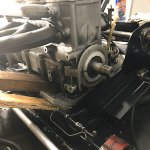
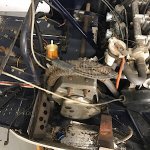
So Monday I was able to get the repaired rails back from the welder. I had mostly finished painting the suspension parts so today I bought new fasteners from the local Fastenal store and started the assembly process.
 

Attachments

  • 841382CB-A052-4520-8FB9-DB21DE83D944.jpeg
    841382CB-A052-4520-8FB9-DB21DE83D944.jpeg
    43.7 KB · Views: 25
  • F3D31D41-9B69-415A-8228-02AA8B1A39F4.jpeg
    F3D31D41-9B69-415A-8228-02AA8B1A39F4.jpeg
    37.8 KB · Views: 23
  • 09487BD3-F0EC-4B2A-9C25-49B541E91C2B.jpeg
    09487BD3-F0EC-4B2A-9C25-49B541E91C2B.jpeg
    43.3 KB · Views: 19
  • 26DE7B28-44BB-4FBD-8F23-0133BD620060.jpeg
    26DE7B28-44BB-4FBD-8F23-0133BD620060.jpeg
    32.8 KB · Views: 20
  • CF013686-F351-433B-9CBE-305A6D14648B.jpeg
    CF013686-F351-433B-9CBE-305A6D14648B.jpeg
    30.6 KB · Views: 17
  • A0BD468D-213E-4D93-B3F8-BBD9828551BC.jpeg
    A0BD468D-213E-4D93-B3F8-BBD9828551BC.jpeg
    46.3 KB · Views: 16
  • 74006950-534C-4199-A861-D7F9840D891A.jpeg
    74006950-534C-4199-A861-D7F9840D891A.jpeg
    31.7 KB · Views: 16
  • 32E59B8B-14D3-4EFA-894F-2D3D023C88DC.jpeg
    32E59B8B-14D3-4EFA-894F-2D3D023C88DC.jpeg
    28.7 KB · Views: 21

kirk600

Active member
So Monday I was able to get the repaired rails back from the welder.
Today I trimmed the hyfax and got them installed now I need to get another locking collar for one of the idler wheels
 

kirk600

Active member
Well today was a good day, I got the skid installed in my TXL, and I placed the seat on it to give me some motivation! I can see the progress is slowly getting better, now that the weather has changed...... hopefully you can enjoy the newest updates....... have a great weekend
 

Attachments

  • D8B146EF-EA2D-4CAB-B185-0D7D97632FA6.jpeg
    D8B146EF-EA2D-4CAB-B185-0D7D97632FA6.jpeg
    31.2 KB · Views: 35
  • 4B6D65F4-70D5-41F1-8720-1913096D0B11.jpeg
    4B6D65F4-70D5-41F1-8720-1913096D0B11.jpeg
    29.9 KB · Views: 34
  • 3191F8BC-48BF-4988-90F7-F1141E68E73D.jpeg
    3191F8BC-48BF-4988-90F7-F1141E68E73D.jpeg
    23.3 KB · Views: 30
  • 4167C807-52FD-4863-A37B-51741380DEDD.jpeg
    4167C807-52FD-4863-A37B-51741380DEDD.jpeg
    22.9 KB · Views: 29
  • B5F493F2-3EB9-446E-A154-442F846314F8.jpeg
    B5F493F2-3EB9-446E-A154-442F846314F8.jpeg
    25 KB · Views: 28
  • 651FA617-8E04-43D0-B044-6B84C83F8552.jpeg
    651FA617-8E04-43D0-B044-6B84C83F8552.jpeg
    24.1 KB · Views: 26
  • 5AF77A89-0934-411F-A5B2-80D1786A816A.jpeg
    5AF77A89-0934-411F-A5B2-80D1786A816A.jpeg
    27.3 KB · Views: 29
  • 03A00132-1E9A-4E30-9A08-2E53EEAEBE9F.jpeg
    03A00132-1E9A-4E30-9A08-2E53EEAEBE9F.jpeg
    27.7 KB · Views: 27
  • 038D3882-6B23-46D3-9AA3-3218319D6049.jpeg
    038D3882-6B23-46D3-9AA3-3218319D6049.jpeg
    32.8 KB · Views: 35

kirk600

Active member
So today I finally got the centurion in the trailer, after 7 months under a tarp on my other trailer. Started to take it apart to see what I am dealing with. I couldn't get spark so I figured some testing might be in order. This sled has 3 coils and none seem to be firing. Had to pull carbs to get to them. Will throw a few pictures on here so you can see what it looks like. I did start cleaning up the 40 years of grime off the engine and under hood in general. Hopefully I can figure out the spark issue tomorrow.
 

Attachments

  • BC46D8F3-F15C-4F7B-AB33-66037841CFFA.jpeg
    BC46D8F3-F15C-4F7B-AB33-66037841CFFA.jpeg
    32.9 KB · Views: 30
  • EB33C760-B687-4854-816D-2AB048291D6F.jpeg
    EB33C760-B687-4854-816D-2AB048291D6F.jpeg
    38 KB · Views: 29
  • 6DF62974-1526-4D50-9CC3-A75FEF013DA3.jpeg
    6DF62974-1526-4D50-9CC3-A75FEF013DA3.jpeg
    46.3 KB · Views: 29
  • 13A5C914-3D2F-480F-A017-61C7288AE469.jpeg
    13A5C914-3D2F-480F-A017-61C7288AE469.jpeg
    42.2 KB · Views: 26
  • 0A4E4C7C-1E43-4C4F-9ED4-18C558AE8BE1.jpeg
    0A4E4C7C-1E43-4C4F-9ED4-18C558AE8BE1.jpeg
    43 KB · Views: 25
  • CCF97F5D-EBA1-4EF4-9484-1516F773D082.jpeg
    CCF97F5D-EBA1-4EF4-9484-1516F773D082.jpeg
    40.5 KB · Views: 27
  • C9E01A10-219A-4E0F-B68D-A8D1438C5696.jpeg
    C9E01A10-219A-4E0F-B68D-A8D1438C5696.jpeg
    46 KB · Views: 26
  • A54485C0-C4E7-4896-9405-86D6401D2DD3.jpeg
    A54485C0-C4E7-4896-9405-86D6401D2DD3.jpeg
    43.1 KB · Views: 25
  • 6E61ADC1-C42B-49B9-8B00-483D04331F08.jpeg
    6E61ADC1-C42B-49B9-8B00-483D04331F08.jpeg
    43.1 KB · Views: 23
  • 46943EF2-9DA4-43D2-9575-4E4EC83428D8.jpeg
    46943EF2-9DA4-43D2-9575-4E4EC83428D8.jpeg
    38.2 KB · Views: 27

kirk600

Active member
Here's a few more
 

Attachments

  • D7144CD1-439E-428F-81D9-85682BB8774A.jpeg
    D7144CD1-439E-428F-81D9-85682BB8774A.jpeg
    41.2 KB · Views: 13
  • B042CD04-D286-47E3-B98B-0D3CBAE972F6.jpeg
    B042CD04-D286-47E3-B98B-0D3CBAE972F6.jpeg
    42.5 KB · Views: 13
  • F3421FAC-4232-4379-9E0E-F412266C97C7.jpeg
    F3421FAC-4232-4379-9E0E-F412266C97C7.jpeg
    43.4 KB · Views: 12
  • 5C8162C3-3D2A-483D-AE3B-6FAC79DF8A8A.jpeg
    5C8162C3-3D2A-483D-AE3B-6FAC79DF8A8A.jpeg
    44.8 KB · Views: 12
  • 8FA375AE-B0D1-4B94-A15D-74148E84A901.jpeg
    8FA375AE-B0D1-4B94-A15D-74148E84A901.jpeg
    39.8 KB · Views: 13
  • 08DF8FD9-1D7F-4CB6-86FC-DB4EF4160722.jpeg
    08DF8FD9-1D7F-4CB6-86FC-DB4EF4160722.jpeg
    45.3 KB · Views: 12
  • 3F57A276-1D74-4A52-A1A4-7FFF580F4704.jpeg
    3F57A276-1D74-4A52-A1A4-7FFF580F4704.jpeg
    36 KB · Views: 12
  • 80624986-44D9-4E0D-82B0-B7AEBBA5750B.jpeg
    80624986-44D9-4E0D-82B0-B7AEBBA5750B.jpeg
    44.8 KB · Views: 13
  • C77AFCF1-0CCF-4312-9A89-4A64726F726E.jpeg
    C77AFCF1-0CCF-4312-9A89-4A64726F726E.jpeg
    38.7 KB · Views: 13
  • 28A36651-E629-47BA-9BF8-C370297ADC9D.jpeg
    28A36651-E629-47BA-9BF8-C370297ADC9D.jpeg
    53 KB · Views: 14

kirk600

Active member
Well today It's been cold so I kept the project indoors.... I pulled the primary clutch apart, and noticed that the moveable sheave is cracked. I tried to remove the spider but didn't have any luck. I decided to use the old spring and put some thunder shift weights in a newer open primary . Also painted a couple trunk doors..... man is it tough to get them to look good, mine are rider quality I suppose!
 

Attachments

  • 03E3AF1C-9262-498C-ABC3-44D61043EA29.jpeg
    03E3AF1C-9262-498C-ABC3-44D61043EA29.jpeg
    37.4 KB · Views: 11
  • 96A403C5-F1F4-45C8-AB31-41171DD90893.jpeg
    96A403C5-F1F4-45C8-AB31-41171DD90893.jpeg
    51.6 KB · Views: 8
  • 85958360-E6FD-42D8-9AC8-F23F0AD47E11.jpeg
    85958360-E6FD-42D8-9AC8-F23F0AD47E11.jpeg
    45.9 KB · Views: 11
  • 777D2962-40ED-4E6A-B53B-EAB3584A38F4.jpeg
    777D2962-40ED-4E6A-B53B-EAB3584A38F4.jpeg
    38.3 KB · Views: 12
  • CB47F41E-C9BA-4F06-A7CE-63204B2C7141.jpeg
    CB47F41E-C9BA-4F06-A7CE-63204B2C7141.jpeg
    36 KB · Views: 13

skiroule

Well-known member
Hey Kirk, that TXL is looking fine! Love the blue hyfax and I’m glad you kept the original skid. You probably already told me this but did you get your seat cover from Dr. Mario? It sure looks like one of his. As I’m sure you’re aware, there are a lot of guys envious of you for scoring that Centurion. By the way, those doors are definitely better than rider quality.

Can’t thank you enough for pressing on with this project and posting these updates. It really has made me want to get back out in the shop and start working again.
 

kirk600

Active member
Hi Kelly, glad you like the updates and really appreciate your updates also. It sure is nice seeing you back in the shop, making a little progress on "the Namesake ".
You are correct on the seat cover, Dr Mario sure does have nice stuff, and lots of NOS parts too.....seat cover cost as much as a new belt does these days, so not too bad when you put it in perspective!
It seems crazy how tough it is to find some of these parts, 5 years ago they were in stock at some of the old dealers around here. I have had a few people ask me about the red ski skins on my old TX, and you can't even get red anywhere now. Some dealer on the east coast told me they don't make any in red anymore because of the way red reacts to UV rays. Whatever the reason It sure looks good on these old sleds though. I tried to get some, and finally just settled for the black ones I got on the TXL.
Take care everyone, and enjoy your Holiday too

Kirk
 

skiroule

Well-known member
I guess I know who to see if I need clutch work done :). I’ve talked to Don Soukup (AKA Dr. Mario) on a number of occasions at different vintage events and have bought seat covers, tracks, and a bunch of small stuff from him, all of which have been top quality items. Interesting guy and he’s been able to actually make a business out of serving the vintage Polaris community. Without guys like him, it would be much tougher to restore these old gems. Whenever I get a chance to rummage through his display tables at an event, I always find something I can use.

Looking at your project is making me wonder about a next project, if there is one. I think I would be leaning towards going back to Polaris. As tough as it can be to find Polaris parts, finding a part for the lower production sled brands can be really a challenge. For some reason, the early 70’s TXs seem to be an appealing sled to add to the herd. Stuff crops up from time to time and eventually I figure I’ll find a deal I can’t pass up. I’m thinking you saw the ad on FB where a guy was selling five Polaris sleds – two colts and three TXs (one of them being a 74 or 75 500 Limited) for $1500 (including the trailer they were sitting on). Heck, that 500 triple sled is probably worth a grand by itself. They were a little rough but very restorable. Got me thinking…..
 

kirk600

Active member
Hey you said the next project, and your story has 5 sleds for $1500 bucks! Now I enjoy bringing these back from the cliff but 5 sleds would take me years to get them all done.... but in your defense I recall reading one time you start with three of the same sled and use the best parts to build yours and sell off the spare parts to finance it!
I have yet to do a full restoration on one, but if I do It will be a Polaris!
You are right about Don, interesting character!!!! Don't see the work he does for the sport slowing down any time soon. He has quite the knowledge about Polaris and Cat sleds and he sells it all at events and eBay. I see he just came out with reproduction drivers (for early TX's I believe ).

hope everyone has a great Thanksgiving,

Kirk
 

kirk600

Active member
Hope everyone is doing well and avoiding the crowds on Black Friday....... I got a little sled time in. I had some tight bearings on my jackshaft, so I pulled it as well as the chaincase to clean things out a little better.
I also need to get the caliper out so I can rebuild it. When these sleds sit for a long time, the brake fluid turns to gel. I have not removed the piston from the caliper yet, but hopefully I can get it done tomorrow. A few pictures to show them after a quick scrub!
 

Attachments

  • 3DCE416B-1B61-4CA8-93D9-793D0982D115.jpeg
    3DCE416B-1B61-4CA8-93D9-793D0982D115.jpeg
    31.9 KB · Views: 12
  • D80C3571-6D9C-4AC1-9DD0-C0626228F5D3.jpeg
    D80C3571-6D9C-4AC1-9DD0-C0626228F5D3.jpeg
    24 KB · Views: 12
  • B6EC331F-2C39-4C7E-B76E-41208586EA97.jpeg
    B6EC331F-2C39-4C7E-B76E-41208586EA97.jpeg
    25.5 KB · Views: 8
  • 3226A64C-6C4B-45B2-8273-14BBFA479431.jpeg
    3226A64C-6C4B-45B2-8273-14BBFA479431.jpeg
    25.4 KB · Views: 11

kirk600

Active member
Well I wasn't successful in removing the piston from the caliper today, I need to get a little creative. I was able to push it in so I know it isn't stuck.
So with that at a standstill, I decided to pull the track and skid. This sled is so much better shape suspension wise. No egged out holes, no stuck shafts, so far no frozen bolts on the skid. We will see once I can disassemble it if there are any surprises.
 

Attachments

  • 3374324B-2FEA-463B-A4FB-83141D074F5D.jpeg
    3374324B-2FEA-463B-A4FB-83141D074F5D.jpeg
    29.4 KB · Views: 18
  • A113C0F7-309F-4C70-B3E8-9086D3EBE2CC.jpeg
    A113C0F7-309F-4C70-B3E8-9086D3EBE2CC.jpeg
    24.5 KB · Views: 17
  • 3604D360-C240-4A24-82CA-B842F5221C4B.jpeg
    3604D360-C240-4A24-82CA-B842F5221C4B.jpeg
    44.5 KB · Views: 15
  • 179E4BB8-16F8-47EF-876C-48378FB4F951.jpeg
    179E4BB8-16F8-47EF-876C-48378FB4F951.jpeg
    39 KB · Views: 16
  • 245BA27C-C29F-461A-A1A6-DB3BA7C20228.jpeg
    245BA27C-C29F-461A-A1A6-DB3BA7C20228.jpeg
    36.4 KB · Views: 15
  • 985C77AC-0968-4ECA-B628-D8268910BB31.jpeg
    985C77AC-0968-4ECA-B628-D8268910BB31.jpeg
    33.3 KB · Views: 13
  • 79765626-C317-45B9-926B-D15FB9817E49.jpeg
    79765626-C317-45B9-926B-D15FB9817E49.jpeg
    33.4 KB · Views: 15
  • 0AF45516-C38F-4E48-8020-BAFE7B2CDEA0.jpeg
    0AF45516-C38F-4E48-8020-BAFE7B2CDEA0.jpeg
    34.9 KB · Views: 16
  • BF322FD4-8FEE-41F0-8DA3-A1A63DB2B951.jpeg
    BF322FD4-8FEE-41F0-8DA3-A1A63DB2B951.jpeg
    45.9 KB · Views: 20

kirk600

Active member
One last photo before I go to work!
 

Attachments

  • B6F949C8-9231-46DE-90CA-A979EFCE36F2.jpeg
    B6F949C8-9231-46DE-90CA-A979EFCE36F2.jpeg
    50.9 KB · Views: 13

euphoric1

Well-known member
kirk600, maybe you have already tried this but some penetrating oil in fluid cavity to help liquify whatever the old brake fluid may have become through the years, crank up the heat on a ultrasonic cleaner if you have one give it a few minutes in the tank and apply compressed air to caliper. had to do that on a Indy Ultra that was stuck, but don't do the stupid thing I did and put fingers in front of piston because it really smarts when that thing flies out.
 

skiroule

Well-known member
One last photo before I go to work!
I don't know how you get so much accomplished while still working full time. I have all I can do to get a couple of bolts removed in a day and I don't have that pesky distraction of a job. I suspect that if I were to do a time-lapse of my shop activity it would probably confirm what I suspect is the biggest problem (lack of focus).

Those Centurions sure had cool looking motors. Hopefully at some point you'll be able to post some video of it running - like the sound of those triples.
 

kirk600

Active member
Kelly, I don't have many distractions whenever I am in the trailer........ no TV, radio house phone etc. people have stopped by and I never heard them.......... luckily the trailer is insulated so I can leave tools out and get right back to work when I can find some time. I have power in the trailer, LED lights and heat should I need it .
My work area is organized Chaos to everyone who see's it....... but I know where everything is at. I want to find a tool box and install some cabinets but not lose functionality so for now it will be a great shop!
Will definitely post pictures and videos of both of them when I get them running
 

kirk600

Active member
So with a little bit of luck, I was able to free up the piston in the caliper. An extra master cylinder and line makes bench bleeding so much easier and that allowed me to use the hydraulic pressure in the line to get the piston out.
Kind of messy but I will take that win!
Also got to install the chaincase, and The jackshaft after I painted it. I used the spacer from my clutch press to pull the jackshaft through the bearing in the chaincase. a new bearing on the driveshaft and track is installed.
 

Attachments

  • FEB548DB-8966-4DE9-BADB-5CB8AE6066F8.jpeg
    FEB548DB-8966-4DE9-BADB-5CB8AE6066F8.jpeg
    37.2 KB · Views: 12
  • 98D7607F-D1C2-4426-8C07-1F8226540B08.jpeg
    98D7607F-D1C2-4426-8C07-1F8226540B08.jpeg
    37 KB · Views: 11
  • 8ED1DC86-098C-4244-AD5E-BE8534E1A0FC.jpeg
    8ED1DC86-098C-4244-AD5E-BE8534E1A0FC.jpeg
    36.9 KB · Views: 11
  • 4EB0687B-9002-4802-8784-3FD927ABF120.jpeg
    4EB0687B-9002-4802-8784-3FD927ABF120.jpeg
    36.8 KB · Views: 10
  • 6A117FA8-D62D-4644-A460-8C52F3F9EE8C.jpeg
    6A117FA8-D62D-4644-A460-8C52F3F9EE8C.jpeg
    46.1 KB · Views: 11
  • 20869223-BE10-47C6-ABC9-889B39988750.jpeg
    20869223-BE10-47C6-ABC9-889B39988750.jpeg
    48.3 KB · Views: 10
  • 6731ABD8-0A5E-42EE-B2DB-BF74F81FA8A3.jpeg
    6731ABD8-0A5E-42EE-B2DB-BF74F81FA8A3.jpeg
    44.8 KB · Views: 12

kirk600

Active member
Also did a little painting on the tunnel and running boards
 

Attachments

  • 59626A7A-54A8-4B92-945A-4815B580DA7B.jpeg
    59626A7A-54A8-4B92-945A-4815B580DA7B.jpeg
    44.8 KB · Views: 17
  • B0F39382-A11E-4E66-9E59-30F30817D2C3.jpeg
    B0F39382-A11E-4E66-9E59-30F30817D2C3.jpeg
    45.6 KB · Views: 18
  • 279C8355-E50D-4AAD-8FB0-DE66FD06736C.jpeg
    279C8355-E50D-4AAD-8FB0-DE66FD06736C.jpeg
    38.7 KB · Views: 17
  • 5416853E-29C6-42C5-8887-11953534251F.jpeg
    5416853E-29C6-42C5-8887-11953534251F.jpeg
    37.9 KB · Views: 18

kirk600

Active member
Here's a picture of the tunnel before I painted it.
 

Attachments

  • 0BCED1C9-37FC-4CA4-818B-4CDE050068AB.jpeg
    0BCED1C9-37FC-4CA4-818B-4CDE050068AB.jpeg
    36.1 KB · Views: 9
Top