Chaparral vs John Deere: A Build-Off Challenge

skiroule

Well-known member
For some time, I’ve been thinking that the shop is missing something. I’m a bit of a slow learner so it took awhile but Gary’s post finally lit the lamp. It needs a Hamm’s banner. I’ll be working on it.

I was going to write something smarta$$ like your an “influencer” and we are your “followers”, but, I prefer guys enjoying shop talk and watching a skilled craftsman at work.
I agree with your preference. I can’t even be an influencer at home, much less out in the online forum world.

Well, your not wasting any time. Quoting a military phrase, "As you were".
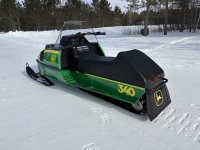
The truth be told, I had a slight head start on the Cyclone earlier this summer. At the Boondock Inn vintage event last year, I promised some of my John Deere enthusiast friends that I would have a re-done Cyclone 440 at the event next year so I’ve been nibbling at it when time permits. Otherwise, I knew I could never fulfil that promise. Of course, adding the Chaparral to the mix really spiced things up, which is why I decided to document the progress here.

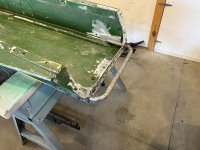
Whenever I look at the beatings these chassis took, I can’t help but think about the stories that some of these dents and hack repair jobs could tell.
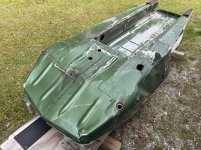
IMG_3977_1.jpg
 
Last edited:

skiroule

Well-known member
I decided to switch horses (sort of) on the John Deere. The 440 chassis was rough but had I no other options I would have tried to work with it. As luck would have it, I had a decent 76 340 chassis off the parts sled that I bought last year that had much less damage.

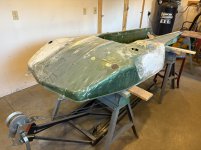
While the damage on the 76 chassis was light, the pan must have been a Monday stamping. This thing has more waves than a parade queen. There’s no point in trying to correct these, it’s just a part of the sled’s character.

So, by virtue of a chassis change, the 77 440 Cyclone will be a 76 440 Cyclone.
IMG_3799_1.jpg
 

skiroule

Well-known member
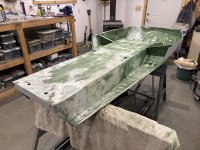
While the 76 chassis was decent, it still required some hammering/filling. I also filled in the passenger grab handle holes in the tunnel. Somehow the handles just don’t seem to look right on this sled.

IMG_3811_1.jpg

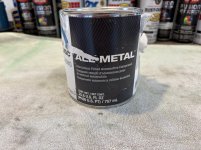
Some guys can hammer sheet metal to near-perfection. I’m not one of them. This is where the cheaters (fillers) come in. When doing the initial filling on bare aluminum I’ve had good luck with this product – USC All Metal. I’ve never bothered to look at the chemical makeup but it behaves like it’s basically aluminum powder mixed with fiberglass resin. It’s workable and very strong. The claim is made that it can be drilled/tapped but I’ve never put it to the test.

IMG_3999_1.jpg

I’ve never had an issue with holes filled with this stuff. I usually just hammer a small depression around the hole to give the filler a more feathered bonding area. Sometimes I will back the hole with fiberglass mat first to contain the filler on the backside. I’m sure it’s not as good as welding but it’s something I can do in my shop.

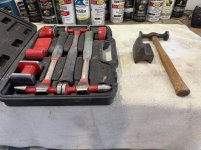
Speaking of hammering, a couple of years ago I treated myself to a fancy (to me anyway) hammer and dolly set to supplement the single hammer and dolly I’ve gotten by with for over 50 years. The new set does make some things easier but guess which set I pull out most often.

IMG_4001_1.jpg
 

skiroule

Well-known member
One curiosity of the Cyclones is that many of them came out of the factory with no dedicated means of lifting the back of sled. Whether it was the intent or not, people resorted to using the rear passenger grab handles to lift the sled. These sleds are heavy and most of the plastic handles eventually snapped under the load, probably causing more than one person to do a 9.5 backwards summersault.

A bumper/lift bar was available but the mounting points put a lot of stress on the rear tunnel “ears” causing them to bend and/or tear away from the tunnel. Deere eventually came out with a reinforcement kit that went out of production but is now being reproduced.

I have both a Cyclone lift bar and the reproduced reinforcement kit but no matter how I tried, I couldn’t shake the feeling that it looked like an afterthought slapped on the sled.

So I went to the well one more time and fitted the project sled with a 79 TX bumper. This the third sled I’ve modified to use this bumper and why not, it’s simple and strong.

The Cyclone tunnel is exactly ½” wider than the TX so I riveted a ¼” spacer plate to each side of the tunnel. The mounting hole placement is important and a little tricky. You want the holes as small as possible for the ¼” mounting bolts but the bolts thread into the bumper so the holes have to be almost perfectly aligned with the bumper holes to get them to thread in. Plus, you want the holes placed correctly vertically so the bumper to fits tight against the top of the tunnel for added strength.

IMG_3764_1.jpg

When it’s done, I think it’s worth the effort. The bumper extends the lift point rearward which provides more leverage and looking back at last year’s cyclone project, I don’t think it looks at all out of place on this chassis.

IMG_3613_1.jpg
 

skiroule

Well-known member
Thanks Guys!

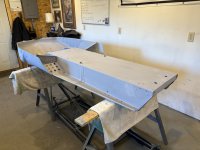
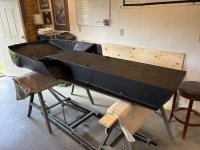
I always feel like I’ve made some progress when I’ve put on the first full coat of primer. It’s mostly to fill sand scratches and expose any work I’ve forgotten. A lot of it gets sanded off and re-primed but it’s at least all one color.

IMG_3815_1.jpg

The paint guy recommends that the stock Cyclone “Mean Green” that I'm going to use be sprayed over a black base coat, which is interesting because a white base coat was recommended for the John Deere Emerald Green I used on the other Cyclone last year.

He custom-mixes all his vintage sled colors and I’ve yet to use one that isn’t a dead ringer for the original color so I’m taking his advice.

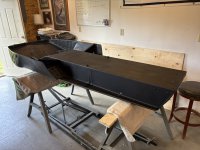
Black it is. I think it looks kind of cool in flat black.

IMG_3883_1.jpg
 

Attachments

  • IMG_3883_1.jpg
    IMG_3883_1.jpg
    206 KB · Views: 3

euphoric1

Well-known member
Again am in awe at the pace and the attention to detail you work at and with, also really enjoy the little history facts and modifications you throw in along the way, you never fail to impress!
 

heckler56

Well-known member
Chiming in with the others on beautiful work and education! As I watch you work on the skid and read how you wonder “what did the owner drive through”, all I keep thinking about is where is my 72 Yamaha EW433 that I had in the UP in the late 70’s. That sled took a culvert in the skid after the skis took a train rail switch on what is now trail 417 from Munising to Marquette (to my defense it was designated a trail but the rails still were in place)..
 

skiroule

Well-known member
Unlike some of my painting efforts, there's no over-spray on the walls, no drips or runs, and no tracks from the wife's cat across the surface.
Nicely done!
:)
Believe me Gary, most of that happens at some point. Maybe not the cat print part but I’ve had my battles with flies landing in wet paint.

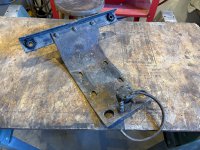
It’s not always easy for me but I do try to plan ahead sometimes. Take the case of fuel pump location. In 76, Deere mounted the fuel pump on the motor plate. Seems reasonable until you have to change the pump with the motor and plate installed on the sled. Much harder than it should be.

IMG_3798_1.jpg

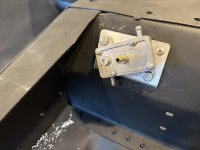
Deere must have realized this and moved the pump location to the bulkhead in 77 where it was easier to get at. I definitely wanted to move the pump on my 76 chassis so I used a simple idea for mounting the pump without requiring access to the back side of the bulkhead. It’s really tight in there with the track installed and thru-bolting would be tough.

I just use a small piece of aluminum plate with holes drilled for rivets and mounting holes drilled for the pump that I tap for 1/4” pump bolts. If need be, you can drill holes in the mounting surface so the bolts won’t bottom out.

Rivet the plate in and bolt the pump on and it’s a simple solution for pump location/replacement.

IMG_3910_1.jpg

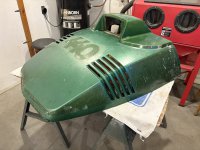
With all this pan and tunnel focus, I haven’t forgotten about the hood. First step was decal removal. I can see why this decal set is one of the most expensive to replace. These decals are huge.

IMG_3812_1.jpg
 

skiroule

Well-known member
Chiming in with the others on beautiful work and education! As I watch you work on the skid and read how you wonder “what did the owner drive through”, all I keep thinking about is where is my 72 Yamaha EW433 that I had in the UP in the late 70’s. That sled took a culvert in the skid after the skis took a train rail switch on what is now trail 417 from Munising to Marquette (to my defense it was designated a trail but the rails still were in place)..

Always thought the 72 Yamahas were cool sleds and my memory might be failing me here but I thought they were already using oil injection. As far as hitting stuff, lots to hit back when almost every ride was "off-trail" or as in your case, a trail that was "kind of" a trail.
 

gary_in_neenah

Super Moderator
Staff member
I believe that is true Kelly all Yamahas were oil injection when they started in 68
from a past SnoGoer article;

Snowmobilers have enjoyed the convenience of oil injection since Yamaha outfitted its 1968 SL350 with an oil pump and necessary hardware. No longer did some Yamaha riders have to carry extra oil — and a way to measure it — out into the bush. Instead, they could fill the reservoir and hit the trail without having to worry about the oil can busting open and leaking, not to mention leaving riders without a way to lubricate their sled’s engine. Needless to say, the concept caught on.
 

heckler56

Well-known member
Always thought the 72 Yamahas were cool sleds and my memory might be failing me here but I thought they were already using oil injection. As far as hitting stuff, lots to hit back when almost every ride was "off-trail" or as in your case, a trail that was "kind of" a trail.
I loved the High Low range transmission. It was perfect back then for the wild UP. Your work gets me thinking of locating a survivor and get going…
 

skiroule

Well-known member
I loved the High Low range transmission. It was perfect back then for the wild UP. Your work gets me thinking of locating a survivor and get going…
Well now we’re talking! If you ever decide to follow up on this thought, I’d recommend holding out for that very sled model for a couple of reasons. First, it has a special significance in your snowmobiling history and second, you know the sled and that would make working on it that much easier. Plus, it would look really cool sitting in the garage next to your other sleds.

Vintage sleds are funny, they have a way of falling into your lap when you least expect it. I’ll bet half my vintage sleds have been acquired this way, so you never know when something you're looking for will pop up.

Yamaha was a big seller back in the day so there should be a fair number of parts floating around and I suspect that items such as ski/suspension parts, graphics, windshields, seat covers, etc. are being reproduced.

People like to rip FB (and rightly so most of the time) but there are a lot of vintage sled groups there that can be very useful for obtaining parts, information, and even complete sleds.
 
Top