Fear the Deere

mezz

Well-known member
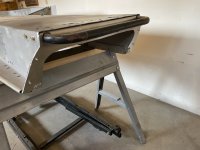
It looks like he did a hard tail landing to cause that bend in the slide rail. I had a friend that did that to his '98 EXT 580 EFI slide rails. He was hitting a small pile of snow in a parking area and launched about 8-10' straight up and landed on the tail of the suspension on the hard plowed ground after the third hit it resulted in bending both slide rails. Sled rocked like a rocking chair afterward, dumb move. I am amazed that both didn't get bent on that Deere.
 

skiroule

Well-known member
Yeah, I’m thinking he corkscrewed on one or more jumps and landed with all the weight on a single rail tip. These sleds are tail heavy to begin with and when you add rider weight that’s a lot of force.

Even after repairing the suspension, I became increasingly suspicious that the entire chassis was also tweaked. The measurements still suggested a twist from front to back. Because of this, I threw out some feelers for a replacement chassis in the spring of 2022. A fellow in Cameron WI said he had a Cyclone chassis and Liquifire chassis that he would let me have for free.

From Baudette MN to Cameron WI is roughly a 650 mile round trip but I added some time/distance by stopping in Duluth to pick up the parts that eventually became the basis for the Mutt.

Anyone that has ever picked up things from vintage sled guys knows you don’t just blow in, get your stuff and get moving. Figure on at least an hour of conversation and looking at what else they have because they usually have a lot of cool stuff.

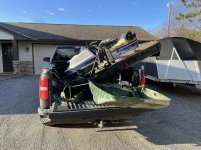
So, it ended up being about a 15+ hour day and when I got home both the truck and I were out of gas but when I went out the next morning and looked at the haul, it was worth the effort.

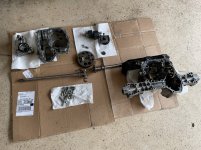
Some of you may have seen a similar photo in the Mutt thread but I never explained how or why I came to have a couple of Deere carcasses in the load. At the time, I was trying to decide which project to do next and eventually decided on the Mutt.
IMG_1563_1.jpg
 

skiroule

Well-known member
Sorry that the project has been a little quiet. I had planned to hit it hard lastweekend but the Cub Cadet threw a wrench in those plans, which caused me to throw a lot of wrenches.
IMG_3326_1.jpg

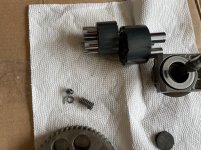
A transmission spring that probably cost 4 cents to make brought the whole system to its knees.
IMG_3327_1.jpg

Of course, you can’t just buy the spring, you have to buy the whole assembly containing the 4-cent spring for $163. Don’t really want to try to cobble up a replacement spring because the piston assemblies look like they are the heart of the hydrostatic drive and I’m sure the spring is precisely calibrated for the assembly.

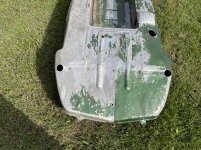
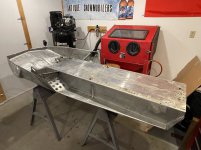
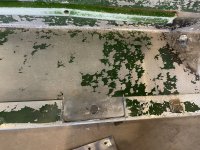
I figured I should at least add a little background on the initial state of the replacement chassis. In spite of its size, the Cyclone chassis is a very lightweight chassis. The tunnel section is heavier gauge aluminum and is quite strong but because the pan has no structural function, it is beer-can thin. It’s a rare day that you find one without dents, cracks, and holes.
IMG_1619_1.jpg

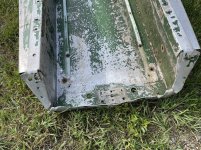
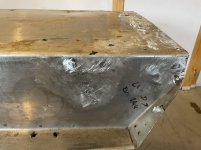
Another common chassis issue is the rear tunnel plate that gets chewed up by the track. It’s hard to believe a rider could get enough travel out that suspension to cause the track to make contact but it happens.
IMG_1621_1.jpg
Since these are common issues, it’s unlikely I could have found a better one.
 

garageguy

Well-known member
Make aluminum gussets for the corners and pop rivet on. You could have it welded but I'd still do gussets. The flap will hide the repair.
You could make the gussets in one piece to look factory.
 

skiroule

Well-known member
Make aluminum gussets for the corners and pop rivet on. You could have it welded but I'd still do gussets. The flap will hide the repair.
You could make the gussets in one piece to look factory.
Great suggestion and that would be a smart way to do it but being smart is not my normal style. One skill I always wished I had achieved was the ability to weld and more importantly, weld aluminum. It would save me a lot of headaches trying to find a welder willing to take on small jobs.

My updates are lagging a little behind the actual state of the project and I did come up with a solution that I’ll share in a future update. Not as good as the gusset/welding idea but it should work.

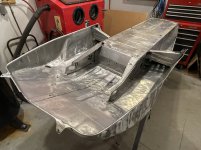
Stripping the chassis of paint better shows the state of the pan in particular. You have to wonder how these get that dented up.
IMG_1641_1.jpg

IMG_1644_1.jpg
.
 

mezz

Well-known member
That is a lot of dents. Wrinkled like aluminum foil, it must be pretty thin gauge. There will be a bit of hammer & dolly time on that one.
 

skiroule

Well-known member
That is a lot of dents. Wrinkled like aluminum foil, it must be pretty thin gauge. There will be a bit of hammer & dolly time on that one.
Yeah Mezz, I have to confess that I eventually use filler but I try to keep it to a minimum. When I do use filler on bare aluminum I use an aluminum-based filler, such as USG All Metal, which is way stronger than typical autobody filler.

You can only hammer so long before you need to take a break and work on another area. This chassis came with passenger handgrips, which always seemed odd for a performance sled and never looked right to me. Plus, some of these sleds inexplicably never came with any means of lifting the back of the sled so people used to lift them with the handgrips. With the track and suspension installed, the back end of these sleds is heavy and the plastic grips would break under the load.

Since I didn’t want the handgrips I did some aluminum brazing to fill the mounting holes. Truth be told, I suck at brazing, I just can’t seem to achieve consistent results. I did eventually get the three mounting holes filled on each side of the tunnel (plus a couple of other mystery holes).

IMG_2960_1.jpg
 

skiroule

Well-known member
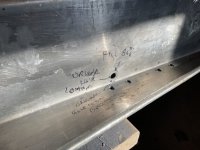
Next up on the chassis (besides dent work) was to deal with the egged-out rear suspension mounting holes. My original plan was to have them welded shut (there’s that aluminum welding thing again) and re-drill them.
IMG_2961_1.jpg

But then I came up with what I think is a better solution. I still had the heavy gauge suspension mounting plates from the Mutt, which I removed because I moved the suspension mounts. below the foot rails. So I notched the tunnel angle strip inside the tunnel to fit the plates (not very surgically I might add).
IMG_2958_1.jpg

Then I riveted the plates in with ¼” stainless rivets. Once the new hole is drilled in the plate the original hole can be partially filled with aluminum filler since it is no longer carrying any load.
IMG_2962_1.jpg
 

skiroule

Well-known member
Nice!! That should work well.
Thanks, I don’t think I’ll ever have to deal with this problem again.

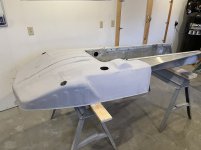
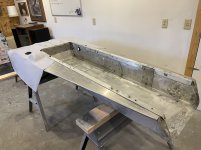
When it comes to metal pan work, I have to constantly remind myself to put it in perspective and at some point, just declare victory, whether the game is over or not. I always see spots that could be made better but I figured it is as good as I can make it with a reasonable amount of effort. It should be good enough for paint.
IMG_2990_1.jpg

IMG_2991_1.jpg
 

skiroule

Well-known member
Thanks guys. With the pan pretty much in order I moved on to the rear of the tunnel.

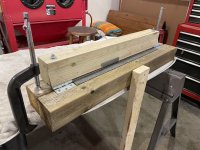
You may have noticed in the last set of photos that I removed all of the rear tunnel plate. The plan I had for a replacement required a beefier metal brake than my Harbor Freight version so I threw together a simple brake that was much larger and tested it on a small piece of aluminum. Crude, but it did the job.
IMG_3178_1.jpg

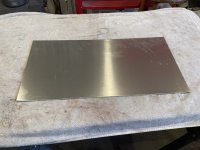
The starting point for a replacement plate was a plain sheet of .080 thick 5052 aluminum.
IMG_3193_1.jpg

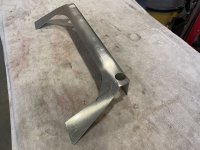
After some bending, sawing, filing, and a little sweating I had the makings of a replacement rear plate.
IMG_3196_1.jpg
 

skiroule

Well-known member
Skin a Deere...someone had to say it:D

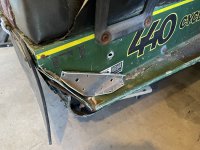
I mentioned in an earlier post that some of these sleds came with no way of lifting the back of the sled, except for the passenger handgrips. Mine was one of those without a lift bar but the bar that came on the sleds that did have one was mounted to the “ears” on the side of the tunnel. This was not the strongest point for mounting the bar, the ears often would bend or tear under the load of lifting the sled.

I believe John Deere originally came out with a reinforcing kit to strengthen the ears and after that went out of production, a couple of guys began reproducing them. I had found a lift bar and bought one of these kits and while I’m sure they are effective, I thought they looked kind of clunky so I decided against using them on the project.

I may still use them and the bar on the 440 rider.
IMG_3364_1.jpg

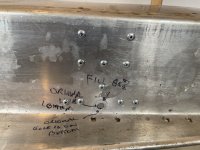
Instead, I went back to the system I used on the Mutt, that being modifying the chassis to accept a 79 TX bumper – simple, clean, and strong. This explains the holes in the rear plate that aren’t normally there
IMG_3199_1.jpg
 
Top