
Sled Solutions
Member
We set out to build a sled that would fit a youngster who loves to boondock since the O.E.M. doesn't. This budget build was also for someone who is still loving their M-Series sled but would like to do some upgrades.
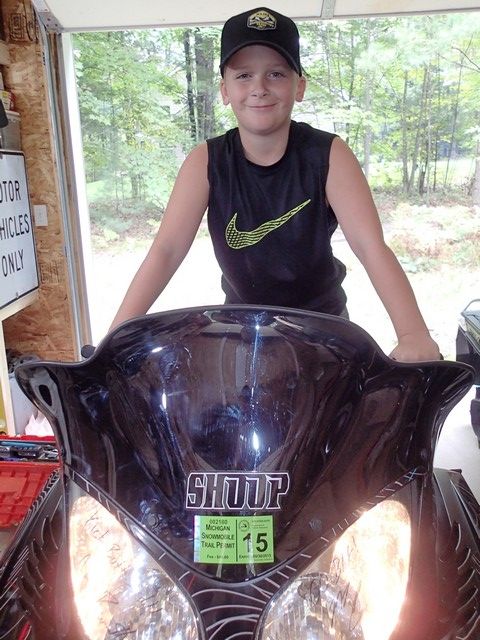
Once the plan was in place we contacted all the companies that we were planning on using to complete the build. So many saw our vision and jumped on board providing discounts or free parts to complete the project. The sled belongs to my 10 year old son who was the "problem" with no sled available to meet his riding style and skill level. He worked on the project from start to finish and the only thing he didn't do were the things I wouldn't LET him do. It was a fun project for father and son that taught him a lot of garage skills. This is how the project went as well as why we did it.
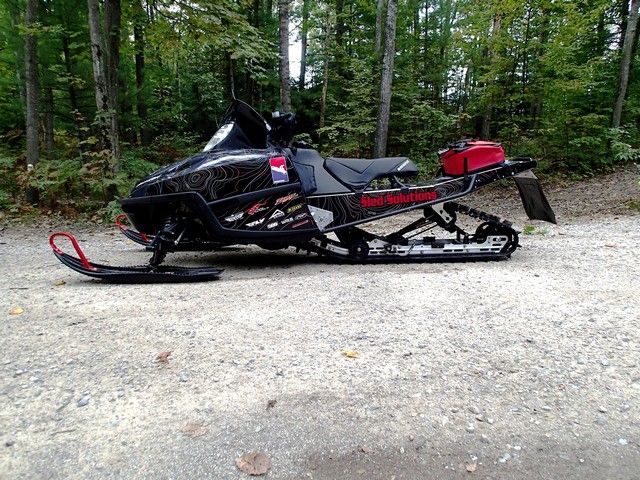
We started with a 2006 Arctic Cat M5 141 EFI machine that had seen better days.
Chassis
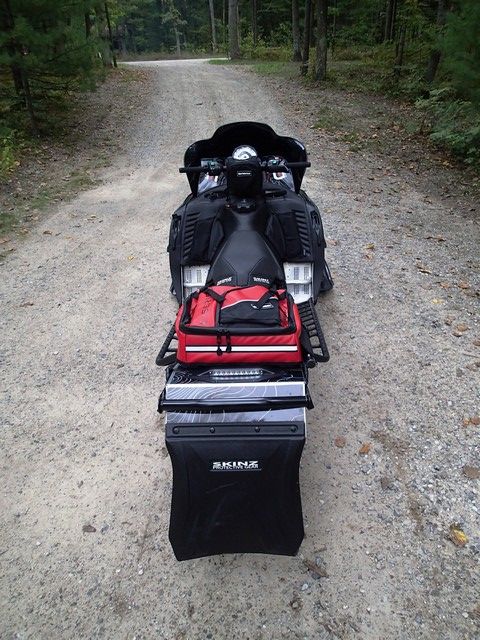
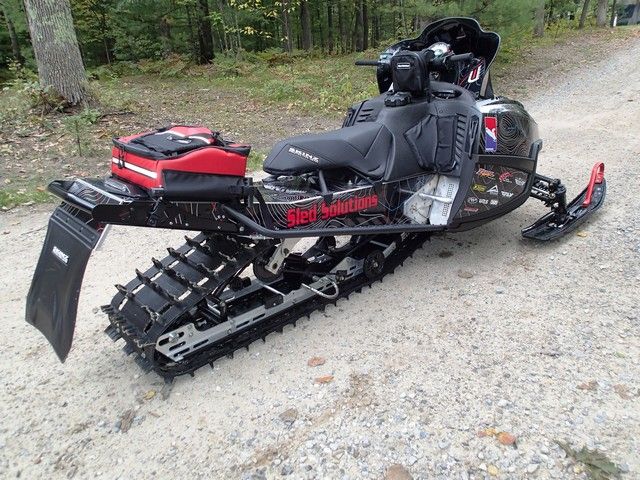
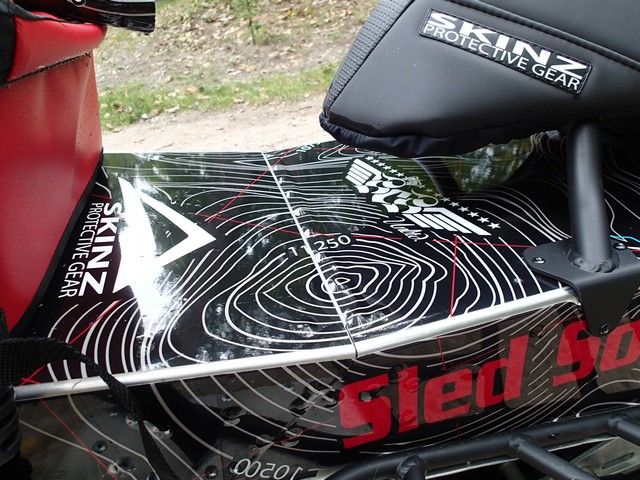
The first place we focused on was the running boards and rear tunnel. Back when the M was introduced in 2005 fancy running boards weren't around yet but they are today and provide fantastic snow evacuation. The 2005-2008 M-Series/Crossfire sleds have a tail section that has running boards that go all the way to the rear of the sled and a bumper that was incorporated into the taillight and snowflap. In order to install the Skinz Protective Gear Airframe Running boards you have to cut the running boards off completely. By doing this you take away some of the strength of the tunnel AND the plastic cover that the taillight/snowflap is housed in. Lucky for the consumer Skinz offers a tunnel kit that reshapes the rear of the tunnel. There are a lot of rivets to drill out and reinstall during this step and a pneumatic rivet gun will quickly become your friend. A good 3/16 drill bit, rivet gun and some clamps is all you really need to complete this upgrade.
Now that we changed out the tunnel and running boards we needed to focus on the taillight. We turned to PDP (Proven Design Products) for one of their universal L.E.D. taillight kits.
Rear Suspension
The stock track was shot so we installed a Cobra 141" x 1.625" that I picked up locally as a takeoff. Same lug height as the stock track just a better design and more kid friendly for riding around the house. A two wheel kit was installed in the rear skid to help loosen up the stability of the machine. Ryan loves to carve and removing the outside wheels will only help a 75 lbs kid through it on its side. I really wanted to put the lightest torsion spring on the sled to get the rear suspension to squat for him but Cat has discontinued the spring we wanted to use so he'll just have to eat more. Because the suspension doesn't move much with him on it the snow flap doesn't catch the snow like if an adult was riding it. Since he will most likely not notice the temp light coming on my goal was to do what we could to keep the sled cool. Two things we could do was mount the Skinz snowflap as low on the rear tunnel section as possible and add ice scratchers. Straightline Performance sent us a set of the short cable style scratchers which we installed for those hard crusty snow days.
Front Suspension
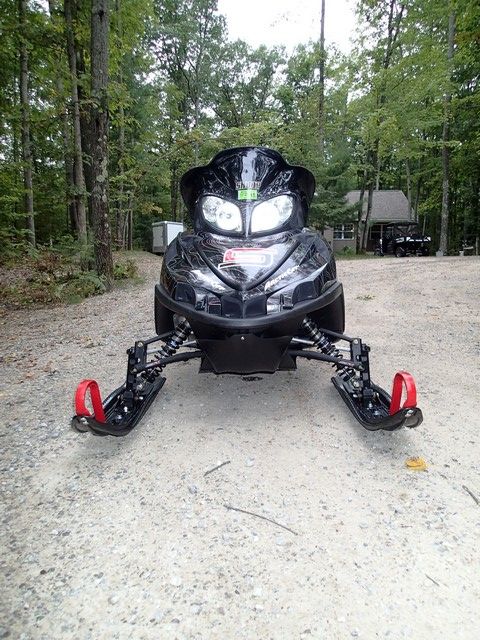
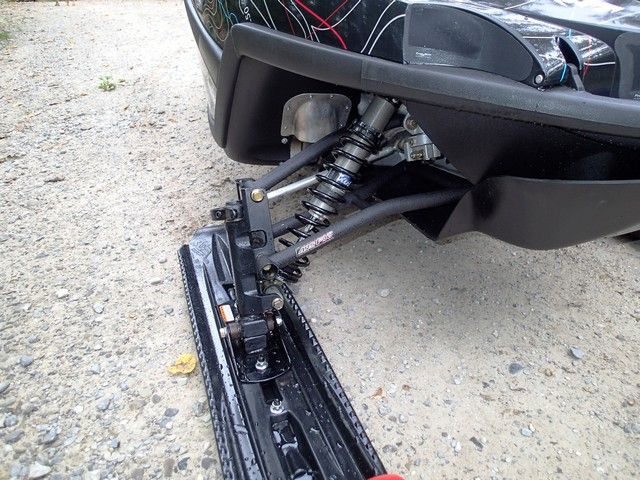
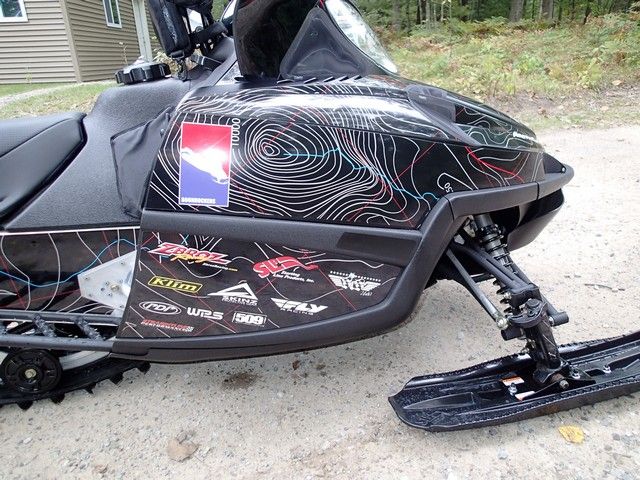
Of course we contacted Z-Broz as they are known for making an affordable stronger replacement a-arm. The front Fox zero pro shocks were rebuilt with new parts and stock springs powder coated black. It's no secret that Cat has struggled with making a powder ski worth using so those had to go. We've had quite a bit of personal experience with SLP ski's since 2004 and seemed like a natural direction to go. We ordered the new SLP Mohawk ski to get the front of the sled on top of the snow a little better.
Ergonomics
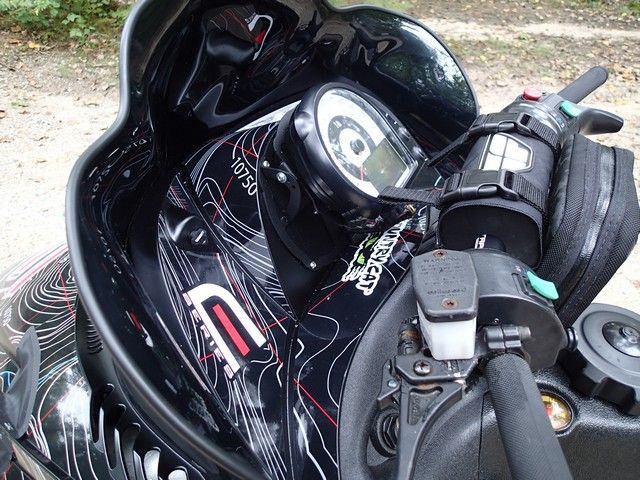
Next, shrink some things to better fit a smaller rider. Handlebars were way to tall for a 10 year old and the seat although almost short enough needed to be slimmer. We turned to the experts at Fly Racing for handlebars and the riser. After measuring the stock bars and where he needed them to be when standing on the sled we ordered up. Fly aluminum Aero Taper mountain bars, Fly aluminum pivot adapter, 4" Fly riser and Fly Bar Pad. Not a tough project just a tedious one, pulling grips, installing new hand warmers, reinstalling grips, making the stock controls work without the rubber coated stock bar etc. Once complete the bars were at the perfect height for him and I believe will give him better control over the sled. The short bars bring the bars below the windshield so no need for hand guards at this time. We installed a Skinz Freeride seat which shorten the seat by 1.5", lowered it by 3.25" and is 5lbs Lighter. A set of Skinz kneepads were also installed just in case he ever jams his knee into the console.
Body
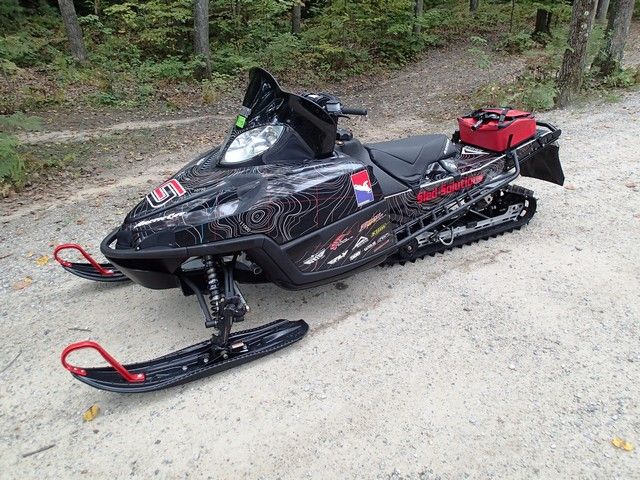
When it came time to replace broken o.e.m. parts Country Cat set us up with some nice pricing on everything we needed. Like I had mentioned this sled was in pretty rough shape, hood was zip tie stitched together in 8 places and side panels/fenders were cracked. We transferred over all the underside foam and sound deadening to a new hood. While we had all the body parts off we degreased the engine before putting it back together. After all body panels were back installed it was time to transform the plain M into something custom with the rest of the SCS Unlimited graphics kit that Ryan wanted. Lastly, I wanted to keep the snow from entering the engine compartment so Straightline Performance sent us a full Frogzskins kit to cover all the vents on the hood.
Protection
Because he's 10 and isn't quite as aware of the dangers lurking under the snow we put as much protection under this thing as we could. A Skinz float/skid plate and a secondary guard was installed to help keep things where they should be in the event he encounters the land mines most of us have hit at one point or another. Again, thanks to Todd for him supplying the float plate that was collecting dust in his barn.
Performance
Well, this is one of the spots we didn't do much on this machine. The goal was to build a sled for a 10 year old and 500cc EFI engine is plenty for now. When we bought the sled it actually had a intake kit and a silencer on it which were removed. Clutching was provided by the one and only Jason Price at Priceless Performance.
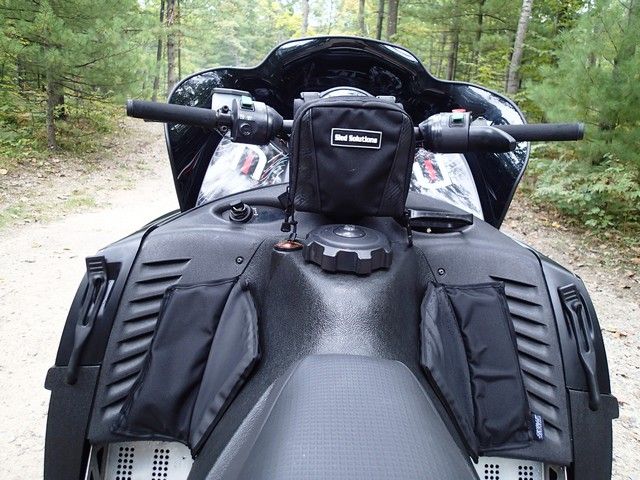
Storage
We didn't have to go far when it came to a storage solution. We installed a E-Series Mini Carry All on the handlebars and a E-Series Compact tunnel bag on the tunnel. He now has as much storage as he needs for when we venture out on our backcountry adventures.


Once the plan was in place we contacted all the companies that we were planning on using to complete the build. So many saw our vision and jumped on board providing discounts or free parts to complete the project. The sled belongs to my 10 year old son who was the "problem" with no sled available to meet his riding style and skill level. He worked on the project from start to finish and the only thing he didn't do were the things I wouldn't LET him do. It was a fun project for father and son that taught him a lot of garage skills. This is how the project went as well as why we did it.
We started with a 2006 Arctic Cat M5 141 EFI machine that had seen better days.
Chassis
The first place we focused on was the running boards and rear tunnel. Back when the M was introduced in 2005 fancy running boards weren't around yet but they are today and provide fantastic snow evacuation. The 2005-2008 M-Series/Crossfire sleds have a tail section that has running boards that go all the way to the rear of the sled and a bumper that was incorporated into the taillight and snowflap. In order to install the Skinz Protective Gear Airframe Running boards you have to cut the running boards off completely. By doing this you take away some of the strength of the tunnel AND the plastic cover that the taillight/snowflap is housed in. Lucky for the consumer Skinz offers a tunnel kit that reshapes the rear of the tunnel. There are a lot of rivets to drill out and reinstall during this step and a pneumatic rivet gun will quickly become your friend. A good 3/16 drill bit, rivet gun and some clamps is all you really need to complete this upgrade.
Now that we changed out the tunnel and running boards we needed to focus on the taillight. We turned to PDP (Proven Design Products) for one of their universal L.E.D. taillight kits.
Rear Suspension
The stock track was shot so we installed a Cobra 141" x 1.625" that I picked up locally as a takeoff. Same lug height as the stock track just a better design and more kid friendly for riding around the house. A two wheel kit was installed in the rear skid to help loosen up the stability of the machine. Ryan loves to carve and removing the outside wheels will only help a 75 lbs kid through it on its side. I really wanted to put the lightest torsion spring on the sled to get the rear suspension to squat for him but Cat has discontinued the spring we wanted to use so he'll just have to eat more. Because the suspension doesn't move much with him on it the snow flap doesn't catch the snow like if an adult was riding it. Since he will most likely not notice the temp light coming on my goal was to do what we could to keep the sled cool. Two things we could do was mount the Skinz snowflap as low on the rear tunnel section as possible and add ice scratchers. Straightline Performance sent us a set of the short cable style scratchers which we installed for those hard crusty snow days.
Front Suspension
Of course we contacted Z-Broz as they are known for making an affordable stronger replacement a-arm. The front Fox zero pro shocks were rebuilt with new parts and stock springs powder coated black. It's no secret that Cat has struggled with making a powder ski worth using so those had to go. We've had quite a bit of personal experience with SLP ski's since 2004 and seemed like a natural direction to go. We ordered the new SLP Mohawk ski to get the front of the sled on top of the snow a little better.
Ergonomics
Next, shrink some things to better fit a smaller rider. Handlebars were way to tall for a 10 year old and the seat although almost short enough needed to be slimmer. We turned to the experts at Fly Racing for handlebars and the riser. After measuring the stock bars and where he needed them to be when standing on the sled we ordered up. Fly aluminum Aero Taper mountain bars, Fly aluminum pivot adapter, 4" Fly riser and Fly Bar Pad. Not a tough project just a tedious one, pulling grips, installing new hand warmers, reinstalling grips, making the stock controls work without the rubber coated stock bar etc. Once complete the bars were at the perfect height for him and I believe will give him better control over the sled. The short bars bring the bars below the windshield so no need for hand guards at this time. We installed a Skinz Freeride seat which shorten the seat by 1.5", lowered it by 3.25" and is 5lbs Lighter. A set of Skinz kneepads were also installed just in case he ever jams his knee into the console.
Body
When it came time to replace broken o.e.m. parts Country Cat set us up with some nice pricing on everything we needed. Like I had mentioned this sled was in pretty rough shape, hood was zip tie stitched together in 8 places and side panels/fenders were cracked. We transferred over all the underside foam and sound deadening to a new hood. While we had all the body parts off we degreased the engine before putting it back together. After all body panels were back installed it was time to transform the plain M into something custom with the rest of the SCS Unlimited graphics kit that Ryan wanted. Lastly, I wanted to keep the snow from entering the engine compartment so Straightline Performance sent us a full Frogzskins kit to cover all the vents on the hood.
Protection
Because he's 10 and isn't quite as aware of the dangers lurking under the snow we put as much protection under this thing as we could. A Skinz float/skid plate and a secondary guard was installed to help keep things where they should be in the event he encounters the land mines most of us have hit at one point or another. Again, thanks to Todd for him supplying the float plate that was collecting dust in his barn.
Performance
Well, this is one of the spots we didn't do much on this machine. The goal was to build a sled for a 10 year old and 500cc EFI engine is plenty for now. When we bought the sled it actually had a intake kit and a silencer on it which were removed. Clutching was provided by the one and only Jason Price at Priceless Performance.
Storage
We didn't have to go far when it came to a storage solution. We installed a E-Series Mini Carry All on the handlebars and a E-Series Compact tunnel bag on the tunnel. He now has as much storage as he needs for when we venture out on our backcountry adventures.


