Finishing Off the Inside of a Trailer

garyl62

Active member
Looking to finish off the trailer this spring. 7X22 drive in/out with side door up front, roof vent and inside led lighting from the factory. Been thinking about the typical white ceiling and walls FRP with foam board insulation, but thinking I'd use it in the summer to camp with also. Been a tent camper and figured this could be a good "double duty" for the trailer in the off season. Have some kitchen cabinets, a 6' countertop with a sink, 6 gal 120 h2o heater, and 120 water pump laying around so I'm considering putting some outlets in the trailer to hook those things up, a spare outlet or two and maybe a wall light, then install a covered outlet on the outside of the trailer that it is all wired to so I can plug into a 20AMP outlet someplace and have enough power to run everything. I'd put a couple cots in there and have a couple chairs and maybe a small table if it would fit. Then my mind kept running and I priced out tongue and groove knotty pine instead of FRP for the walls and it actually ends up being a little cheaper. That would really change the look though, and I'm wondering if it will end up making it look to much like a home made deal. Sure the knotty pine would be a nice summer camper, but it would look out of place with the sleds in the winter.

Anyone made a duel season type trailer like this? Any thoughts?
 

ezra

Well-known member
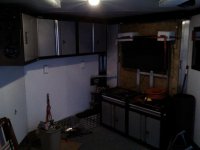
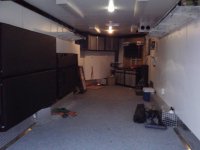
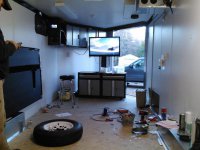
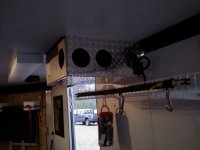
IMG128 trailer 3.jpg IMG126 trailer 2.jpg IMG098.jpg IMG129 trailer 4.jpg the knotty pine could be a tough deal with all the fasteners needed could look like a screw display board hard to conceal self tapping screws.
we used some steal cabinets from menders and put large casters on them so we could wheel the main unit out when needing to have the room.
drop down bunks and couch are kind of spendy but deff nice and convenient.
we did every thing to run on 12v or 120 lots of time U don't want to have to run the generator.
a inverter/ charger can be had for under 150 at most rv junk yard sites. or just a cheep inverter and a battery charger works fine with 2 deep cycles.
we usually just run the generator to charge battery's or run a/c and microwave.
U deff want a ez accesses door for plug in and a small fuse box.
and a small ext door for gas hook up

- - - Updated - - -

oh and I think if u could make knotty pine work it would look sweet
 
Last edited:

ezra

Well-known member
btw if u keep your eyes open lots of paneling options out there .
my whole garage is done in clear 1/4 inch maple plywood. did it cheaper than dry wall got all prefinished clear 4x8 from a cabinet shop clearing inventory like 4 bucks a sheet.
check out some steel and vinyl fiberglass Formica options also. think commercial building lots of cool stuff out now days.
 

polarisrider1

New member
Menards sells a fake Diamond plate made out of plastic. looks very real and light weight. The thing man caves are made of.
The knotty pine can warp, mold and mildew. you want easy to clean and light weight. no need for termites in your trailer.
 

garyl62

Active member
Been working through the details of what I'm going to end up doing, and I'm just sticking with typical foam board and frp. Going to do a little with different colors and adding a few outlets, but nothing extreme.

One question for you guys, has everyone pretty much used covered fasteners for the frp? Typically when I apply it to a wall we use an adhesive but not sure that will work well in this setting. I'd need to use some to glue the foam to the trailer skin, then apply more adhesive to the foam to get the frp to stick. Not sure I want to apply adhesive to the aluminum trailer skin. Seems like the best bet is fasteners even though the finished look isn't as clean. Anyone have some thoughts?
 

JasonF

Member
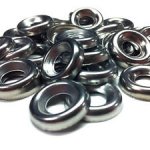
I have the FRP in my trailer as well with the 1" foam insulation between the ribs. If you are not dead set against using fasteners I used a stainless countersunk washer with a stainless sheet metal screw and a dab of lock tight. Worked perfectly and by chance if you ever want to pull a panel down you still have the option to do so. I don't have any pictures on my but this is what the washers look like.
 

Attachments

  • mwjvn3fElguDMfoe-GJYgrw.jpg
    mwjvn3fElguDMfoe-GJYgrw.jpg
    14.7 KB · Views: 80

fusionfool

New member
Been working through the details of what I'm going to end up doing, and I'm just sticking with typical foam board and frp. Going to do a little with different colors and adding a few outlets, but nothing extreme.

One question for you guys, has everyone pretty much used covered fasteners for the frp? Typically when I apply it to a wall we use an adhesive but not sure that will work well in this setting. I'd need to use some to glue the foam to the trailer skin, then apply more adhesive to the foam to get the frp to stick. Not sure I want to apply adhesive to the aluminum trailer skin. Seems like the best bet is fasteners even though the finished look isn't as clean. Anyone have some thoughts?

I used the FRP plastic fasteners and had no problems. You should use fasteners of some nature, as they trailer does flex a little when entering driveways and such. The panels will move a bit and that is why I liked the plastic fasteners, they allowed movement but brought the panel back to position. Also then you have the correct thermal expansion / contraction with change of temperature.
 

indy_500

Well-known member
I love how finished off trailers look but I'm really curious have those who insulated their trailers noticed a difference? I have a hard time believing it'd be of much help but I suppose the foam board isn't all that pricey.
 

fusionfool

New member
I love how finished off trailers look but I'm really curious have those who insulated their trailers noticed a difference? I have a hard time believing it'd be of much help but I suppose the foam board isn't all that pricey.
It helps keep the condensation down. Can not eliminate it but does help.
 

2003polaris

New member
Gary what did you put on the floor for the carbides? Do you have ski runners down? I'm buying the frp board and getting the screws and washers at work for free. I work for Wurth Service Supply, its a fastener company. I made my own traction slabs out of rubber stops used on back of trucks. We were throwing them away, so I cut the round part off and slip it down the middle. Save on buying plastic grips. I brought home 40 of those, have plenty. Thanks.
 

garyl62

Active member
Don't have anything on the floor. Didn't have any issues this year except with the little aluminum corner guard at the ramp doors. Ripped off by the second or third time I loaded the sleds.
 

2003polaris

New member
Neo switched to marine grade flooring instead of advantec flooring which you have . My carbides are sharp, they will cut through concrete. I'm ordering it in Sept. I will keep in touch, thanks for the help. Polaris .
 

switch07

Member
Don't forget the lighting. I found some bright white led lights in a roll, 18 ft long, 12v and put them in the top corners in my Stealth inline. They have an adhesive backing and install easy. I have a cabinet installed and drilled a 3/8 hole thru the side and ran the lights right into the cabinet. On the front and rear ramp I installed refrigerator switches so when you open the ramps, the lights come on automatically, as long as you're plugged into the truck. I also swapped out the light bulbs in the over head lights to led bulbs and now you almost need sunglasses inside the thing. Works great!!
 

garyl62

Active member
Well I’ve started to finish mine off. After a lot of planning I’ve finally settled on what I’m doing.

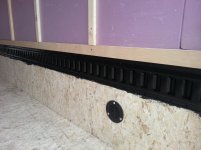
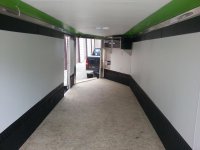
I’m leaving the floor alone, didn’t seem to have any issues last season tearing it up with studs and like Ezra said a while back, it’s easier to walk on it without tracks and tie downs in it. Working up the walls I’m putting 1” foam board in, then I’m furring out all the aluminum with a ¾” board so the finished wall will line up with the Advantech material already on the sides at the bottom of the walls. I’ll add another layer of foam board ¾” to fill the walls completely. I’m putting in some 110 outlets, recessed since I now have walls that are 1 ¾” thick I can get them to fit, using 12 gauge stranded wire so I can run a 20 amp circuit. At the top of the existing Advantech board I’m using ¼ plywood painted black then mounting black E-Track. This will give me tie downs, and the ¼” will bring the front of the track out even with the rest of the walls and it will hid the foam board you can see through the E-Track. The ceiling will get 1" foam also.

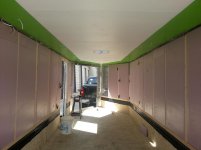
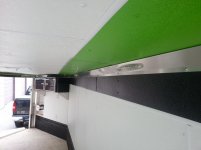
For the finishes I’m going to diamond plate the first foot right over the Advantech panels there already, then the E-Track, a 4’ white FRP panel, and at the top there will be about 6” of black FRP. I’ll use the factory aluminum corner molding pieces with the 12 volt led lights already in them, then on the ceiling a 12” band of Arctic Cat green FRP around the edge with some 110 dimmable under cabinet puck lights. Then the 60” or so of the center will be white FRP.

I've got some more ideas on how to use it for camping that are a lot simpler than my first thoughts, but I'll wait to post those until I get a little farther along.

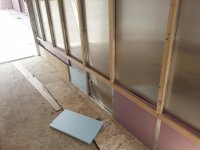
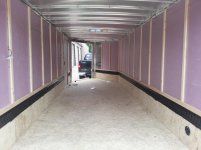
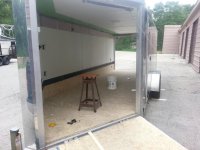
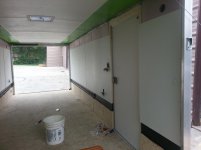
It’s a lot of work but I got started a few days ago, here are some photos from yesterday. Had to strip everything off to get the first layer of foam in, but got all that done and put back together. Got some of the E-Track mounted too. Now I’ll mount the electric boxes, run wire, then add the next layer of foam board.


20140607_115533.jpg 20140607_115539.jpg 20140607_170912.jpg 20140607_170930.jpg 20140607_170948.jpg
 

garyl62

Active member
Here's an update. By tomorrow night I should be done with the frp, the e-track and the electric except for the ceiling lights. I'll wire those and install the diamond plate on the sides in a few weeks as I'm running out of time now. I also need to re-install the aluminum trim that acts as a "crown molding" so to speak and hides all the wires. Once all that is done it will be back to winter form. Problem is I'm using it to go camping on Friday. So I'm also going to cut down a screen door to fit into the side door, and I'm framing in a rear screen door with screen sidelights on both sides in the rear ramp door. Then I'm throwing down some carpet tiles, putting in a base cabinet, under counter mini fridge and a countertop. Got a lot to do between now and Wednesday night but if I can make it as nice as possible for my wife, maybe she'll be willing to go more often.

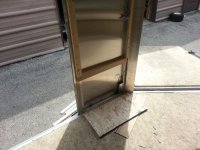
These show the progress so far, I've also trimmed out the electric and added a few pieces of black frp along the top where the pink foam board is in these photos. Hope to have a few more photos tomorrow night.

20140621_110221.jpg 20140621_141307.jpg 20140621_141330.jpg 20140621_141348.jpg 20140621_160335.jpg
 

ezra

Well-known member
I love how finished off trailers look but I'm really curious have those who insulated their trailers noticed a difference? I have a hard time believing it'd be of much help but I suppose the foam board isn't all that pricey.
it makes a big diff
we originally did not do the back door ended up hanging some blankets over door .back door was very very cold
when real cold all the screw heads and washers all over trailer become frost clumps kind of crazy.
deff thinking spray foam underside then bed liner over that.
we can run heat below 0 for 10 days and never drain a 5ft tall propane tank.
the suburban heater we used was the top of the line at the time may have something to do with it.
only issue we had was when real cold regulator froze up out side that is now mounted in side. yeah I know not the safest but what ever.
 

Woodtic

Active member
Ezra,that reg may have a 1/8 fm thread on the top of it. You can vent it to the out side with 1/4" soft copper. If there is just a pin hole for the reg vent,buy one with the threads. Keep your old one as a spare,they do have a high failure rate. Just remember to blow out the vent line a few times a year. Spiders like to build nests on the end. This will prevent the diagram from going up or down.
 

garyl62

Active member
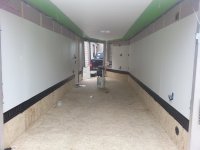
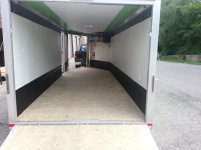
Well almost everything for it to be a "sled" trailer is done. Just need to mount the 110v lights and fill in the last section in the V where the battery is mounted. That's going to take some time so I'm holding out on that until after the camping trip. Same with the diamond plate inside along the bottom, that will be a fall project at best. I painted the advantec along the sides and I may just keep it that way too. Cheaper and just a little annual painting maintenance to keep it looking good. May get to the lights Tue or Wed.

For now here it is.

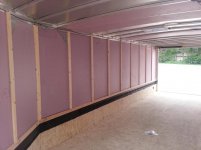
20140623_165632.jpg 20140623_165638.jpg 20140623_165647.jpg 20140623_165827.jpg 20140623_190741.jpg

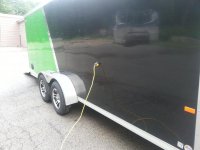
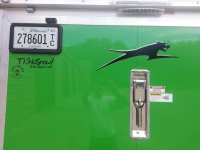
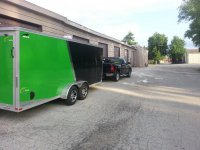
First couple show the overall, you can see some of the 110v drops and the E-track all the way around for tie downs. I'm real interested to see how that works. The third shows the 12v lights up closer and some more of the drops I have for the 110V. Those will be dimmable LEDs, 3 on each side. The forth is showing off some of the best things around, and finally in the last one I couldn't believe the cottonwoods, actually looked like small piles of snow had accumulated.

I also started working on the screens for the camper side of it. Hope to have a few photos of that in a day or two.
 
Top