Heres my first Vintage Project........TXL 340

L

lenny

Guest
that's not bad at all, thanks for posting as it is good to know!
 

kirk600

Active member
Yes Lenny, i thought it worked pretty good myself. I just used a pint sized plastic container, put enough "EVAPORUST " in it to submerge the parts, and pulled them out a day later.

Now the one thing i didnt try, but my buddy did it to the caliper bolts........is he uses an old crock pot and heats the stuff up for a few hours, and they come out looking brand new.

I will say, i think any old plating on your fasteners will be gone with this stuff, but i cant say for sure. Maybe i will try a new bolt just to test my theory.

You can buy this stuff in quarts or gallon sizes.......i bought a gallon at harbor freight for $25.00 minus my 20% off coupon (which you can find almost any magazine) it was $20 plus tax.
 

kirk600

Active member
So after a few days, here is the progress i have made.
I got the brakes put back on the sled and bled, my recoil installed,
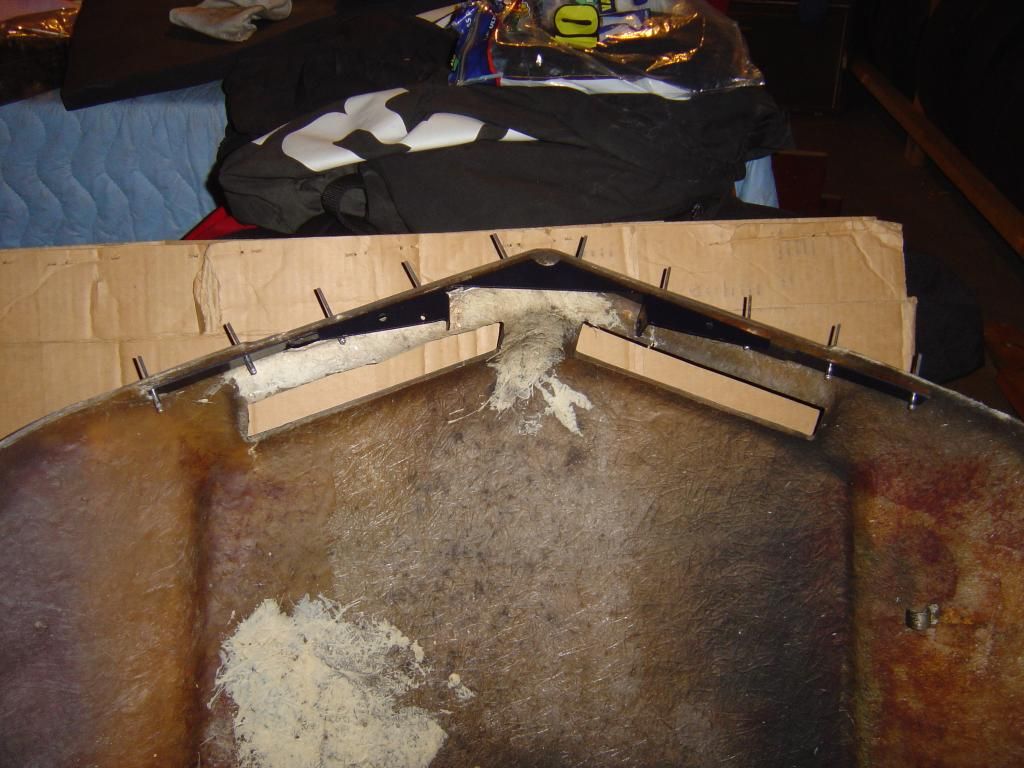
and mocked up my hood on the bumper and belly pan Skiroule donated to me.

Thanks for that Kelly, The more i think about it, i am going to install it now.
Mine has no less than five holes, and its brittle like fine china. My hood is kind of
warped in front so i have it clamped right now trying to get its shape back.
I will keep looking for a better pan, but right now as a driver this year it should
work great.
I still need a seat cover and the dash piece that goes on top of the hood
above the air box, the actual air box, and wear bars.....I have a seat with good foam, and i will try
the heat gun trick on the trunk lid.

Hopefully next week i will have more to report, And maybe even get my other sleds
out for a ride.
 

skiroule

Well-known member
Yeah Kirk, the name of the game is to get out and ride it. As I recall, the bow on the bumper was slightly different on each side but I can’t say for sure which is correct. Good plan to mock it up. I can tell you that if you’re not a drinkin’ man before you start fitting this all together, you probably will be when you’re finished. It’s more of an art than anything. I’ve been known to stand on a bumper to “shape” it on more than one occasion.

Don’t be alarmed if the cross member braces don’t seem to line up with the bumper holes. It seems like they messed with the cross member angle a lot during these years and depending on the year of the bumper and the chassis they are different. On the Make-A-Wish sled I had to drill new holes in the braces to match the bumper.

If the heat gun doesn’t quite give you the desired results, don’t be afraid to throw a coat of paint on it. For whatever reason, I’ve had very good luck painting the Polaris plastic. You can order a 16oz aerosol can of midnight blue from this guy http://vintagesledpaint.com/. Great product and nice to have around just to touch up things.

Today I just finished painting a dash and 77 tank for a vintage buddy up in Houghton. I did use heat before I painted them just to cut down on the contrasting color. These also have a coat of clear satin finish. Also did the heat gun treatment on a 79 tank today that was badly faded. Will probably still paint it because I suck at getting the color even with the heat gun when there is this much surface area. Here’s a before and after shot of the 77 dash/tank and the 79 tank.
 

Attachments

  • Tank_1.jpg
    Tank_1.jpg
    96.5 KB · Views: 75
  • DSC_0006.jpg
    DSC_0006.jpg
    94.5 KB · Views: 85
  • DSC_0001.jpg
    DSC_0001.jpg
    97.4 KB · Views: 80
  • DSC_0015.jpg
    DSC_0015.jpg
    97.6 KB · Views: 83

Bradzoo

Active member
Kirk is your seat a long or short seat? I have a brand new long seat cover that I will let go of cheap

Bradzoo
 

kirk600

Active member
Hi all,
Kelly, that looks real nice I may have to go that route also. Do you use the clear just to dull it?

I got a little work done this afternoon, trying to keep making progress. I did learn a few things along the way.
It seems funny I bought a used seat from a guy up north on Friday, as Angi and I wanted to get our first ride of the year in. So I bring it home, leave it in the trailer until tonite, and wouldn't you know, its too short........

I should have asked the experts first, Brad even mentioned it in his last post a few hours ago!
So yes Brad, I need a long seat cover so put my name on it and I will make plans to come get it.
I also found out I need a different clutch puller, so thats been added to the list. but We did get the pan removed and after we get the rivets tomorrow, we will start fitting the new one. Here are some pics for now........hope you all enjoy them.


- - - Updated - - -


[
 
Last edited:

skiroule

Well-known member
Looking at that last photo, I can't help but think about the game of Jenga. That is some serious balancing skill! By the way, hang onto that short seat. They are like gold if the foam is in decent shape and that one looks pretty good.

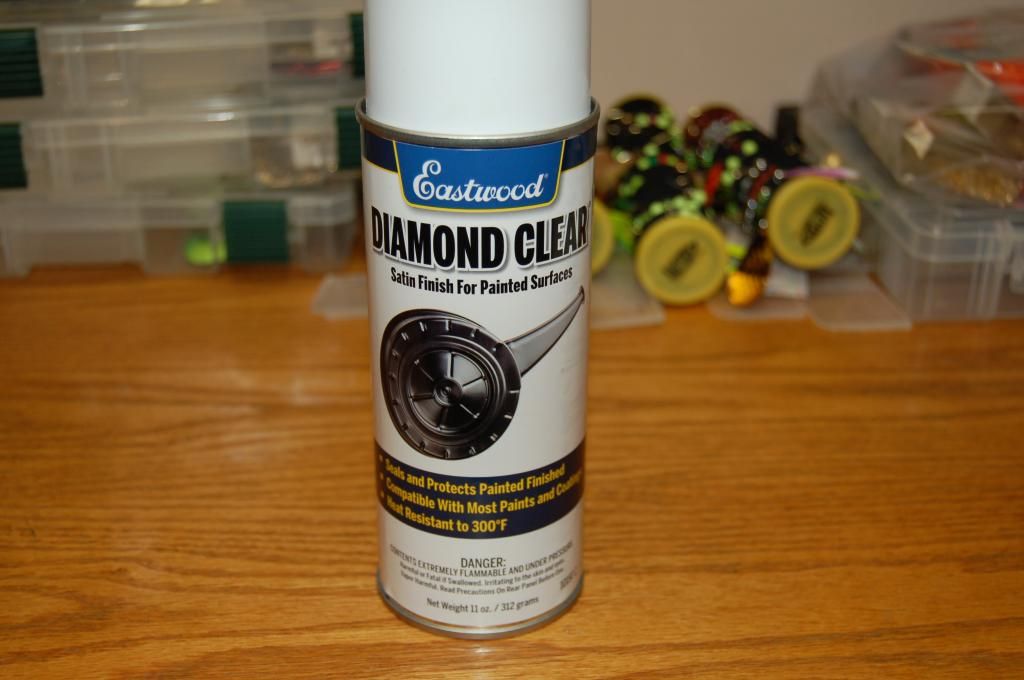
Yes I just use the clear to knock down the gloss a little. I try to spray the part with a medium/light coat of clear, let it dry for a few minutes and then sort of mist/fog it to soften it a little more. In the end maybe a little more glossy than factory but pretty close.

This is the clear I've been using.
DSC_0030_zps88a696e3.jpg
 

kirk600

Active member
Kelly,
Thanks for the explanation, That makes sense. As far as balance, It looks worse than it really is.........all but the top two boards are nailed together so it is fairly stable.
We are doing this at my buddies shop, and he has a few of these for painting frames and such....

Angi said jenga too when i showed her the picture.........
 
Last edited:

Bradzoo

Active member
That trunk looks in good shape too, no problem Kirk the seat cover is yours when you want it, I couldn't tell for the previous pic's if it was long or short. Be careful and don't pull out the wrong block playing Jenga hate to have you needing more parts,hahahaha

Bradzoo
 

kirk600

Active member
Hey everybody, I didn't pull the wrong block, but the old polaris did end up on the floor! The pan and front bumper are installed.
And now for the fitting of my warped hood, I need a board game name........and some free time. It seems my hood is one inch wider than the bumper, possibly due to some old fiberglass repair,or from the old broken bumper. Maybe its "operation" time........
Thanks Brad, I sent you a message. I dont know what I will do with the short seat, so if anyone needs one later let me know, or just the rear trunk. I have a few of them.
So now with my second attempt at pulling the primary, guess what.........it wont fit thru the bumper........the clutch puller that is. But I am pretty sure the primary wont go thru the bumper either. Is it common for the hole in the bumper to be misaligned from the clutch? Is this why they offer a two piece puller?( I got the one piece)
Here she is after pulling it home tonite, sorry about the lighting....


kirk600

Active member
Quick Question folks,does anyone know where I can get some of that aluminum foil for inside the belly pan, so I dont melt the new one?
 

skiroule

Well-known member
Welcome to the wonderful, wacky world of vintage sled work. I did some checking here at home with my puller and it does fit through the bumper hole but....it doesn't always line up with the clutch either. On the 250 the clutch lines up side to side but the hole/bumper is too high. On the 340 it is fine.

So apparently your problem isn't all that uncommon after all. To tell the truth, I've never pulled a clutch with the engine installed. Not sure this would work on your liquid but one option is to unbolt the engine (easy enough to do) and raise it/tip it or move it which ever direction it has to move to line up with the hole or clear the bumper all together. Not sure how much hammering you could do in this option but from what I've read, it's not the best idea anyway. All of mine have come off with just an impact wrench on the puller.

I did notice that on the 78 I bought the hood comes to rest at least 2" outside the bumper on the left side. I can force it to fit inside the bumper but it doesn't seat inside on its own. This hood is in pretty rough shape so I'm not surprised. Even when they are in good shape you sometimes have to "help" them a little to line up.

Good work on the pan and bumper! Should be able to find the foil stuff on-line somewhere.
 

kirk600

Active member
Thanks for the help Kelly, i have to pull the bumper back off to massage it a little bit, so i will hopefully pull the clutch off then. I had hoped to be riding all weekend, and thru midweek, but mother nature had other plans so i plan on
working on the TXL instead.
 

kirk600

Active member
Hi again folks, today was a good day as far a progress on the TXL. I got the exhaust painted, the skis and shocks blasted and painted, and new carbides installed. I also had removed the hood hinge assembly and straightened it out, blasted and repainted those pieces also. They didnt turn out too bad so I hope to clear them tomorrow.
I was hoping to find out what kind of bushing or washer goes between the chassis and the spindle, as the chassis is getting some grooves in it. But the young parts guy at my local polaris dealer wasn't able to find any listing. So for now I will keep searching. Hope to have more to report tomorrow......


- - - Updated - - -


kirk600

Active member
Ok here are a few updates. i was able to get the spindle bushings from another polaris dealer. So i need to replace these and while i was waiting for the bushings to arrive,
I finally pulled the primary off and disassembled it.
All was going good until i removed the cover, and found a mouse nest inside...........literally! So after pleading with Angi to
remove it, i was forced to dispose of it myself.
I did find a few flat spots on the rollers, so I started replacing these as well as the pins. I should have picked up a few fibre washers when was at the dealer, as i damaged one upon reassembly. Another trip tomorrow, if they have the washers in stock.


I also am in need of one "W" weight, as one has considerable wear from riding on the flat roller............and no dealer has had them for years..
ah the life of vintage sleds.

I wont be able to make the "ride in" so hopefully the weather cooperates for everybody
 
Last edited:

kirk600

Active member
Well folks, I hope your all at the ride are having a great time. I have been making a little more progress today. I did get the fiber washers from the dealer today, now granted these things are smaller than a dime, but these babys cost over $7.00 a PIECE! And they were nice enough to give me a break on the price, since they have not sold any in the last 228 months.........thats right, these babys have been on the shelf for 19 years.

So I got them installed, got my spindle bushings ready to install.


So to remove my clutch, I used a home made removal tool that was a fine thread bolt and a cut off bolt. I seem to have bad luck though, at least it is luck, heres why. I went to a junk yard that I know has a 1980 TXL indy in the yard. I knew it had a P-85 CLUTCH on it, so I made a detour with my clutch tool that I made. It seems that sled has a different crank snout on it, as I put my cut off bolt inside, and my fine thread bolt threaded all the way down to the clutch. So here I am 45 miles from home, with no means to remove the cut off bolt to install the other clutch puller I brought. So I left empty handed that day, minus one homemade tool...........so I guess the old clutch is trying to tell me something..


- - - Updated - - -
Also got some clear coat on the skis, now I can install them once the spindles are installed.


skiroule

Well-known member
Kirk, excellent work! I'm getting the feeling that this will end up to be much nicer than the "touch up" rider that you originally planned. Welcome to the club. Once you get a few things looking good, it's really hard to just let something slide.

I wonder if a mouse would throw the clutch out of balance? Although, the extra mouse-power couldn't hurt.

P.S. If you still have them out, could you post a close-up of the spindle bushings. I'm wondering if the TXL version is the same as the TX.
 

kirk600

Active member
Thanks for the compliments guys. I have a feeling this old TXL has been neglected the past few years, maybe even the past decade, so I am trying to get a few things back up to snuff. I hope someday it looks as nice as some of these I have seen on here.

I am fortunate to have gathered experience working on old cars, as that is all I could afford when I was younger. We all know how those things can be a humbling experience, especially when you have to walk to the nearest town. And the funny thing is, I still play with them and would rather have one 30 years old than a brand new one. So with all my toys, I try to fix the little things before they become big things. This old TXL is no exception.

I have been doing what I can inside, and working on the sled when the weather has been warm enough. The trailer is like a ice box inside....... Most of the stuff lately has been remove, repair, and replace. It keeps me moving forward, and also gives me a chance to find out what I need to address down the road.....

I didnt know what was bouncing around in the primary clutch, but you could here something in there when you rolled it over. That mouse nest could have affected the clutch engagement, so at least that issue is off the table.

Kelly, here are a few pictures for you, I do think you can get something similar at a hardware store even a bronze bushing if you prefer. They were $5.00 a piece, 4 required. Polaris Part #3573908


Bradzoo

Active member
Just let me know the dimensions and material and I can make any bushings you need (toolmaker remember) hahaha.

Kelly, How was the ride in shoot me an email, I broke my sled last weekend and haven't had a chance to edit the video we took

Bradzoo
 
Top