My Second Vintage sled project........1979 Polaris TX 340

kirk600

Active member
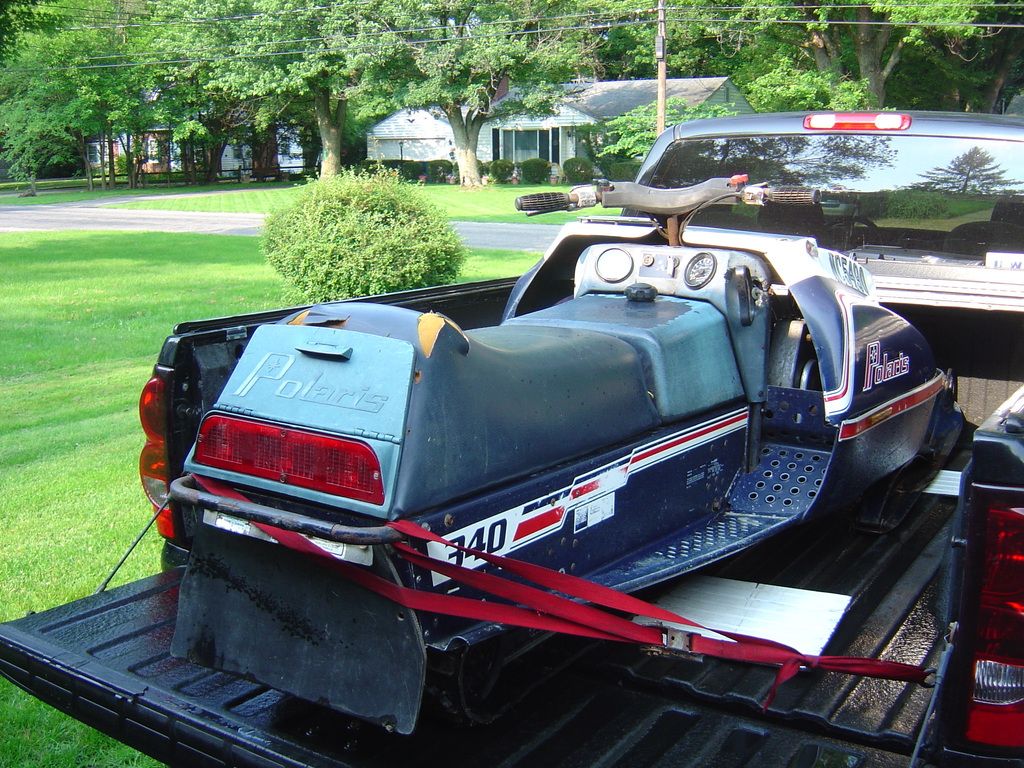
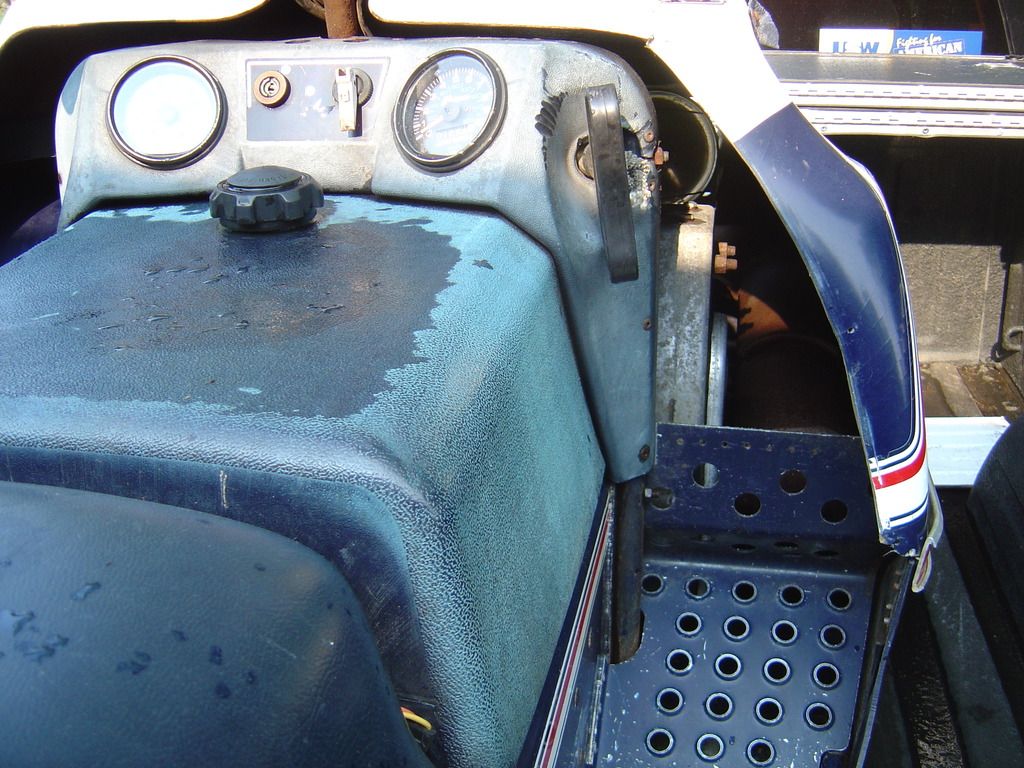
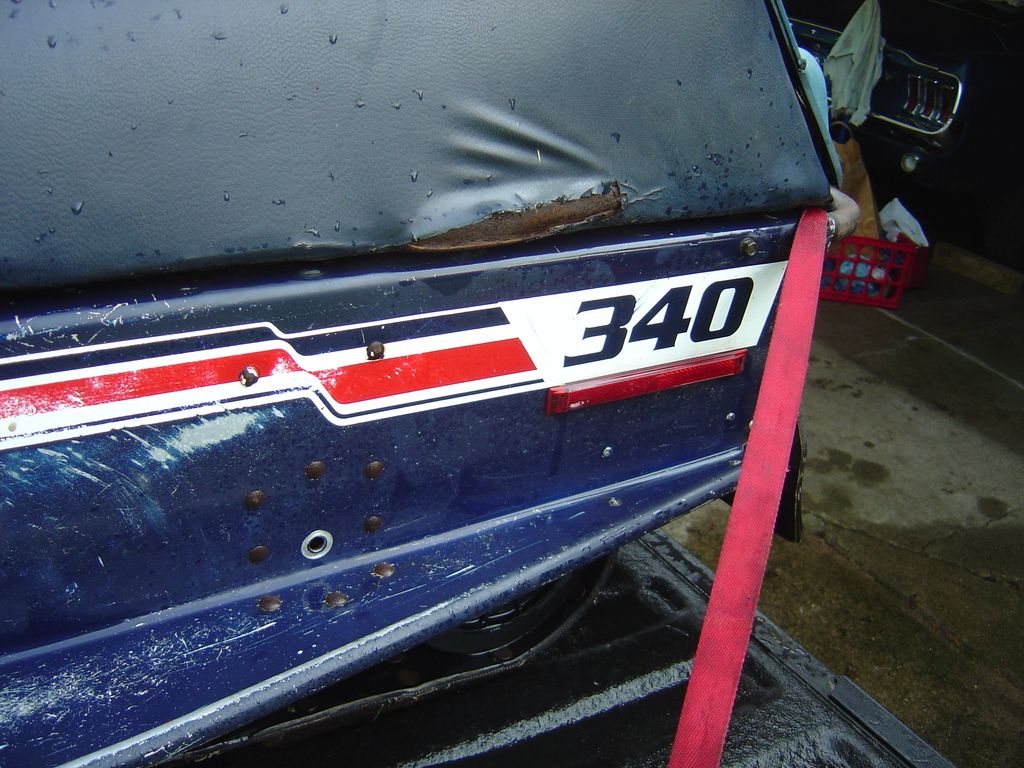
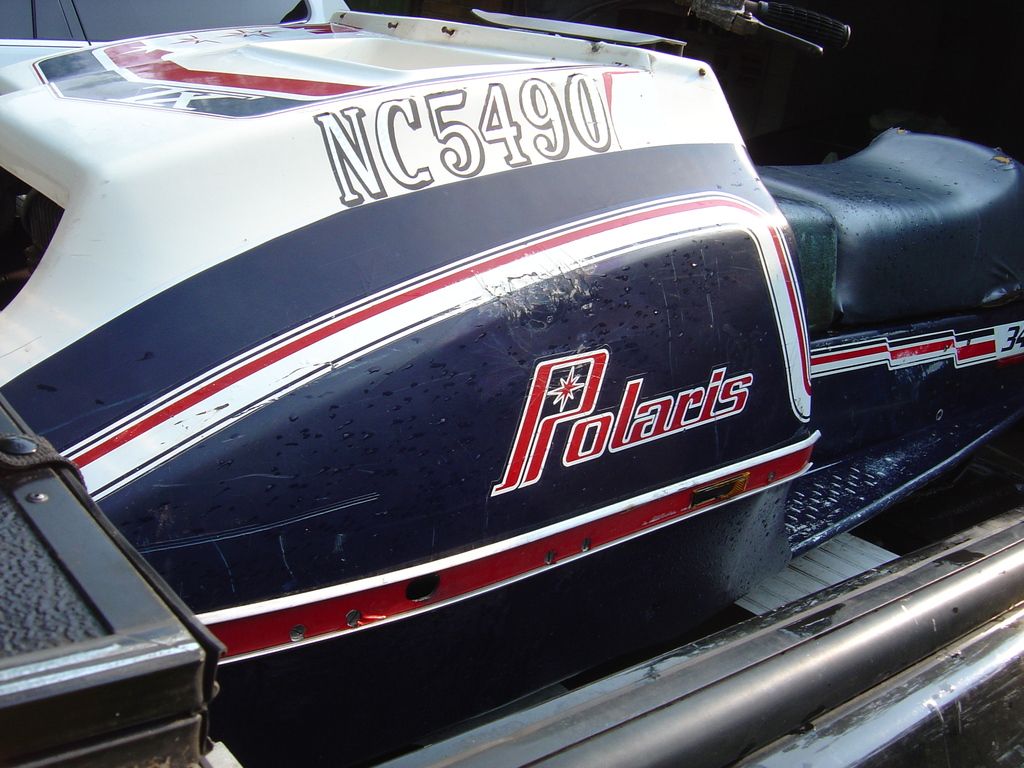
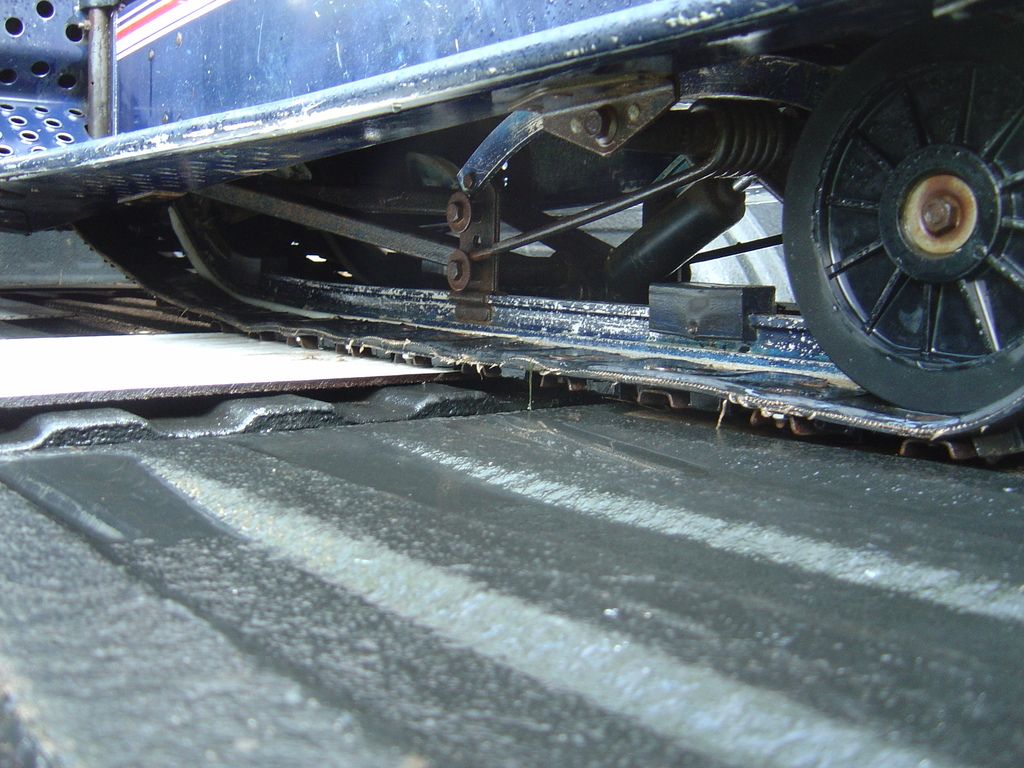
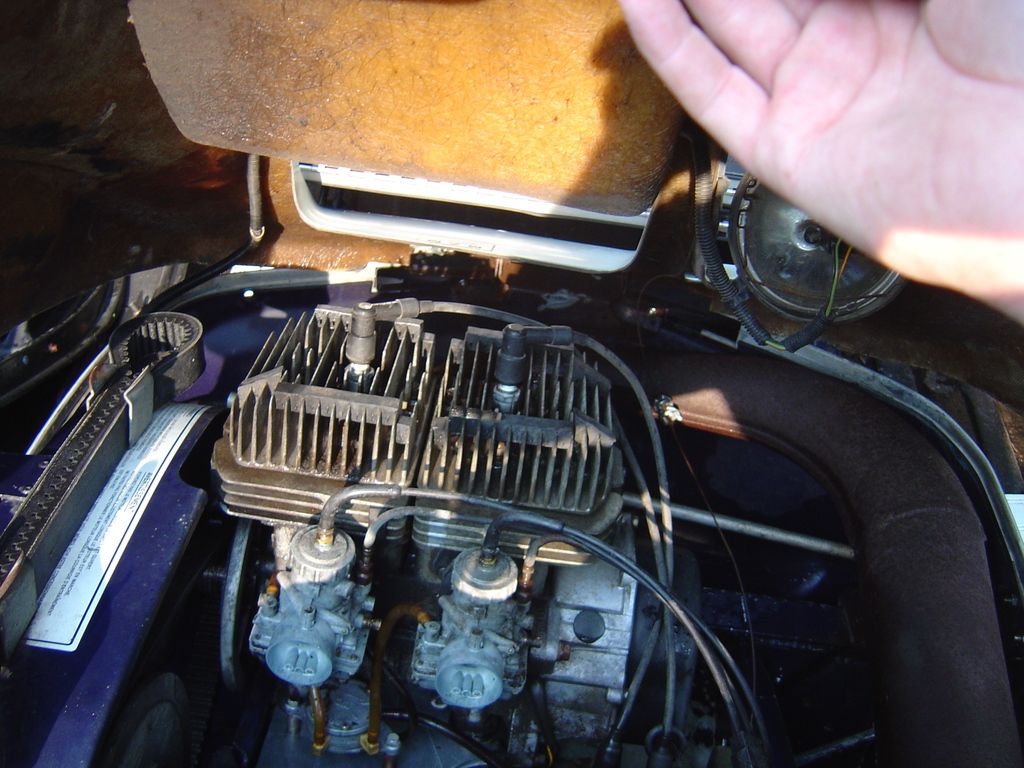
Ladies and gentleman, here is the start of my latest project for this upcoming winter. I rescued this little gem, or germ, (you can decide) that you see from a mosquito infested back yard from a gentleman this summer. I know its a little rough, and my plans are to fix the basics, upgrade the rear track and suspension to indy style with 7-8 inches of travel. Rebuild the brakes, install new seat cover, possibly replace the hood, and install a windshield.


- - - Updated - - -


- - - Updated - - -


kirk600

Active member
So far I have removed and replaced the fuel lines and rebuilt the carbs.. The previous owner stated that it was running fine and just suddenly quit. after he could not get it to restart, he just left it out in the yard for the last couple years. I determined after unloading it that all the fuel lines were hard and brittle. I cut the old ones off the fuel pump....the ones that go to the carbs, the pulse line, and it still wouldn't start. I then replaced the line from the tank to the pump, and discovered it was split allowing it to suck air instead of fuel. I put a gallon of fuel in the tank, and it started on the fifth pull!
 

skiroule

Well-known member
As Brad said: "Welcome to the world of free-air." Yes, the liquids ended the run of the free-air but there's just something about those fins. Plus, you could actually grill a brat in a pinch.

She's a fine looking machine and I can't believe you want more than 4" of travel.

I see it has the usual rope burns on the dash. I finally found the product that will repair this. Let me know if you're interested. The front mounting holes look a tad egged out but for all-around riding the middle position is better anyway so it's not an issue. I'm sure you've figured this out.

Looking forward to this build. You set a pace that puts me to shame.

Going to swing by Princeton in a couple of weeks - have a Cyclone chassis on order. It's never a good thing to turn me loose around row after row of vintage stuff but it will be a good test of the therapy.
 

kirk600

Active member
Hi Kelly,
Yes I agree the fins do look pretty unique in this day and age. This sled is probably going to be more a rider for the low snow conditions and maybe the frozen lakes. It needs a track, and with the prices of the cleated tracks, doing the indy skid swap is more cost effective.
I have already removed the hood, steering, brakes, and exhaust. The clutches have been rebuilt and I also replaced the rope in the recoil. I am actually using a synthetic rope that they use for winches, in the recoil. It is rated at around 5000 lbs so I dont think I will break it if the mighty 340 gets an attitude.
The master cylinder was frozen, and I ended up cutting it off the handlebars. So I am using a newer one off a mid 90's polaris that actually bolts onto the handlebars with a two piece clamp.
So hopefully I can get things pretty much wrapped up before the snow flies.
The only big expense items I need are a seat cover and a hood. And if I replace the hood, it wont look right without graphics. And you dont want to install graphics on the hood and not repaint the tunnel without replacing those graphics as well.........so maybe the hood will have to wait for another time.
 

kirk600

Active member
So for an update, I have been hunting for parts, removing and cleaning some parts. So in the pictures it progressively looks less like a sled, and more a pile of parts.....


I also bought a donor sled for the rear skid, track and drivers. It turns out I am going to have to drill new holes in the tunnel. The stock TX dimensions from the center of the driveshaft to the front suspension hole is 14"
I bought a 1992 RXL for a donor sled. The dimensions on that sled are only 11 1/2" so I have to decide do I drill, or find a different skid.
 

kirk600

Active member
here is the track and Suspension......


Found a stock airbox as well


New Windshield.......

Some fresh primer on the handlebars after cleaning all the rust off


kirk600

Active member
And there is even some more stuff I have bought. I got a new seat cover from Dr. Mario over on Vintagesleds.com. We went to the National show up in Midland a few weeks ago, and I got his number out of the show catalog. I got a used headlight grill, some new wear bars, fresh springs in both clutches, I got a decent master cylinder off the RXL so I will have brakes once it gets installed. I still need a decent hood, but that will have to wait until next year.
Thats all the updates I have for now, hope you all enjoy them.
 

skiroule

Well-known member
That's probably one of the nicest airboxes I've seen.

You will like how the cover you got from Dr. Mario (aka Don Soukup) works out. They are not cheap but I think they are the best you can buy. He still claims he can't make a living in the vintage business but man, does he put on the miles. Never seen a major event where he hasn't been there. He was at Princeton this weekend.

I talked to a guy that has done some Indy suspension conversions and he told me that the Indy suspensions are a bolt-in for the TXL's but the TX's require re-locating the mounting location. I do see a lot of TX conversions around though so maybe it's not always the case. I probably saw a hundred Indy suspensions for sale this weekend so maybe catch a swap meet and do some measuring.

Good job on the tear-down and I see you're already in the restoration mode.
 

kirk600

Active member
Well not much to report here, I went up to the cabin for some dirt bike riding over the holiday. Today I got back into the swing of things on this old polaris.
It seems like the stock steering on this sled and my TXL both feel a little sloppy, and the main tie rod that runs from side to side gets bent way to frequently. The tie rod ends are sloppy as well, so I took the ones off the RXL and made some new ones out of 6061 aluminum. I had to buy a left handed tap, 3/8-24 pitch for $16.00 to match my right handed 3/8-24 tap, and the 6 foot of 5/8" 6061 solid tube cost me $9.00. Here are the pics.....


they came out pretty good. and for less that the price of one new polaris rod end, I got both tie rods done. And I have two spare tie rod ends off the indy.......
 
Last edited:

kirk600

Active member
Well I have been making slow progress lately. I did get the tank off and repainted that, and spray bombed the tunnel.
The dash is next on the list, repair the rope burns and paint.....
( Kelly, I could use some help here)
I got the one ski installed, brakes bled and half of the steering back together. Here are a few pics.....


- - - Updated - - -


- - - Updated - - -

 
Kirk looking good.. just wondering what you did to the tank to get like that ( dye or paint ) I rebuilt a Centurion from the ground up and we painted the belly pan / tank but the tank is not holding up well , we even used an epoxy primer on the 2nd try and still not holding up so , I have heard of people dyeing them
 

kirk600

Active member
Hey confusion 900, i just cleaned the tank with purple power and rinsed it off, then painted it with the same aerosol paint i used on the ski's, tunnel and everything else. Just light coats though.......

I actually have a real nice tank I believe is the same as the TXL AND Centurions, with no fade that I am not using, if your interested i can grab a picture. It actually came off a real early indy 600 which had a vinyl cover over the tank from the factory......well scratch that idea. The tank is similar in size but the indy tank has different lines than my TXL, and i believe it is wider at the top where it meets the seat. I can grab a few pics anyways tomorrow.
 
Last edited:
Kirk , have you had gas in the repainted one yet ? mine looked awesome till I put gas in it and then it started to blister up on the tank and like I said we used an epoxy primer the 2nd time and it did it again
 

kirk600

Active member
Hey there Confusion,
No I haven't put any gas in it yet. If it does blister, Bradzoo here on the board recommended to use a heat gun on the plastic dash and trunk door, so if you washed the tank out with water I dont see any reason why it wouldnt work also.
 

kirk600

Active member
Well today I finished running the new fuel lines, and bolted the tank in place. I did find out that the thicker fuel lines will not work inside the tank, as they wont slide through the hole with the weight on the end. and they wont allow you to start threading on the fuel fitting to the tank either, the line is just too thick. So I went back and bought the cheaper blue stuff and it went together with no problem. I like the see through lines better anyways!
The next item to get reinstalled, was the dash assembly. It is broken where the recoil goes through, but you dont see it when its not pulled out, so a quick paint job and some fresh rivets and good as new. The stock rivets were steel, and a uncommon size to boot, so I drilled the holes where the rivets go out to 3/16" and used aluminum rivets. I think it turned out pretty good.
The third and last thing I put back on was the recoil. I didn't use common recoil rope from a dealer, but instead I used synthetic winch cable. This stuff is strong folks, like 3500lbs rating, so hopefully the little 340 wont break it.


looking good... I see you said the dash wash broke near the pull rope area , I had bought a used vent for on top of the hood for my Centurion and they're always broke on them , so I epoxied it and then used a little roto zip to grid it smooth and painted it turned out really nice , just a idea for you
 

kirk600

Active member
That is the same problem i have with my tXL air vent. I tried to repair it last year and was not happy with the results.

Also, i talked to my buddy who owns a body shop, and told him about your dilema with your gas tank paint, and he said you need to wash it with soap and HOT water and use a adhesion promoter for plastic, probably one or two light coats with 30 minutes between coats. After that you can then paint it and it should work better for you. I used really hot water and purple power on my tank, then just rinsed it off and let it bake in the sun for a few hours. I painted it when the tank was still warm...........keeping my fingers crossed
 

sweeperguy

Active member
Are you using that plastic fusion paint by I think it's rustoleum? Or is all the prep and adhesion promoter for using regular spray paint
 
Top