Summer Vintage Projects 2013

snoluver1

Active member
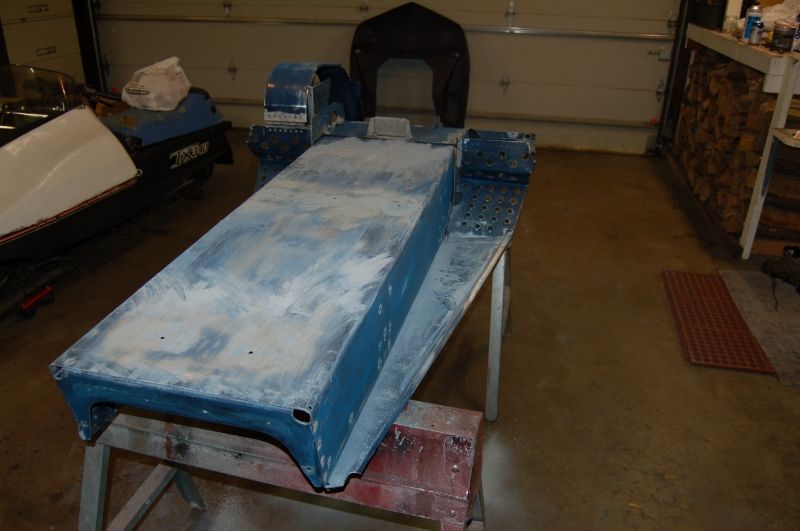
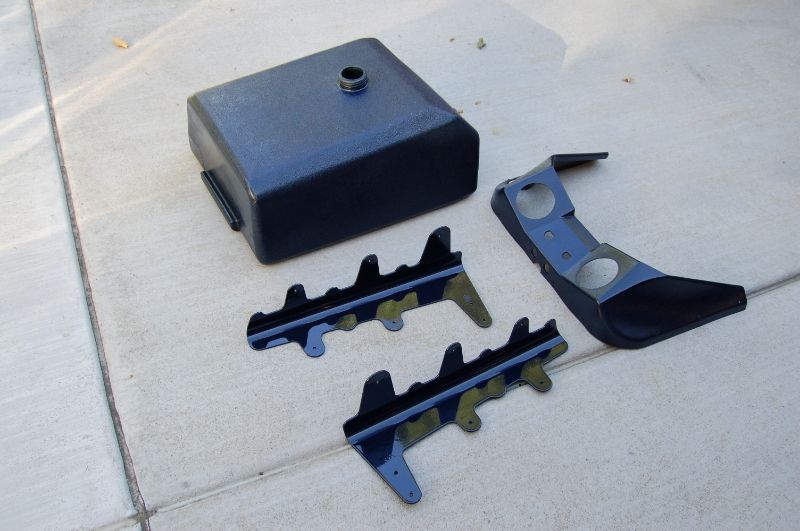
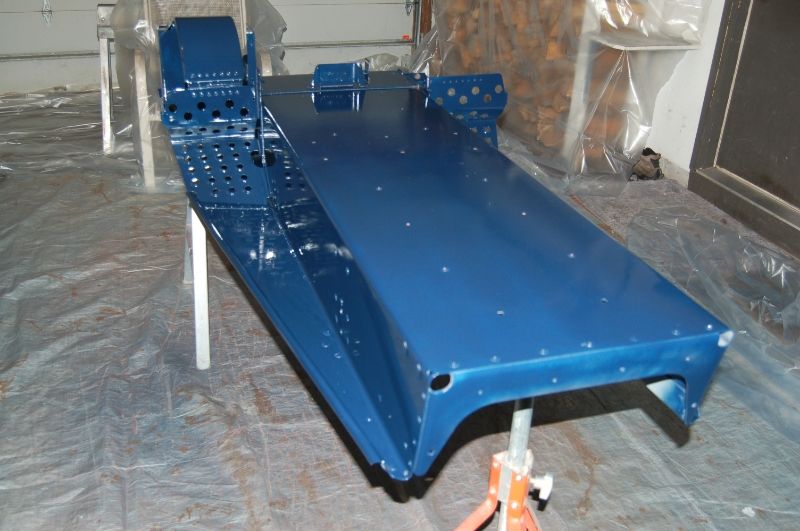
Jeff its tough, I try to get in a couple hours every day some days more if I can most days less, I'm sure mine won't be anywhere as nice as that TXL your restoring you need to post some more pic's I'm sure everybody is tired of looking at my stuff, I'm just trying to make a good solid rider. I couldn't find a decent bumper within driving distance and I'm not gonna pay freight to get one here, so I straightened mine, I got it on my new replacement belly pan to see how it fits and it doesn't look to bad. I haven't done any cleaning on either yet but the fit looks pretty good, it will do until I can find a better one.

View attachment 41496 View attachment 41497


Bradzoo


It's kind of funny. Kelly and I just had a conversation about this the other day. I think few people realize how much time is involved in these projects. I personally had several hundred hours of labor into that make a wish sled. On top of that I had several people helping me also. Even after all those man hours there were still some things that I would have liked to have done to a higher standard. As with your bumper sometimes you just have to draw a line in the sand, for the sake of getting the project done.

Definitely some nice work going on here gentleman. The reward in the end will be well worth it. The first time you pull the rope and she comes roaring back to life you'll know what I mean!!!
 

Bradzoo

Active member
Well theres still along way to go but I'm kinda on my loose schedule, past few day's last nite for sure I got more time to work on the sled. As Kelly already knows the brush and roller came back out and I got the chassis painted the other day, I figured with heat the past few day's it was the perfect time. So the chassis is now fresh blue and what started out as putting the reflectors on yesterday after work turned into about 5 hours of quality work time with a few barley pops as it was still plenty warm. The reflectors turned into the rear bumper, snowflap, hitch, moved forward to the steering and the electrical componets so I got alittle carried away.
CAM00242.jpg CAM00244.jpg
Bradzoo
 

skiroule

Well-known member
Not Slackin' (Really)

Had a sneak preview of Brad's last post - Nice!

Figured I’d better check in before I’m accused of being a slacker. Did a little filling/sanding on the chassis and it should be ready for paint in about a week. If it comes out anywhere near what the other guys have posted, I’ll be thrilled. A hairline crack in the jackshaft mounting plate that was discovered when it was cleaned up will get welded this week.

Chassis_1_zps2e84b689.jpg


Re-assembled the skis and driveshaft tonight (note to self: make sure the drivers are synchronized before assembly). Obviously the skis aren’t stock color but the black/red scheme is just a personal preference, plus touch-up paint is way easier to come by. I reversed the drivers because the backside of the cogs had zero wear. My goofball logic was that it basically gives me a new set of drivers. Who knows, I might be right. Sometimes there’s a fine line between madness and genius.

Skis_Drivers_zps5dbb20c1.jpg
 

Bradzoo

Active member
VERY NICE!! Kelly, I don't think anybody would ever accuse you of slackin, those ski's turned out great, I finally got my replacement driveshaft it has the same problem as yours did but not as bad as mine is, looks like it will clean up fine once I cut the old bearing off. I got a few more things powder coated last night (spindles, belly pan braces, lower hood hinge) while I was cleaning and making room for the new toy. Its up to you and Jeff to keep them in pic's while I'm gone.

Bradzoo
 

skiroule

Well-known member
Have to see the Humor

Nothing much will happen on my end either – fishing weekend.

Thought people might get a kick out of this. The seat on my 440 had been recovered and I could tell by the shape that something was not legit so I wasn’t surprised when I pulled the old cover. My assumption was that this was done by an upholstery shop when the seat was recovered. What’s surprising is that it doesn’t match the contour at all and even with the crappy replacement cover it showed. It would look awful with a high quality heat/vacuum formed seat cover.

Seat_1_zps01c6f7c7.jpg


It looks like someone took a piece of cake out of the middle. I have a scrap seat that I think I can cut up for a piece of foam that will match in shape and density. It will be an adventure, as my experience with foam is pretty much limited to the stuff in my malty beverages.

Seat_2_zps9531fe98.jpg
 

renten

New member
Hi Kelly, If you take your seat to an auto upholstery shop, they can match the density of the foam. I took the seat from my TXL in because it was suffering from the same disease. I let them handle it because they are good and reasonable. With my seat they opted to cut the entire top off, then layer the foam and air sand it to the desired shape. Unfortunately the cover that the previous owner sent with the sled was not of the highest quality. I can always change it later. I am going to have so much money and time tied up in this sled, that I have to trim where I can. Did you see further up the page that I just bought a '78 TX to be the stable mate to my TXL. Very nice original condition and nice running. A little TLC and it would be very similar to your TX that I saw it your garage when Mike and I came up to pick up the TNT. I will be posting more pics when I make a little more progress. Keep up the great work, Jeff
 

skiroule

Well-known member
Good idea Jeff. I'll check with some local shops here. It might be worth the money. As I mentioned, if it isn't done right, the cover will definitely show any defects in the seat foam. I was lucky in that the 340 seat was perfect so it was a snap to recover.

Yes, I saw that you picked up a 78 (Excellent). These things have a way of multiplying like rabbits, but as Adam (Snoluver1) said, it's really pretty cool to be preserving a piece of snowmobiling history. Guess you'll have big decision on which one to ride but it a good problem to have.
 

Bradzoo

Active member
Kelly seems to think I cheated putting my drivers on the axle only took a couple of minutes.HAHAHA
CAM00261.jpg
CAM00271.jpg
Started taking the striping tape of the bumper tonite holy crap don't know where the found the stuff but it was ever gonna fall off, its fighting me even with a heat gun.
Bradzoo
 

skiroule

Well-known member
Started taking the striping tape of the bumper tonite holy crap don't know where the found the stuff but it was ever gonna fall off, its fighting me even with a heat gun.
Bradzoo

It's the "Revenge of the Drivers". When I tried sanding the stripe off mine last year the tape was so tough I could sand it to a feathered edge.
 

skiroule

Well-known member
Good Day

From the vintage sledding perspective, it was a good day. First, this beauty arrived in the mail: a TX speedometer still in the Polaris/Textron box - 00000.2 miles.
Speedo_zpsaa23d0f9.jpg


Then it was off to America’s Dairyland to pick up a bumper. Not only was it a scenic drive through the rolling hills of western Wisconsin but I got to meet another “TX Head” and look at all his projects. Plus, the bumper is excellent, even the clutch plug is still in place.

With apologies to the pure restoration faithful, I had to paint the tank because it was messed up with paint from the previous owner. This had a snowball effect because the dash would have looked out of place. It’s a little shiny for my taste but it’s better than the alternative. I’m not too worried about the paint coming off. I painted the pan on the 340 and it held up fine last year. Also painted the fishbone braces (yes, fishbone braces). Most likely they will go on. I have them on the 340 and they look surprisingly at home on the TX chassis, maybe because it’s a pretty aggressive look to begin with. Also, no more bent running boards.

BlueParts_zpsff23a6b5.jpg


Can’t wait to join the Painted Chassis Club. Got it primed.

Primed_Chassis_zpsaa6995de.jpg


and sealed.

SealedChassis_zps8ab0cbb3.jpg
 

Bradzoo

Active member
Its looking good Kelly I can't wait to see it painted, the plastic parts turned out real nice, I still need to figure out what I'm gonna do with my tank, and once again I got nothing done on mine, got called into work yesterday, so I got some catching up to do, I'm falling behind, I may have to ship my engine to Adam after all!!!

Bradzoo
 

renten

New member
Hi Kelly, Everything looks great. How did you prep the tank? What type of paint did you use? Did you add a flex additive? I was going to paint my tank but I chickened out because I thought it would start cracking and flaking. My tank is only slightly faded so thought I'd live with it. Jeff
 

skiroule

Well-known member
Jeff, after tonight's adventure (more on that in a later post), I'm hesitant to provide any reasoning behind my methods but...since you asked.

The flex additive would definitely be added insurance but I just used standard Vintage Sled Paint with no flex additive. My logic was that the tank is pretty rigid and under normal circumstances doesn't bend that much. I suppose the back corners could be an issue if they were somehow badly distorted during use but then there might be bigger issues. I sprayed the tank as dry as possible and with the tank texture there's no sign of lack of flow so I'm hoping that I can touch it up if need be and it will still look pretty good.

If yours is only slightly faded and matches the dash and pan, I think I would leave it as is.
 

skiroule

Well-known member
Sometimes You win, Sometimes You Lose

I told Brad I’d never admit it if the chassis painting didn’t work out but since I’m not hesitant to post things when they go my way, it’s only fair to post the things that don’t.

Tried out a new paint product on the chassis tonight – not at all happy with the results. To be fair to the supplier, the biggest issue was my miscalculation on coverage. I’ve used their standard acrylic enamel in aerosol form before with very good results and assumed that I would get similar coverage with the version that included a urethane hardener additive. It didn’t flow out as well as I expected and in a nutshell, I ran out of paint before I could get the desired finish.

So, no more Mr. Nice Guy, I’m abandoning the aerosol approach and breaking out the old Devilbiss. It’s older than the sled it will be painting but it still works perfectly. After the next session I’m hoping it will look better than this first attempt. No question, it's disappointing but fortunately, embarrassment is rarely fatal.

Paint_Take_1_zps7e4a4262.jpg
 

skiroule

Well-known member
How did you prep the tank? Jeff

Forgot about the prep part. I just scrubbed it real good with a fairly mild lacquer thinner (DTL-16 in the Ditzler line), which still seemed to give it some bite. Then I went over it with a wax and grease remover (Ditzler Acryl-Clean) and let it dry.
 

Bradzoo

Active member
Looks good Kelly, doesn't look like you miscalculated by much, very impressed by how wet looking you kept it its tough with all the nooks and cranies.

Bradzooo
 
Top