The Namesake

skiroule

Well-known member
Thanks, hoping the project will live up to expectations.

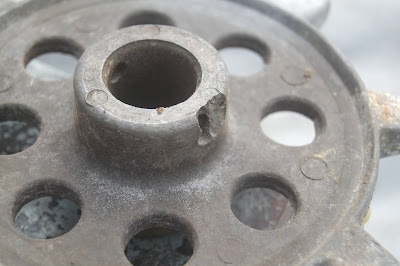
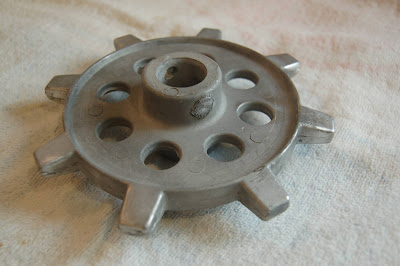
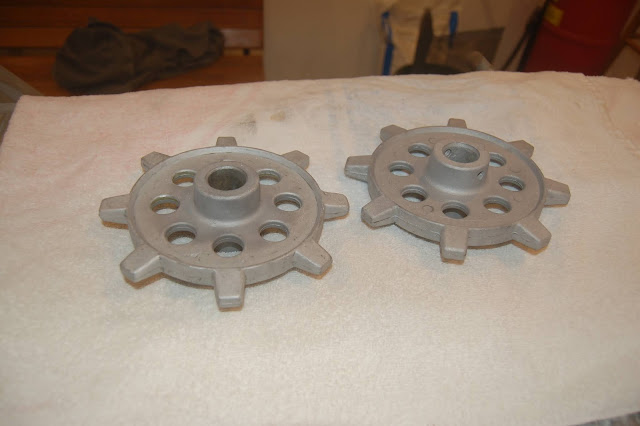
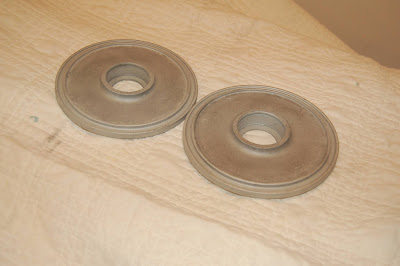
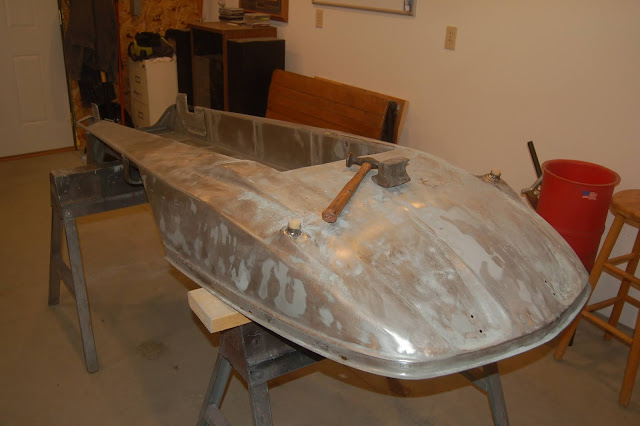
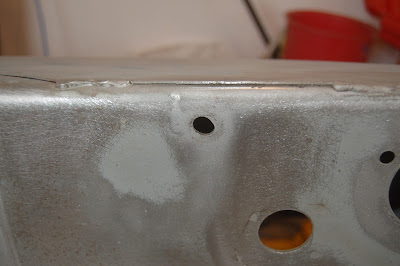
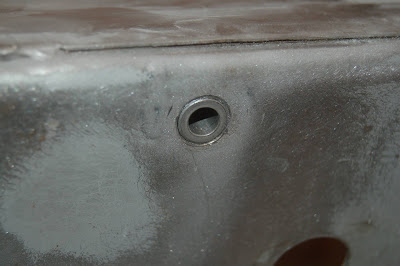
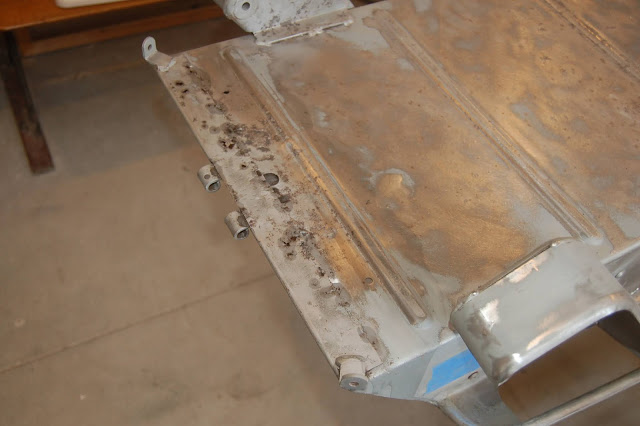
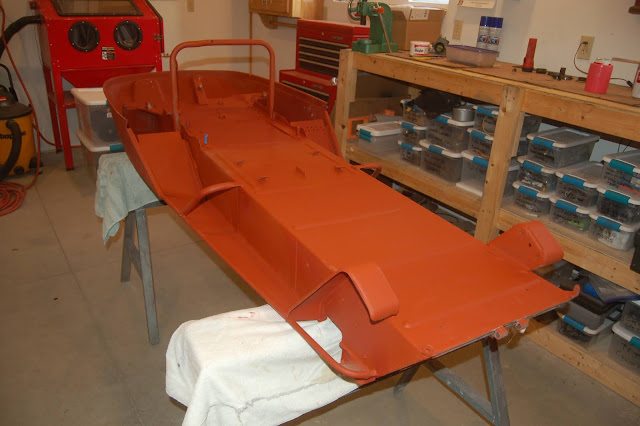
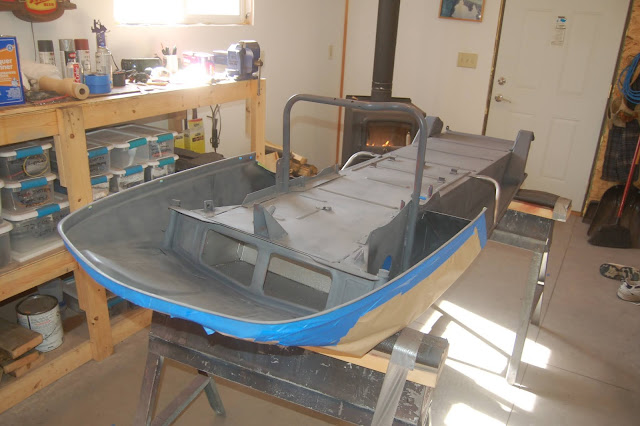
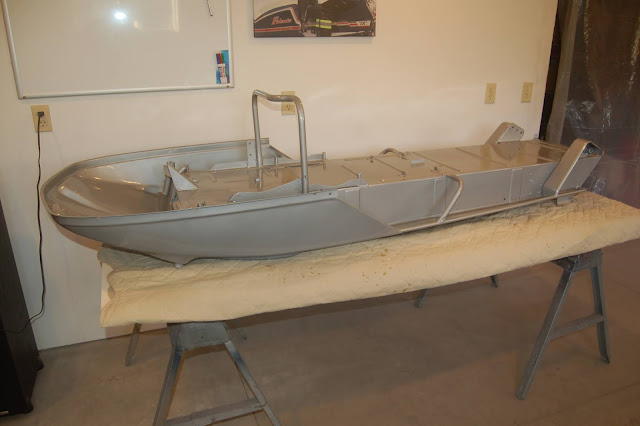
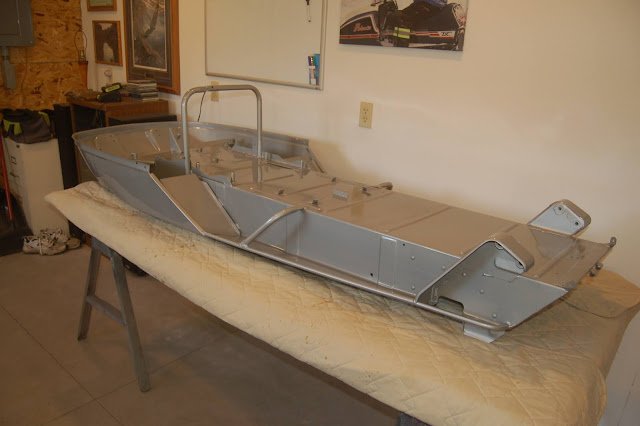
It took a few sessions to get every nook and cranny blasted but it was mostly done in this shot. One of the obvious issues with the all steel chassis is rust-through, especially if it has been sitting out in the weeds for a couple of decades. This one was pretty good with only some minor rust in the reinforcing plate at the end of the tunnel, which could be easily repaired with metal filler.

DSC_1091.JPG


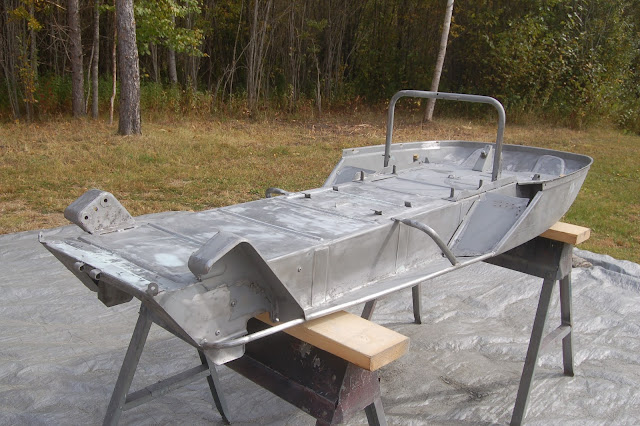
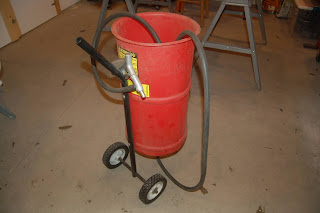
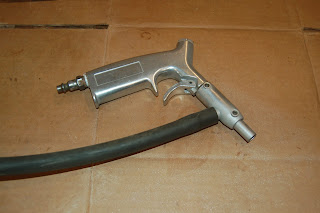
If anyone has the impression that I have some kind of high dollar shop operation, this should cure that impression. I use this inexpensive hopper setup from Harbor Freight for all of my outside, big part blasting. It’s not as fast as a big commercial setup but it’s also not as harsh. I have pushed a lot of blasting material through this thing and have (literally) blown through a couple of steel nozzles. Luckily, for as crude as the gun is, the nozzles are replaceable and I discovered that common steel spacer/sleeve stock fits perfectly and is readily available at most hardware stores.

DSC_1103.JPG
DSC_1101.JPG
 

xcr440

Well-known member
My Dad used to catch all his blasting material.... I screened waaaaay too much sand when I was younger! Nice job - following.
 

kirk600

Active member
Glad to see you're doing well Kelly and still at it. I wish I had more time to do these sort of things. I finally broke down and sold my vintage sleds, but I sure enjoyed bringing them back to life! I will keep an eye on here for updates.

Happy Thanksgiving,

Kirk
 

skiroule

Well-known member
Kirk, I actually saw the ad for your sleds and while I was a little bummed that they were for sale, I figured you had some fun with them and they most likely will be well taken care of by their new owner.

More than one manufacturer made some use of roll pins to hold the drivers in place. It works but the pins and the driver/shaft holes drilled for the pins are carrying all the load that the track puts on the shaft. The pins usually don’t break but the driver holes often start to wear, become egged-out, or lose chunks of aluminum around the holes. Sometimes the pins actually fall out and I’ve even seen shafts break right at the point where the hole is drilled.

I took the drivers to a local marine prop repair guy and had him flow new aluminum into any damage and any holes that were out of round. This took a couple of passes because I only had him do one side at a time so I could use the other side to help maintain alignment when I re-drilled them.

DSC_1085_A.JPG
DSC_1086.JPG


In the end, both drivers came out pretty decent and should last a lot longer than if I had left them as is.

DSC_1090.JPG
 

skiroule

Well-known member
Got some bolts delivered this morning and reminded me that I should throw an update out here.

Was only going to re-do the drivers but when I looked closely at the rear idlers, the lining had quite a few cracks so I decided they should be done as well. Even with the cracking, the lining was not going to give up easily. Man, this stuff was bonded! Procedure was to soak the wheels in acetone for a few days, cut or scrape what would come off fairly easy and then repeat the process. Once I got all of the material off, a little wire brushing and blasting and they’re ready to go.

DSC_1106.JPG


Sent the idlers and drivers off to Rick at Rick’s Rupps down in Stewartville, MN for re-lining. Rick is a stand-up guy and without guys like him, a lot of these projects wouldn’t be possible. He’s reasonable, fast, and his work speaks for itself.

DSC_1107.JPG
 

jd

Administrator
Staff member
Nice!

I sure wish we were neighbors Kelly. I would love to hang out and watch you work!
 

skiroule

Well-known member
You guys would be welcome anytime. Refreshments and snacks would be served. You might have the need to duck the occasional flying (thrown) tool and I’m thinking your questions might be more along the line of “What the H is he doing now?”.

You could find some of my work-arounds amusing though. Like this crude jig I used to straighten the front suspension shaft tube when I didn’t have a big enough press. Just needed something to fit the shaft and hold it vertical while I gave it a few “gentle” taps with the 8 lb. Problem solved.

DSC_1101.JPG
 

skiroule

Well-known member
Meanwhile back at the chassis. Blasting done, time to break out the hammer and dolly. Skilled people would cringe if they were to watch me “work the metal” but I do try to get things close enough to get by with a very thin coat of glazing compound. I really try to avoid using Bondo on these sleds.

Whether it’s by design or just a by-product of the process, the metal stamping of the pan at the factory creates distortion ripples in the side panels and in other areas of the pan bottom. This has become somewhat of a trademark of the RTX chassis and is almost considered an endearing feature. So, the goal is to fix the dents and imperfections that aren’t supposed to be there but not get wrapped up in trying to refine the factory look.

DSC_1088.JPG
 

kirk600

Active member
Hey Kelly if your work- arounds get the job done, then I say mission accomplished! I have done a thing or two at the dinner table because I needed a flat surface to work on...... all my benches seem to get crowded before I need them!
Now the boards at the bottom, I never thought of that...... I usually try to hold said item between my legs and wonder why I'm suddenly bleeding when I am finishing my work. I don't tell anyone those stories though! Looks great so far keep up the pace you'll be done before winter break
 

skiroule

Well-known member
Well Kirk, the truth be told, I did have a bit of a head start on this so the photos are kind of a mix of earlier work and current work. This probably gives the impression that things are moving along faster than they are, but you’re right in the sense that the progress on this project is light speed compared to some of my previous efforts.

Like a lot of vintage sleds, this one had the problem of “egged out” suspension mounting holes (the front in this case). Even when the suspension shafts aren’t seized, the minimal travel of these suspensions causes the mounts to just get hammered constantly because the travel limit is so easily reached on rough terrain and a substantial amount of the excess force is transferred to the mounts. A lot of these sleds never saw a groomed trail so they took a pounding.

My preferred solution has become the use of press-fit bushings. These can be sized to work with almost any application. I just drill out the mounting hole, and install the bushing using a bolt, washers, and nut to pull it in. If need be, I shim the length on the back side so that the bushings are flush with the mount surface when installed. This takes a bit of measuring in advance because once they're in they're in.

DSC_1084.JPG
DSC_1087.JPG
 

mezz

Well-known member
All I can say is you are a cut above the rest. Your fortutiv thinking is what results in a quality restoration, love your thought process. You have a special talent that not only preserves the past, but, improves it in the process. -Mezz
 

gary_in_neenah

Super Moderator
Staff member
Just curious, Kelly. How many restorations have you completed? I recall the TX 340 but I know there were others. If you ever write a book on your experiences I think it would do well in the snowmobile community.
 

skiroule

Well-known member
Mezz, this year is kind of messed up but I’d love to be able to make the Vintage Run for Fun in Houghton in 2022. Should that happen, you need to stop by for the show and we can enjoy a beverage of choice.

In answer to one of your questions Gary, it’s not as many as you would think. This might be due in part to the fact that I’m so old I spent many years riding these sleds when no restoration was required. I did a few rider restorations back in the late 90’s but they eventually went away and thought I had beaten the bug. Then snoluver1 got the idea to do a Make-A-Wish raffle sled around 2012 and after helping out on that a little, the bug came back with a vengeance. I guess that since 2013, the list would include: 79 TX250, two TX340’s (77 and 79), 79 TX440, 72 Chaparral SS650, 76 John Deere Cyclone 340 (rider restoration) and the current project, 73 Skiroule RTX440. So, I guess that works out to around a project per year. As far as a book, I’m way too undisciplined to make that effort.

I’m sure it was the furthest thing from his mind when he titled it, but it’s amazing how many times the title of Neil Young’s 79 album “Rust Never Sleeps” comes to mind when I’m working on these things. As I mentioned before, for a steel chassis, I got by pretty easy on this one. Only a small amount rust-through at the rear of the tunnel that was limited to the reinforcement bar so it didn’t penetrate the tunnel. The rust spots repaired; it was time for the first coat of “high solids” primer.

DSC_1085.JPG


DSC_1092.JPG
 

mezz

Well-known member
Mezz, this year is kind of messed up but I’d love to be able to make the Vintage Run for Fun in Houghton in 2022. Should that happen, you need to stop by for the show and we can enjoy a beverage of choice.


DSC_1092.JPG
I will make a point of it, one way or the other, whether it be by way of participant or observer, I'm there. Keep on keeping on. :cool::cool: -Mezz
 

skiroule

Well-known member
One final coat of gray primer after spraying/sanding two coats of red oxide. Some guys have enough space that they can suspend a chassis and spray the color all at once. I have no such luxury. In fact, my enclosed trailer is now my unofficial paint booth. This requires masking half the sled and painting it in two sessions.

DSC_1086.JPG


Dennis Wedll over at vintage sled paint is another guy that really helps the vintage sled community. Hopefully I can actually meet the guy at the Outlaw Grass Drags next summer. His color formulas are as close to a perfect match for vintage colors as you will find. I’m a huge fan of his “Ready to Spray” mixes. Just add the Urethane hardener that you can buy from him in convenient 4 oz bottles and shoot it. I usually buy some of the aerosol version for touch-up and places where the gun can’t reach.

DSC_1085.JPG
 
D

Deleted member 10829

Guest
Coming along nicely Kelly! Where do you store all of your restorations? Has it really been 8 years since the Make-A-Wish sled? Wow.
 

euphoric1

Well-known member
All I have to say is WOW!! You must be a wealth of knowledge when it comes to connections, suppliers, where and how to find things to do and complete these restorations! Someone had posted an antique snowmobile site on here that I frequent now in amazement of just how many brands there were at one time, truly neat stuff and luckily there are people like you out there to preserve it! I like the shot of your shop as well with the wood burner in the background, my shop was organized like that for about one week, and no wood burner. Neat stuff skiroule you are truly a master at your craft and again I enjoy the play by play!!
 

skiroule

Well-known member
Coming along nicely Kelly! Where do you store all of your restorations? Has it really been 8 years since the Make-A-Wish sled? Wow.

I built a second garage that was primarily intended to serve as sled storage and a small shop. Naturally, I now wish I had built it bigger. It would be a push, but if I dedicated it just to vintage sleds, I probably have space for about ten. Unfortunately, the late model sleds and other stuff takes up some of that space.

Yes, looking at snoluver1’s original post on the first Make-A-Wish sled, it was November of 2011, nine years ago. Think it was completed and raffled off in Jan. of 2013. Man, the time flies!


You must be a wealth of knowledge when it comes to connections, suppliers, where and how to find things to do and complete these restorations. I like the shot of your shop as well with the wood burner in the background

Over time, a person does develop some good sources of information and stuff you need but in reality, without the web, these projects would be difficult, if not impossible to pull off, especially given my location. You do get pretty good at rooting out parts from online sellers and a lot of times you just get lucky. There is a core group of people that have basically made vintage sleds a business, both in terms of reproducing parts and buying up NOS parts inventories from old dealers. These projects would have been much easier 25 years ago when there were numerous vintage snowmobile salvage yards around. Now most are gone or not doing business any more.

I’ll confess, most of my life I was a shop pig. It took several decades but I have gotten a little more organized now that I have some dedicated space. It’s really become a necessity with these projects, as it might be months or even years before I get back to something I’ve taken apart. Nice to be able to find things again.

I love my wood burner, couldn’t do much without it. Still can’t believe I got the whole setup for free. A friend said if I took it out of a shop he only uses in the summer and fixed the hole in his roof, I could have everything; stove, pipes, supports, flashings, cap, etc. The stove is a Nectre bakers oven made in South Australia and runs about $3000 alone. Think it had maybe been used once. Makes a wicked good pizza.
 

skiroule

Well-known member
This is a bit of a Back to the Future update. Since I decided to paint the chassis myself, I needed cooperating weather. Luckily, a few weeks back I got a 2+ day window of decent weather. Not great, but decent, so I dug out the old Devilbiss gun that has served me well since the mid-70’s and had at it. If I had waited another couple of days, I couldn’t have gotten it done, it never warmed up again.

Some metallic colors can be prone to mottling, where the metallic in the paint bunches together and creates light and dark spots. Often, this comes from spraying the color too wet, even just a tad. This particular shade of silver metallic was very susceptible. Not sure what the body men would think of it, but my solution is to follow the last heavy coat with a fogging coat, holding the gun at a much greater distance from the surface. This can be tricky, spray it too soon and the metallic will continue to pool in the wet paint. Wait too long and the fog coat won’t flow and you end up with fuzzy paint. Either way, you blow through a whole lot of paint.

I can always find flaws in my paint work but I have to consider the source. It will do.

DSC_1101.JPG


DSC_1104.JPG
 
Top