You are using an out of date browser. It may not display this or other websites correctly.
You should upgrade or use an alternative browser.
You should upgrade or use an alternative browser.
The Namesake
- Thread starter skiroule
- Start date
Nice!
I sure wish we were neighbors Kelly. I would love to hang out and watch you work!
It's the old adage, "It costs more when you watch."
skiroule
Well-known member
Merry Christmas everyone! It’s going to be a white one in northern MN for sure.
As I’ve mentioned before, one of the interesting things about tearing into these early sleds is seeing the various approaches that manufacturers took to create basically the same functionality.
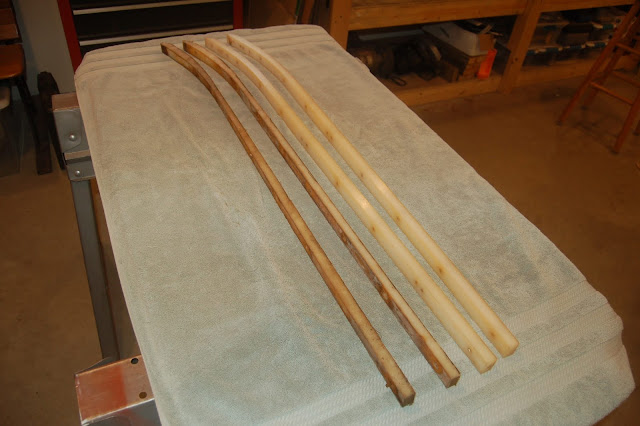
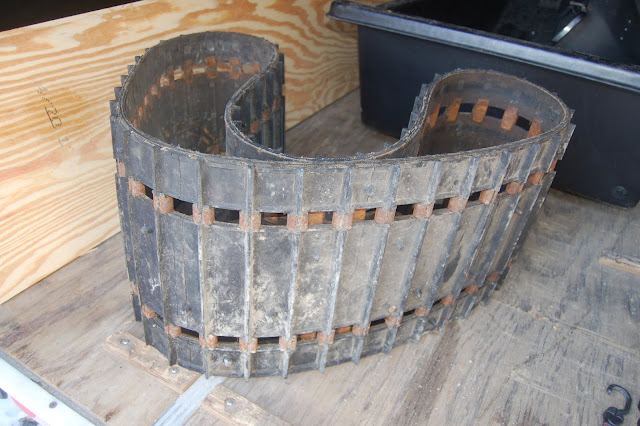
On the RTX sleds, Skiroule had a pretty unique solution for slide rail hyfax installation. They countersunk screw holes in the hyfax and just screwed the strips to the rails. It probably made changing hyfax a real challenge with the suspension in the sled but from a restoration perspective, this might have been a stroke of genius. With some hyfax material you could actually make your own replacements, as they are simply rectangular strips screwed to the rails.
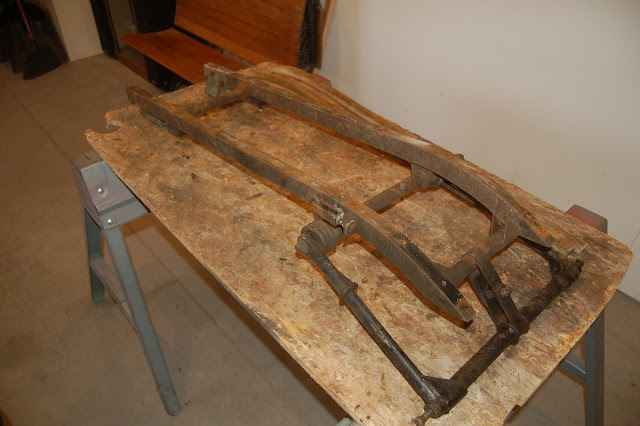
The fact that the one sled had a wrecked suspension had at least one silver lining. When the rails broke, I assume the hyfax was also damaged because it definitely was replaced after the rails were re-welded. It appears that the sled was not ridden much after the repair (maybe the owner had second thoughts about sledding). The difference between typical hyfax wear on a sled of this vintage and the set on the repaired sled is obvious when you see them side-by-side.
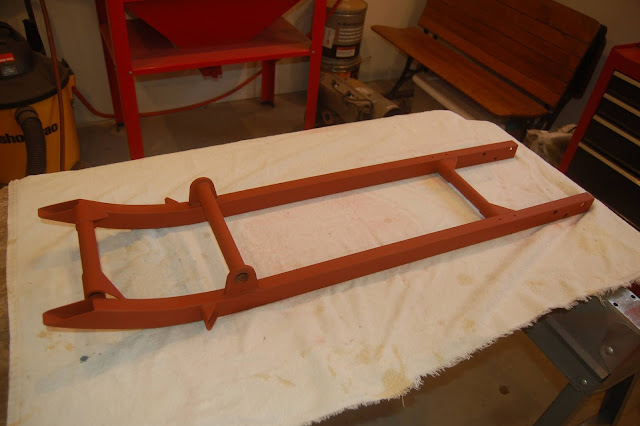
One other feature of this suspension is that the rail setup is a welded unit. The rails cannot be independently replaced without cutting it apart and re-welding. This is the setup reduced to the most basic component.
As I’ve mentioned before, one of the interesting things about tearing into these early sleds is seeing the various approaches that manufacturers took to create basically the same functionality.
On the RTX sleds, Skiroule had a pretty unique solution for slide rail hyfax installation. They countersunk screw holes in the hyfax and just screwed the strips to the rails. It probably made changing hyfax a real challenge with the suspension in the sled but from a restoration perspective, this might have been a stroke of genius. With some hyfax material you could actually make your own replacements, as they are simply rectangular strips screwed to the rails.
The fact that the one sled had a wrecked suspension had at least one silver lining. When the rails broke, I assume the hyfax was also damaged because it definitely was replaced after the rails were re-welded. It appears that the sled was not ridden much after the repair (maybe the owner had second thoughts about sledding). The difference between typical hyfax wear on a sled of this vintage and the set on the repaired sled is obvious when you see them side-by-side.
One other feature of this suspension is that the rail setup is a welded unit. The rails cannot be independently replaced without cutting it apart and re-welding. This is the setup reduced to the most basic component.
D
Deleted member 10829
Guest
Merry Christmas to you skiroule! Isn't it pretty outside right now?
skiroule
Well-known member
Christmas eve day was very cold and VERY windy but the wind subsided overnight and it made for a special scene on Christmas day. Sitting in the living room with a cup of coffee on Christmas morning, looking out at all that pristine white and the pines covered with hoar frost gave a person a sense of calm that can be hard to come by these days. Maybe I’m getting a little sappy in my old age but it was pretty amazing.
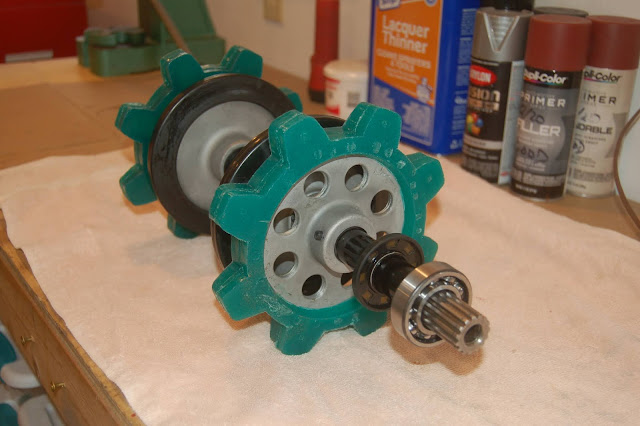
One of my favorite things on any project is taking little parts

and putting them together to make bigger parts.
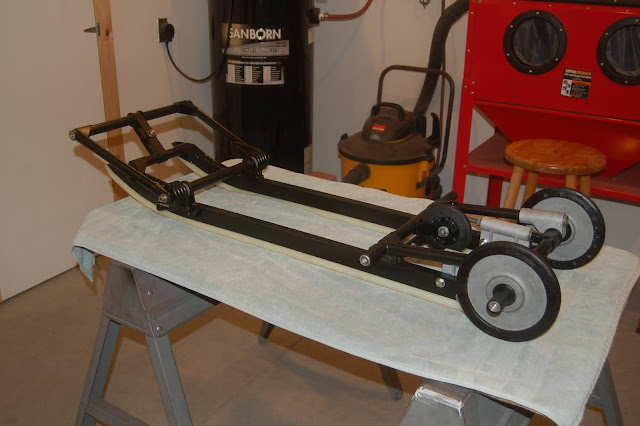
One of my favorite things on any project is taking little parts
and putting them together to make bigger parts.
Unlike some of us that usually has parts left over after a project like this.
skiroule
Well-known member
Well helloooo 2021!
Thought I’d throw out a quick update on the project situation. Rung in the New Year with a full-blown case of pneumonia so I’m down for the count until who knows when. I still have some photo backlog of work completed to date so hopefully that will carry over until some new progress can be made.
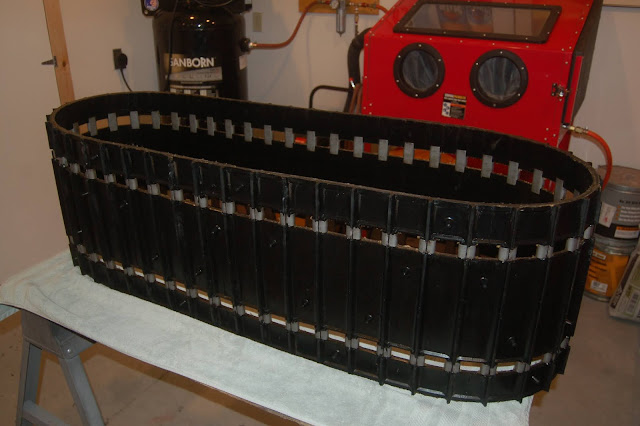
Got a weather break last fall that allowed me to sandblast the track clips. After getting rid of the sand residue, I clear-coated the clips with lacquer to preserve them a little longer. They will eventually rust again but it just didn’t make sense to put on a track with rusty clips when everything else has been somewhat reconditioned.
Track cleaned up pretty well. Burned off some of the loose threads on the track edges and used a lot of cleaner/conditioner. Has a few damaged cleats but nothing major, just trimmed off some of the damage. These tracks are not being reproduced and are getting harder and harder to find. Maybe someday a creative restorer will come up with a conversion to a more common track.
Thought I’d throw out a quick update on the project situation. Rung in the New Year with a full-blown case of pneumonia so I’m down for the count until who knows when. I still have some photo backlog of work completed to date so hopefully that will carry over until some new progress can be made.
Got a weather break last fall that allowed me to sandblast the track clips. After getting rid of the sand residue, I clear-coated the clips with lacquer to preserve them a little longer. They will eventually rust again but it just didn’t make sense to put on a track with rusty clips when everything else has been somewhat reconditioned.
Track cleaned up pretty well. Burned off some of the loose threads on the track edges and used a lot of cleaner/conditioner. Has a few damaged cleats but nothing major, just trimmed off some of the damage. These tracks are not being reproduced and are getting harder and harder to find. Maybe someday a creative restorer will come up with a conversion to a more common track.
skiroule, I've said it before but you are truly a master at your craft! Hopefully you feel better soon, my father in law had a bad case of pneumonia, swear it was the unmentionable illness but was negative, spent a stint in hospital and really threw him for a loop! Take care my friend!
skiroule
Well-known member
Thanks guys!
I am feeling somewhat better, at least for a few hours of each day. Other times during the day, not so much. Had the COVID (rapid) test, came back negative but I don’t know, this seems different than anything I’ve had in the past. Been monitoring my O[SUB]2[/SUB] level and so far, it’s holding at the low end of the normal range so I guess that’s good.
I know I probably talk too much about the little things on a project, but sometimes these little things can really throw a wrench into project progress if you can’t come up with a solution to a problem.
The bushings on the ski shocks were badly deteriorated and at some point, a previous owner decided to try to preserve them by dousing them with epoxy. All this succeeded in doing is fusing the bushings to the sleeves. I had to drill a series of holes in each bushing to weaken this bond so the sleeves could be pressed out.
Obviously, the factory bushings have been long out of production so the search for a suitable replacement was on. Summit Racing had the answer - sets of two-part bushings that were almost exactly what I was looking for. The ID and length were perfect but the OD of the insert section was just a hair too big. Some careful grinding on the bench grinder to reduce the OD and they fit nice and snug.
skiroule
Well-known member
Thanks Mike! Polaris is a great choice for a vintage restoration project. Lots of cool models built. The popularity of these sleds has made for pretty good parts availability, both used and NOS. Also, more reproduction parts are coming out all the time.
I’m afraid I’m a little biased towards the 77 – 80 TX/TXL models. Aluminum tunnel/subframe, non-metal pan (no rust), easy to work on, and I can’t think of a vintage sled that has been more fun to ride. For their engine displacement, these things fly. They do show up fairly regularly on vintage sled sale group pages. Bargains are getting harder to come by but every now and then you can pick up one at a lower price that’s a little rough, maybe needs a motor, etc.
Hopefully the day will come when you’ll pursue a project and have a lot of fun with it.
skiroule
Well-known member
Still not back in the shop, but don't think it will be too much longer. In the meantime, nothing preventing me from throwing a quick update out here.
Not sure why I was a little stressed about re-assembling the driveshaft. Maybe it was because I remembered how difficult it was to remove the old bearings. Fortunately, I was able to take advantage of the magic of thermal expansion. Kept the shaft in the cold garage overnight and heated the chain case side bearing for 8 minutes in the wood stove oven. Dropped it on the shaft and “clunk”, it seated right into position without touching it.
I didn’t want to use the same technique on the speedo side bearing because of the rubber seal on one side of that bearing and I wasn’t sure how much heat it could take. I did heat it some with a heat gun and was able to drive it on with a minimum of force. Interesting greasing approach on this side of the shaft. Instead of installing a grease zerk in the speedo housing, they installed a zerk in the shaft inside the tunnel. The grease is pushed down a hollow shaft section and through the triangular speedo insert to fill the housing and bearing. Seems odd but I guess they had their reasons.
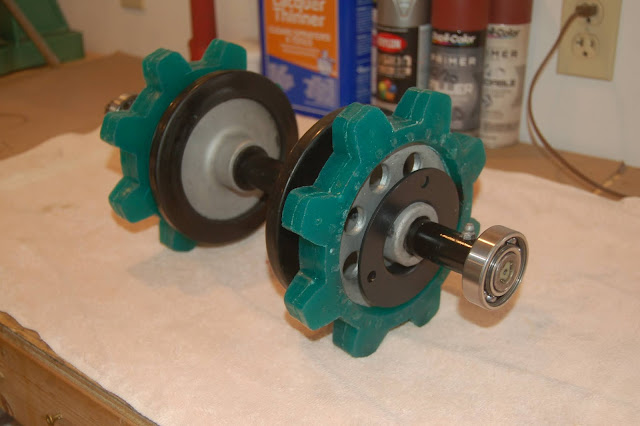
Glad to have this done, as this shaft must be installed with the bearings already seated on the shaft.
Not sure why I was a little stressed about re-assembling the driveshaft. Maybe it was because I remembered how difficult it was to remove the old bearings. Fortunately, I was able to take advantage of the magic of thermal expansion. Kept the shaft in the cold garage overnight and heated the chain case side bearing for 8 minutes in the wood stove oven. Dropped it on the shaft and “clunk”, it seated right into position without touching it.
I didn’t want to use the same technique on the speedo side bearing because of the rubber seal on one side of that bearing and I wasn’t sure how much heat it could take. I did heat it some with a heat gun and was able to drive it on with a minimum of force. Interesting greasing approach on this side of the shaft. Instead of installing a grease zerk in the speedo housing, they installed a zerk in the shaft inside the tunnel. The grease is pushed down a hollow shaft section and through the triangular speedo insert to fill the housing and bearing. Seems odd but I guess they had their reasons.
Glad to have this done, as this shaft must be installed with the bearings already seated on the shaft.
skiroule
Well-known member
Yeah, it’s amazing the difference a thousandth or two of clearance can make in the ease of installation. Just goes to show you the precision with which mechanical parts can be milled with modern milling equipment – ridiculously tight tolerances.
I’ve only seen videos of the oil bath technique but it was impressive, very large bearings just drop right on the shaft.
I did see the post on the TX that is up for auction. Very cool! Not everyday you run across a vintage sled of this quality. It really needs nothing to get out and play in the snow. Someone is going to end up with a nice piece of Polaris history and an excellent vintage ride.