Polaris Mutt Mod

skiroule

Well-known member
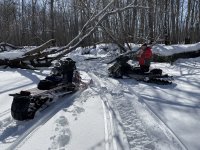
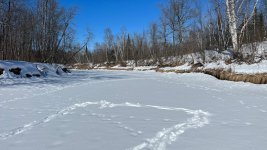
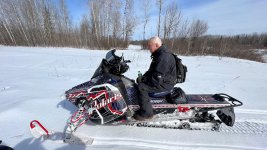
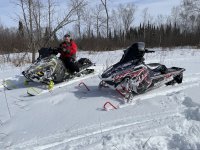
Another diversion of the best kind. An old riding buddy from the Cities made a trip north to visit his parents in the area so we were able to put in a day on the sleds.

As I’m sure I’ve said multiple times before, after at least two years of almost no riding of any kind, it sure feels good to be on a sled again. We rode creek beds, swamps, brush, trees, power lines, rivers, logging roads, fields, and even a little trail. The snow was a typical spring mix of set-up, windblown, and pillow soft and it was all a blast to ride. The photos do a better job of describing the experience.
IMG_2160_1.jpg

Power_Line_3_1.jpg

IMG_2166_1.jpg

River_2_1.jpg

Old_Sledder_1.jpg

I’ve always had this mindset that if I get something done on a project every week, no matter how small, it will eventually get done. I guess it states the obvious but it keeps me from getting discouraged and it certainly applies from time to time.

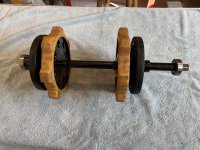
I did get a couple of spindle arm stops made to replace the welded-on ones that were either sheared off or cracked.. This aluminum is very strong, if these break, I’ve got bigger problems than a broken stop.
IMG_2172_1.jpg
Since this is a whole different engine configuration for this sled, I wanted to make sure there is no interference between things under the hood so I did a test-mount of the CDI box, voltage regulator, coil, and fuel pump. These will basically be a bolt-in now, once the chassis is painted. It sure seems simple compared to modern sleds.
IMG_2175_1.jpg

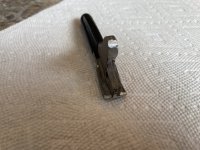
In the “Little Victories” department, I finally won the battle with the pin in the hood piano hinge. Looking at it now, I can’t believe how hard it was to get out. This thing was stuck, stuck. It took penetrating oil, heat, and all the patience I could muster to remove it.
IMG_2180_1.jpg
 
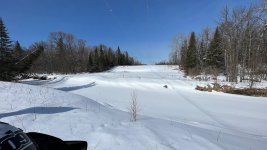
Another diversion of the best kind. An old riding buddy from the Cities made a trip north to visit his parents in the area so we were able to put in a day on the sleds.

As I’m sure I’ve said multiple times before, after at least two years of almost no riding of any kind, it sure feels good to be on a sled again. We rode creek beds, swamps, brush, trees, power lines, rivers, logging roads, fields, and even a little trail. The snow was a typical spring mix of set-up, windblown, and pillow soft and it was all a blast to ride. The photos do a better job of describing the experience.
View attachment 68143

View attachment 68144

View attachment 68145

View attachment 68146

View attachment 68147

I’ve always had this mindset that if I get something done on a project every week, no matter how small, it will eventually get done. I guess it states the obvious but it keeps me from getting discouraged and it certainly applies from time to time.

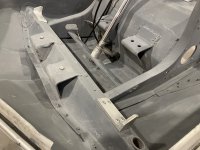
I did get a couple of spindle arm stops made to replace the welded-on ones that were either sheared off or cracked.. This aluminum is very strong, if these break, I’ve got bigger problems than a broken stop.
View attachment 68148
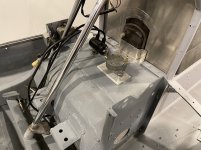
Since this is a whole different engine configuration for this sled, I wanted to make sure there is no interference between things under the hood so I did a test-mount of the CDI box, voltage regulator, coil, and fuel pump. These will basically be a bolt-in now, once the chassis is painted. It sure seems simple compared to modern sleds.
View attachment 68149

In the “Little Victories” department, I finally won the battle with the pin in the hood piano hinge. Looking at it now, I can’t believe how hard it was to get out. This thing was stuck, stuck. It took penetrating oil, heat, and all the patience I could muster to remove it.
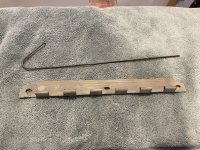
View attachment 68150
Thanks for posting, great work!
 

skiroule

Well-known member
Seems like my spare time lately has been totally taken up by riding and/or ice fishing and it looks like that will be the case for at least the next week or so. Looks like winter isn’t going anywhere soon.

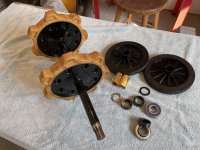
I did mange to slip in a little driveshaft work today. The idlers are basically freewheeling on the shaft so they wear over time and get a little sloppy so I decided to make a thin bushing of .012 brass shim stock to tighten them up a little. Not sure how long it will last but they are nice and snug now.
IMG_2223_1.jpg

Mounted the idlers and test-fit the new bearings so I can now add the driveshaft to the “bolt-in ready” collection of parts.
IMG_2226_1.jpg
 

skiroule

Well-known member
It’s funny how the even the most basic things can be a battle. The plan seemed simple enough: Assemble the brake master cylinder and bench-test it and the brake caliper. This is how things went today, I hope you will find this update entertaining.

Upon assembly, the master cylinder wouldn’t pull fluid from the reservoir. After scratching my head for a while I discovered that the piston was not retracting enough to clear the fluid supply port. I had to use the brake lever from a 79 because the original lever was toast and even though it looked identical, it was actually slightly different from the original and wouldn’t allow the piston to fully retract. A little strategic filing on the lever cam lobe and lever stop solved that problem.
IMG_2229_1.jpg

Still no fluid flow. Even though the piston could now retract further, the tired old return spring didn’t have enough oomph to push the piston to the fully retracted position. A modified spring from the hardware store finally got it pumping fluid.

After bleeding the caliper, I got the system to build pressure but the caliper piston wouldn’t move. This is where the bad decision of the day comes in. I decided to remove the clip on a washer on a shaft on the back of the caliper, not realizing that the clip/washer were retaining the mother of all springs, which was designed to retract the piston when the brake lever was released.

When the clip was released, the clip, washer, and spring went by my ear at about 70 mph but apparently the shock of the quick release freed up the piston, as it would now move when I pulled the brake lever.

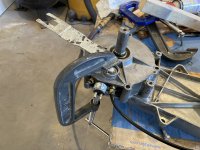
Now the problem was how to compress the spring and hold everything in place so I could reinstall the clip. After a couple of hours of failed attempts, the answer was a clamp, a socket for a fulcrum, and a modified tool for removing window cranks from 60’s Chevys. Also, notice the neat work area.
IMG_2233_1.jpg

Even though I could get the clip back on I discovered that the tension had gone out of it and it wouldn’t reliably retain the washer/spring. So it will be back to the hardware store tomorrow for a new clip.

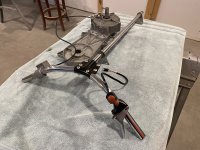
Not a total success, but there were no leaks and the brake system looks like it will function. Close enough that I felt I could put the bars and steering shaft together and add the kill switch and throttle block. Grips are on the way and when they arrive, the handlebars/steering will be one more piece of the puzzle that is ready for installation on the chassis.
IMG_2235_1.jpg
 

skiroule

Well-known member
It probably goes without saying that I’m not as far along as I thought I would be in terms of progress on the project but I guess all you can do is keep suiting up for the game.

With the help of a friend and his 20 ton press we were able to get the skis reasonably straight (if frnash were still with us I’d say “skies” just to poke the bear. Who knows, I maybe would still get a grammar correction from above).

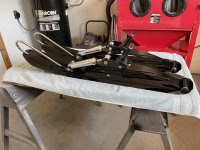
Original chrome shocks in good condition are not easy to find so I went with a pair of street rod shocks. The shocks on these skis have a relatively long “ride height” so the shocks had to be a little longer than I’ve seen on some other brands.

The chrome on the skis proper was rough so I blasted, sanded, and painted them. I did use some bonding primer to help the paint stick. The loops were actually in good shape so I left those chrome. Think they go well with the shocks.
IMG_2274_1.jpg

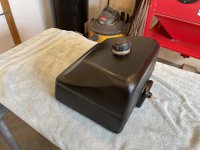
There wasn’t much to do with the gas tank. For some reason, there was no fuel line or pickup in the tank so I added those. Other than that, just a new cap, cleanup, and paint. I’ve had pretty good luck with painting tanks and if they need touch-up in the future, just re-spray them. Turned out a little shinier than I expected (for satin paint) but the seat vinyl is also on the shiny side so maybe it will look OK.
IMG_2267_1.jpg

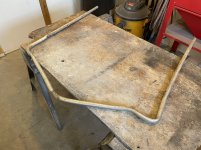
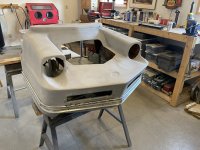
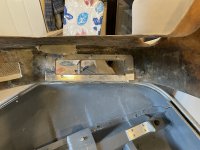
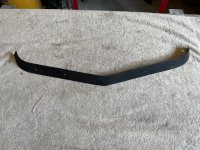
The current work in progress is a replacement for the so-called “bumper”. The original was beyond my ability to save.
IMG_2262_1.jpg

I cheated a little on making a replacement and sectioned it, as I didn’t trust my ability to calculate the three radii well enough to use a single piece of tubing. The replacement is basically cosmetic and isn’t strong enough to be really functional. I could have gone without it but wanted the sled to look somewhat stock. If I don’t screw up drilling the mounting holes it should be good to go.
IMG_2279_1.jpg
 
Last edited:

mezz

Well-known member
You continue to amaze with your attention to detail & the quality of your work is outstanding as always. Nice work is an understatement.:cool:
 
  • Like
Reactions: C W

skiroule

Well-known member
Thanks Mezz, these projects are as much about patience and organization as anything else. Even a project that is not a show sled can and often does turn into a marathon so it’s important to recognize that right out of the gate.

I sat down about 3 weeks ago and made a list of all the remaining tasks, big and small, that could be done before the lack of a painted chassis brought things to a halt. I came up with 58 things, some of which might take an hour, others, maybe a day or two. Since then, I’ve whittled the list down to 24 so the count is going in the right direction.

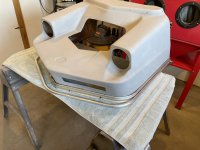
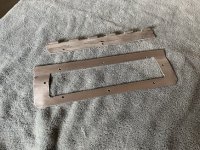
A couple of final footnotes on the pan trim and bumper: With temps in the 50’s today, I was able to get outside and bead blast the pan trim to clean it up. I’m toying with the idea of painting it a brushed aluminum color but I can make that call later.

The bumper mounting holes also got drilled and I was pleasantly surprised to discover that all the holes lined up. Now I can set the bumper aside, put the trim back on the pan and go to work on the hood hinge.
IMG_2289_1.jpg
 

pclark

Well-known member
Beautiful work on these sleds! Skiroule, if I may ask, do you have a museum that you store these finished sleds in and can we see all of your rebuilds if possible?
 

skiroule

Well-known member
Now that ice fishing and sledding is winding down, you should have more time.
An excellent plan (on paper), after all it’s over 5 weeks until the Ontario Walleye opener. The problem is execution. You know how spring projects just seem to appear. I still have my Christmas lights up.
Beautiful work on these sleds! Skiroule, if I may ask, do you have a museum that you store these finished sleds in and can we see all of your rebuilds if possible?
That’s a great question. I do have an area of the garage that might be big enough to properly arrange them if they didn’t have to share it with other late model sleds and everything from log splitters to table saws. I need to work on it and add some better lighting. Something I haven’t done but hope to next fall is to see if I can get them outside for a lineup shot once the snow flies.

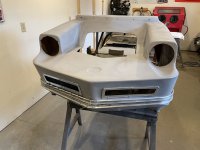
The job today was to get the hood hinge done. I’ve been avoiding it because I figured that if I screwed it up, the hood might not even close.

The original 73 hinge that came on the sled isn’t right for the 72 hood for a couple of reasons: First, it was a triangular aluminum frame that would cover the 72 vent opening and second, it only had three mounting points which worked with the stronger 73 hood but would be suspect on the weaker 72 hood.

I cut the piano hinge portion off the 73 hinge and made a new frame, figuring I could mount it flat in front of the hinge. After trying for a couple of hours to make this idea work, and failing, I came to the conclusion that you fabricators out there would have figured out in about three minutes: Put an “S” bend in the frame and mount it behind the piano hinge.
IMG_2305_1.jpg

Since the inside of the hood isn’t perfectly flat, there was still some massaging to be done on the shape but I eventually got a fit I liked. From the front it looks a little clunky now with temporary screws holding it together but will be cleaner when I eventually use pop rivets.
IMG_2302_1.jpg

It works surprisingly well and I propped it partly open as evidence that it will actually open (and close).
IMG_2294_1.jpg

Looking at it from the backside, it all seems so simple now. Hard to believe I spent all day on it but this is a big deal (for me anyway) and I think it was worth the effort.
IMG_2299_1.jpg
 

skiroule

Well-known member
Thanks wiscrev (aka ndrev), I’ll admit I’m guilty of getting a little down in the weeds with some of these updates but I’m hoping it helps explain my shop adventures.

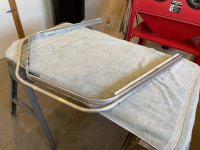
The original hood vent covers were a snap-in plastic affair and needless to say, most were either broken or lost. I’ve seen the CNC guys make some killer replacements but they’re in an entirely different league than me.

I did make some aluminum frames and used hexagonal automotive grill screen to fill in the openings. I’m going to experiment with some other treatments for the frames because, looking at them now, the polished aluminum seems a little too bold. I guess that worst case, I can always paint them to match the hood.
IMG_2317_1.jpg
 

mezz

Well-known member
I did make some aluminum frames and used hexagonal automotive grill screen to fill in the openings. I’m going to experiment with some other treatments for the frames because, looking at them now, the polished aluminum seems a little too bold. I guess that worst case, I can always paint them to match the hood.
View attachment 68495
Maybe paint them the same color as the tunnel & belly pan? Just a thought as the hood has a lot of surface & I am assuming it will be white. Just a thought,:unsure: carry on.(y)
 

garageguy

Well-known member
Keep the crome look till the sled is done. You can always tone it down after the sled is finished and you can see the whole appearance of it.
 

skiroule

Well-known member
These are both solid suggestions....
Maybe paint them the same color as the tunnel & belly pan? Just a thought as the hood has a lot of surface & I am assuming it will be white. Just a thought,:unsure: carry on.(y)
Yes, the hood will be white. To be honest, I didn’t think about the option of using the chassis blue but it could give the vents a more integrated appearance with the rest of the sled and not look like something I just slapped on as an afterthought.

Keep the crome look till the sled is done. You can always tone it down after the sled is finished and you can see the whole appearance of it.
Now that you mention it, I do have the luxury of not having to make a final call until the hood is painted and even sitting on the sled. I have some extra aluminum, I think I’ll make up one more test frame and between that and the frames I’ve already made, I can create the most likely options and see what they look like with the painted hood. I might be surprised at which one I think looks the best.

We're getting so close to painting weather that I should be able to do the painting myself rather than farming it out. That will save money and eliminate the need to rely on an outside source. If I get my act together, I will have things ready to go as soon as the weather cooperates.
 

wiscrev

Well-known member
These are both solid suggestions....

Yes, the hood will be white. To be honest, I didn’t think about the option of using the chassis blue but it could give the vents a more integrated appearance with the rest of the sled and not look like something I just slapped on as an afterthought.


Now that you mention it, I do have the luxury of not having to make a final call until the hood is painted and even sitting on the sled. I have some extra aluminum, I think I’ll make up one more test frame and between that and the frames I’ve already made, I can create the most likely options and see what they look like with the painted hood. I might be surprised at which one I think looks the best.

We're getting so close to painting weather that I should be able to do the painting myself rather than farming it out. That will save money and eliminate the need to rely on an outside source. If I get my act together, I will have things ready to go as soon as the weather cooperates.
I know you said "soon" on the painting. Was just going to say "you might have spoken too soon!' Didn't you get a bunch of snow? 6" here and expecting a little more. Neillsville, WI about 75 miles south west of me just got 19". Crazy weather. We had 81 on Wednesday and 74 on Thursday, [even took the bike for spin] and now I'm in the middle of a Winter Storm Warning-------with ice!
 

skiroule

Well-known member
I know you said "soon" on the painting. Was just going to say "you might have spoken too soon!' Didn't you get a bunch of snow? 6" here and expecting a little more. Neillsville, WI about 75 miles south west of me just got 19". Crazy weather. We had 81 on Wednesday and 74 on Thursday, [even took the bike for spin] and now I'm in the middle of a Winter Storm Warning-------with ice!
We haven’t gotten anything in the last few days. We did get about 10” a week and a half ago but the warm weather last week wiped that out and most of the snow in general. It sounds like we may pick up 3-4” this week but then begin a slow warm-up. Let’s hope so, I guess I’m ready to see green grass.
 

skiroule

Well-known member
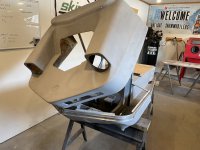
Been spending most of my time doing final sanding/finishing/priming on the hood and chassis, which doesn't result in things looking much different than before.

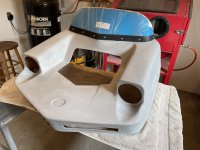
Guess the only thing worth a photo this time is what I hope will be almost be the last thing I have to make, that being the windshield trim. It's kind of an odd piece and apparently there just aren’t enough of this model being restored to justify a reproduction, at least I haven’t been able to find one.

I decided on sheet of 1/16” ABS as a material. It’s plenty heavy enough for trim and lends itself well to heat forming. It has a smooth side and a “hair cell” side that is textured. I think the textured side looks better and won’t show scratches as easily.

You would think it would be as simple as cutting a rectangular piece and drilling some holes but that’s not the case. It has to be shaped to match the windshield angle and formed for the hood corners so you end up with something like this:
IMG_2375_1.jpg

Of course, the proof is in the test-fit. It’s not perfect but like a lot of things on the build it it’s plenty good enough for the mutt. Have to love those little blue windshields.
IMG_2362_1.jpg
 
Last edited:
Top