Polaris Mutt Mod

skiroule

Well-known member
Not a very exciting update but figured I better post some sign of activity so people won’t think I’m as much of a slacker as is already suspected around the home front.

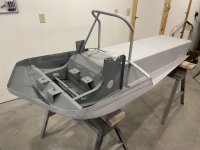
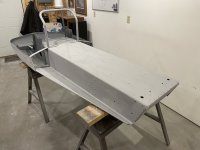
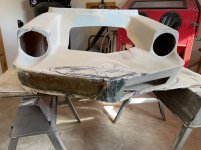
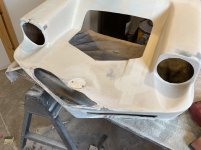
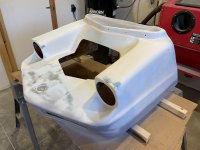
Put the first thin coat of what I call a “sanity check” primer on the bottom side of the chassis today. This should reveal any obvious flaws in my work or things I might have missed. Most of it will get sanded back off before a final primer coat goes on.
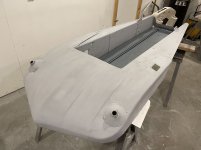
IMG_2080_1.jpg

There’s a little more work left to do on the top side but that should be ready for primer by the end of next week.

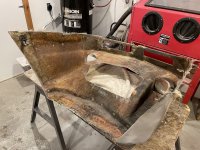
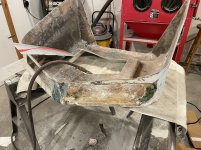
It always amazes me that some of these things take me so long but I guess in my defense, maybe there was a fair amount of work to be done. This is a shot from an earlier post to refresh everyone on the starting point.
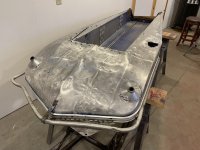
IMG_1810_1.jpg
 

mezz

Well-known member
Thats a lot of hammer & dolly work! Holy crap, that pan was pretty beat up. Nice work!
 

skiroule

Well-known member
Thanks Guys!

I had to buy a bigger hammer and dolly set for this job. Even then, the layout of the cross member required the use of a dent puller and when all else failed, the old crowbar and metal screws usually did the trick.

After the metal bending is finished and the screw holes brazed shut, I use a product called “Metal 2 Metal”, an aluminum-based filler that dries very hard and is very strong, maybe even stronger than the metal. Then some standard filler to even things out, followed by a polyester glazing compound. I’ve gotten really fond of the two-part stuff; you can feather it so thin you can see through it. Obviously, the goal is to minimize the use of fillers but I guess it’s a necessary evil.

Even when it is done, the chassis will have some waves and imperfections, but as is the case with a lot of the old stamped/riveted/welded aluminum chassis’, they came out of the factory with waves and imperfections and even some high-end restorations I've looked at have them.
 

skiroule

Well-known member
any more sanding and it will be a trailer queen 😉
I really had to laugh at this. At my pre-retirement job we often used the expression: “Polishing the Cannonball”, which is something I have to constantly resist doing on a project. I’m a little prone to trying to make things better than they have to be.

A trailer queen it won’t be though, sooner or later I’ll plant my rear-end on it and take it for a spin. This should be a fun sled for a vintage ride.
 

skiroule

Well-known member
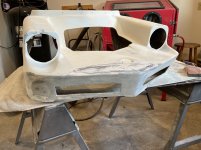
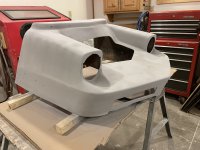
Back in the sub-zero temperature world outside so it seemed like a good night to work in the shop. Got the rest of the chassis finished up and sprayed the first coat of primer, which is good, I'm ready to move on from this phase of the project.
IMG_2090_1.jpg

IMG_2087_1.jpg
Next major task will be the hood and I’ve already started experimenting with spider web repair. I think can fix them using the approach I’m trying.
 

skiroule

Well-known member
I guess you have to start somewhere so I decided to start with light work on the hood, fixing some of the spider webbing that covers a good percentage of the hoof. Seems like some coarse sanding, followed by polyester filler and a couple of coats of high solids primer is doing the trick.
IMG_2096_1.jpg


I decided to finish up tonight with some stuff that has a longer drying time so I laid a strip of fiberglass mat along edges of the dash and sides of the hood. Next work session, I’ll hit the edges with the 17” air sander and apply fiberglass filler to finish them off and make them nice and straight.
IMG_2103_1.jpg

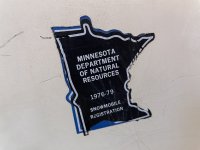
I miss these stickers. Maybe the DNR could charge and extra .02 on registration renewal and go back to these.
IMG_2100_1.jpg
 

skiroule

Well-known member
I remember those stickers. :) Looks like they did what most of us did and put one right over the other.
These things do not come off easy so I guess it was standard procedure. You have to wonder how long the sled was ridden after they quit registering it, if at all.
wish we wernt so far apart , i enjoy fiber glass work, also no stranger to sand paper
Yeah, being this far out in the sticks has some disadvantages. You’re a unique breed if you enjoy working with fiberglass. You’d be welcome in the shop for sure, might even be a creamy dark or two stashed in there.

As far as the project in general, progress is still occurring but nothing worthy of an update going on right now. Extra work shifts and other projects have slowed things a little as well. Also doing more riding this winter. In fact, will be doing some bush exploring with a friend this weekend.

Still hoping to get the hood and chassis painted by around mid-March. Then I can actually start re-assembly. That will be a big morale booster.
 

skiroule

Well-known member
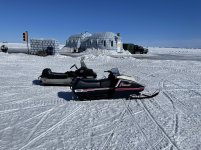
No shop time today. A friend and I busted out the vintage rides for a little spring exercise. Fantastic day for a ride – 40 degrees, sunny, and a lot of pool-table smooth trail. The igloo bar on Lake of the Woods (literally on the lake ice) was a mandatory stop. From there we did a nice little 45-mile loop that was a good mix of winding trail and straight sections where we could turn all those CC’s loose. I’m kidding a little but these sleds do like it when the RPM’s are up.
IMG_2133_1.jpg
But back to business:

Bear with me on this unusually long update but I don’t know how else to explain the progression of the repairs on the hood. I had completed a lot of the side edge repair and spider web repair before I moved on to the front of the hood, which appeared to have been smacked, repaired, and smacked again. It needed work but it was the bad repair work that really added time to the job.

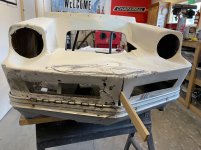
The nose of the hood didn’t match up with the pan trim. The angle was all wrong and there was about an inch gap between the base of nose center and the trim. The solution was to split the nose so it could be forced forward to fill the gap.
IMG_2108_1.jpg

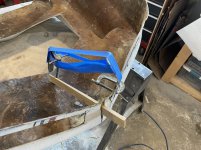
Once I got the fit right, it took a sophisticated jig to hold it in position to tack it with fiberglass: a cedar shim, two clamps, a piece of bent aluminum, and masking tape.
IMG_2109_1.jpg

The next task was to get rid of the crappy repair work on the hinge side. I had previously cut out and patched the broken corner so now it was time to cut most of that side away.
IMG_2111_1.jpg

I laid down an initial layer of fiberglass over the big cutout area, using a waxed Diet Coke carton as a backing surface, followed by two more reinforcing layers
IMG_2116_1.jpg

Then I cut the vent opening size correctly (it was wrong in the previous repair work) and started smoothing things out with fiberglass filler.
IMG_2119_1.jpg

If you’re wondering about the scribbling on the hood in the previous photos, it roughly marked out another previously repaired area that caused a noticeable hump in the hood profile. With a high-gloss paint job, this would have stuck out like a sore thumb so it had to go.
IMG_2121_1.jpg

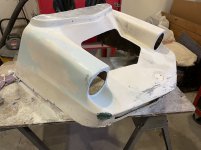
With the last hole patched and spider webbing fixed (hopefully), it was ready for some primer.
IMG_2124_1.jpg

Finally! A base layer of rattle-can primer. It’s not perfect but as $50 hoods go, I think it will be OK.
IMG_2130_1.jpg
 

gary_in_neenah

Super Moderator
Staff member
Sorry to get off-topic here. Is that a Traffic Light in your first photo? And the structure, do they tow that out there or is it in sections?
 

mezz

Well-known member
Sorry to get off-topic here. Is that a Traffic Light in your first photo? And the structure, do they tow that out there or is it in sections?
I have to say it again! Just fabulous work you do!!
Ditto to both posts. The igloo bar is off the charts, I've never seen anything quite like that. You will have to give us some detailed info on that. Of course, the restoration is coming along nicely. It's going to be a work of art when it's done, just like the others.
 

skiroule

Well-known member
Sorry to get off-topic here. Is that a Traffic Light in your first photo? And the structure, do they tow that out there or is it in sections?
Thanks guys, I keep plugging along. Between work, sledding, and .fishing trips, it looks like the project progress might take a bit of a hit in March but I'll still be trying to squeeze in some project activity. One way or another, it has to get done this spring.

Yes Gary, that would be a traffic light. Hard to say how they came to have it. Maybe it’s to handle all the sled traffic :). At noon yesterday we were the only sleds there, although the fishing crowd was starting to build and I suspect that within a couple of hours it would have been rocking.

The bar was kind of a stroke of genius that one of the resorts came up with. It’s actually quite large. They tow it out there in two sections on skids.
The two rooms and bar can accommodate a sizable number of customers and in one of the rooms you can drop a line through the ice for a few bucks. Ice fishing in a bar, you have to love it.

This link provides a good description of the whole deal: Igloo Bar
 

skiroule

Well-known member
In the name of Bud Grant and all that is holy... I'd be wrecked by noon and the wife would have to come and drive me home.
As long as you bring home fish all is forgiven.

A couple of quick hits here. It was nice to work on a few things and not have my hands dripping with fiberglass resin. It was like Chevy Chase in the Christmas Vacation tree sap scene every time I touched something.

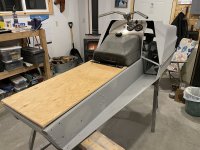
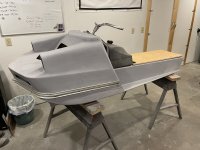
Starting to test-fit some stuff to make sure it all goes together in the final assembly. Gas tank is close, only need a little gasket material for the rear bracket. Added a few holes to the dash and mounted the ignition switch, choke, and light switch to check the placement relative to the tach/speedometer. Didn't turn out how I originally planned it but I guess it's OK. The handlebars need more cleanup but I wanted to get an idea of how it will all look together so I slapped them on. Also did a rough cut of the seat wood. As of now, I’m planning on building a seat but we’ll see.
IMG_2148_1.jpg

It might become a sled yet.
IMG_2142_1.jpg
 
Top