You are using an out of date browser. It may not display this or other websites correctly.
You should upgrade or use an alternative browser.
You should upgrade or use an alternative browser.
Polaris Mutt Mod
- Thread starter skiroule
- Start date
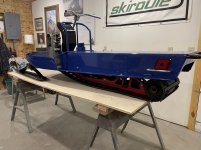
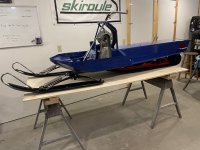
As always, nothing less than Amazing.Put in a little second effort tonight and got the running gear in place. Everything needs to be snugged up and the track tensioned but I’ll take it.
View attachment 68656
Dropping the rear suspension mount points a couple of inches does give it a slightly different look than factory.
View attachment 68657
skiroule
Well-known member
I do, especially since it’s an event that is not all that common.Don't ya just love it when a plan comes together?!!! Love it....
Sometimes the unplanned can be a good thing though. I was browsing though the TX group posts a few nights back and there it was – an ad offering a 73 TX small block motor plate for sale, complete with bolts and bushings. Not only that, but it was posted by the same guy out in Reno that sold me the carbs.
He’s proven to be a good parts source. His prices are reasonable, his stuff is clean, and he ships within 24 hours. I almost hurt myself trying to get a message to him but it paid off. I got the part.
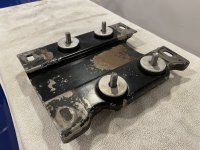
I was pretty proud of the motor plate that I had built because I couldn’t find one but there’s no question that factory is the way to go if you can. I don’t consider it wasted effort because I learned a lot.
Lots of piddly stuff to do on the chassis that won’t actually change the appearance, so look for an update once something that does happens.
skiroule
Well-known member
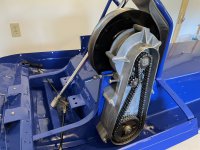
Trying to install the chaincase gears and chain a few days ago was proving to be a lot harder than it should have been. When I did finally get them mounted you could have played a tune on the chain, and that was without the tensioner installed. Something was not right
The gears and chain came with a chaincase that was separate from the chassis so I wasn’t sure which part was mismatched. All I knew was that I had a 39/17 tooth gear set and I had no idea what combination I should be using. One of the TX guys sent me a chart with a ton of specs on the 73 models. According to the chart, the 340 TX should be running a 39/15. As luck would have it, the upper gear off the 75 Colt carcass was exactly what I needed – 15 tooth.
With the 15 tooth upper gear, the chain I had worked out fine. As I’m sure I’ve said many times, sometimes these builds are about little victories.

skiroule
Well-known member
Wasn’t too happy with the first painting pass on the dash so I repainted it about a week ago. I was OK with the second attempt so I mounted it on the chassis, which allowed me to then mount the tank and the dash instruments/controls.
I was going to paint the dash rivets but I think I like them left silver, seems to give the dash a little more “businesslike” look.
Still some stuff left to do before it comes off the table and on the sled lift but it’s getting closer.
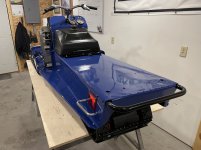
I was going to paint the dash rivets but I think I like them left silver, seems to give the dash a little more “businesslike” look.
Still some stuff left to do before it comes off the table and on the sled lift but it’s getting closer.

skiroule
Well-known member
Yeah mezz, the track came on the chassis. I figured I'd have to buy a different one but when I got it off the sled, it looked usable. There was the matter of a lot of broken cleats but the belts were in decent shape. There are reproductions available but I think this one will work fine for this project.
skiroule
Well-known member
I suspected that this summer would be busy and so far my suspicions have been confirmed. It’s been crazy but it hasn’t completely kept me off the project.
A bunch of small stuff did get done: Installed the brake line, kill switch, fuel pump, CDI box, coil, voltage regulator, and muffler bracket. Hooked up fuel supply line and started sorting out the wiring harness connections.
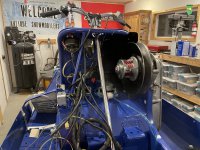
Also installed chain case cover and the foot rests. The foot rests were originally painted, most of which came off during normal use so I decided to just clean them up a little and go with bare aluminum.
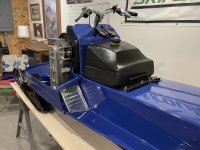
Everything that was planned for installation before the sled gets pulled off the table has now been finished. Once the brake system is bled and some adjustments made (ski alignment, track tensioning/alignment, etc.) it can be moved over to the sled lift.
A bunch of small stuff did get done: Installed the brake line, kill switch, fuel pump, CDI box, coil, voltage regulator, and muffler bracket. Hooked up fuel supply line and started sorting out the wiring harness connections.

Also installed chain case cover and the foot rests. The foot rests were originally painted, most of which came off during normal use so I decided to just clean them up a little and go with bare aluminum.

Everything that was planned for installation before the sled gets pulled off the table has now been finished. Once the brake system is bled and some adjustments made (ski alignment, track tensioning/alignment, etc.) it can be moved over to the sled lift.
skiroule
Well-known member
Don’t think this project will let me lose interest. It’s just daring me to finish it. I will admit, though, there has been a summer slowdown.
I would like to be spending more time on it but shop time has been hard to come by. Like Mezz said: “Have to make hay while the sun shines.” In addition to the normal summer activities, I have a few other home projects that need to get done this summer.
I agree Mark, I like the plain rivets. The ATX, which the project sled kind of emulates, was a very no-frills sled when it came out in 72. Other than hood emblems, it really had no molded plastic anywhere and it was obvious that the sled was built as a race-oriented machine.
skiroule
Well-known member
Managed a couple of small, non-visible things on the sled this week. Not very exciting but something that had to get done - Aligned the skis and tightened all the steering system bolts/nuts. I have to get this pretty dang close because once the engine is in there's no accessing the lower tie rod jamb nuts. Without removing the engine, the only adjustment is in the tie rod ends at the spindle arms.
Only thing left while it’s on the table is to tension the track, then it’s on to the sled lift and engine installation.
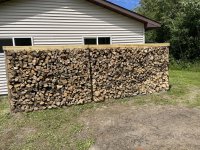
Most of the free time over the last week or so has been spent on the shop wood supply. Figured I had enough for one more winter but a group of angry beavers managed to fall and limb a bunch of trees on his property and he needed the trees cut up and removed. It’s mostly Popple but I can’t turn down free wood and it will work fine for heating the shop. Should be good for a couple of years now.
rp7x would scoff at this wood pile but it is three rows deep and I’m ready to be done with wood splitting.


