One Man's Trash

D

Deleted member 10829

Guest
Fish in the morning, work on the sled in the afternoon, more fishing at night and then a few beers as you sit around the sled looking at what you have gotten done. Repeat the next day. What a life you have now! Very jealous.
 

skiroule

Well-known member
Fish in the morning, work on the sled in the afternoon, more fishing at night and then a few beers as you sit around the sled looking at what you have gotten done. Repeat the next day. What a life you have now! Very jealous.

You won’t hear any complaints from me but not every summer day will be quite like you and Steve think . Some days I’ll mess with sled projects in the morning, take a nap, fish in the afternoon, and then reflect on the day’s accomplishments over a few beers in the evening.

The whole drive system is pretty much ready to install but believe it or not, the hang-up is the seat. The Chaparral solution to mounting the front of the seat is not the answer. The plywood base was fastened down with four screws driven up through the tunnel into the plywood. This meant that the seat had to be installed before the track went on.

DSC_0095.JPG


My preference is that the seat is almost the last thing to be installed so my plan is to make some tab retainers similar to what the other manufacturers of the day used and fasten those to the tunnel so the seat can be slid forward into the tabs when installing it. Not quite sure how to do it yet without affecting the seat cover but hope I can figure it out. If not, the only solution will be to drop the track again when the seat is ready to be installed.
 

skiroule

Well-known member
Regardless of project size, I guess you have to sweat the small stuff.

The WD-40 bath on the spindles did the trick and with a little help from a big pipe wrench (and a bigger hammer) the bushings broke loose. Now all the ski mounting hardware could be cleaned up and painted. In spite of the age and wear, the stuff cleans up pretty good.

DSC00601.JPG
DSC_0097.JPG
 

skiroule

Well-known member
If you can get the pipe/muffler assembly loose from the motor it just about looks like it will fit in a five gallon bucket with the mufflers sticking out on top. Fill the bucket full of favorite solvent or liquid wench swill and leave it alone for about 3 months. Right now it thinks it is all one piece. Try to make it remember it should come apart.

Turns out Grub was correct. I did get both pipe/muffler assemblies off the motor and commenced to soak the first one a few days ago. It really didn't take too long to loosen the pipes enough to separate everything. Unfortunately, that was the good news. Both the header pipe on the motor end and the muffler inlet are pretty rusted out. I think a skilled exhaust guy can (hopefully) fabricate replacements.

All of the 72 SS sleds used the Donaldson mufflers but the 650 version is way different from the smaller engines which had a factory-looking stamped/welded inlet. On the 650's that had much bigger pipes it looks like they simply took a muffler blank and welded on a custom pipe - actually a pretty crude looking job. It seems to be another piece of evidence that stuffing the big engine in this sled required a fair amount of hands-on engineering. It's not surprising that the factory version of these sleds is not very common, given that the number of mods required probably resulted in very little profit margin.

What has me puzzled is the amount of dirt that came out of the upper muffler chamber when I got the pipes off. The pile in the photo is not rust, it's dirt! - have no idea how it got in there. Bees maybe? The sled had a lot of mud wasp nests sprinkled here and there.

DSC00603.JPG
 

skiroule

Well-known member
It's possible that I mess with these old relics to appreciate the history as much as anything else, which is a good thing because sometimes the build work itself can be pretty overwhelming and frustrating at times.

I'm putting together a second chassis mock-up in order to get the exhaust right without having to use the finished tunnel/cross member but I'm using the original pan to be sure of the muffler fit. Looking at the pan today, it still amazes me that the pan (and the hood) were pinstriped by hand. It's hard to tell if the striping is the same as on the Bobby Unser sled but I'm betting that each sled had a few unique features.

DSC_0083.JPG


DSC_0084.JPG


1500522_3.jpg


Another obvious difference when looking at the pan is that the muffler holes are in non-standard locations. On the right is a production 400/440 SS pan, in which the holes are located in a symmetrical pattern in the exact same place on every sled. My suspicion is that on the 650's they stuck the mufflers on and then figured out where to drill the holes. It would have been great to actually see one of these being built.

DSC_0087.JPG
 

skiroule

Well-known member
The project continues to stumble along, with the usual life interruptions.

One diversion is our fishing boat. Apparently this is the summer to dump a ton of money into the boat: Replace one of the fish graph units, power trim repair, three new batteries, and a new cup holder.

Anyway, this side-by-side of the skis shows why it is sometimes a challenge to keep plugging away at these old relics. Turning rust into shiny stuff can require more effort than a reasonable person would invest but for us unreasonable people, preserving this stuff seems worth it.


IMG_0613%255B1%255D.JPG


I do have a couple of other things in the works but it might be a while before I can post some evidence.
 

skiroule

Well-known member
OK, a long over-due check-in.

As is often the case with these relics, I ran into some complications with the exhaust. All of the connection pipes were rusted out, as were the muffler inlets. After sandblasting both mufflers I also discovered that the muffler that was full of wasp mud (or whatever) had numerous pin holes due to rust. Rather than be constantly fighting with new pin holes that were sure to appear, I scavenged a different muffler from a 440 sled. The muffler is the same as the 650 version but the inlet is a different design so that needs to be modified.

After talking to the local repair shop owner, we came up with a plan to cut the mufflers at the inlet and fabricate a whole new exhaust, but with a twist. His suggestion (which I like) was to replace the flex tubes with late-model flex connectors, which are found on most of today's vehicles. I'm keeping the original flex tubes in case they are ever needed for a purist restoration but since this sled seems to becoming more of a "resto-mod" than a pure restoration, I have no problem replacing them with a more effective system.

I built a mock-up that is identical to what will be the finished sled configuration and that sled is now in the mechanics possession. He has obtained the parts he thinks he needs to build a complete new exhaust system. The flex connectors are stainless and the rest of the pipe is "rust resistant" steel but I plan to paint the pipes and leave the connectors as bare stainless Think it will be pretty cool. Hopefully he will get this fabrication done in the next week or so.

IMG_0634%255B1%255D.JPG
 
Last edited:
D

Deleted member 10829

Guest
Enjoy the updates! Lots of room under the hood, it looks like mostly exhaust with the engine mounted where they did then.
 

skiroule

Well-known member
Enjoy the updates! Lots of room under the hood, it looks like mostly exhaust with the engine mounted where they did then.

Yeah, not much else under there with the tunnel mounted engine configuration. Even though the hood is pretty low profile in front, the limiting factor on the exhaust replacement design is the steering shaft. There's not much clearance between the PTO side pipe and the shaft. Also have to make sure that there's enough exposed header pipe to be able to get clamps on the pipes outside the engine cooling shroud. It will be interesting to see if our plan works out.
 

skiroule

Well-known member
Checked in with the local auto shop guys last week to see how they are coming on the exhaust. They have the inlets cut off and are trying out some pipe configuration options. They had me drop off the engine cooling shroud so they know how much exposed header pipe they have to work with. Things are pretty tight there. They are going to use a pretty cool stainless clamping system at the header pipes but may have to trim the shroud a little to get them to fit.

This is where things were at last week.

IMG_0646%255B1%255D.JPG
 

gary_in_neenah

Super Moderator
Staff member
Ski,
So I'm wondering, why did they build these with two mufflers and not just one. Is this the same muffler they used on their singles and just doubled up? And since they used two, why on the one side and not split them? It looks like more space on the left side. Any guesses or out-right lies would be welcomed!

Gary
 

skiroule

Well-known member
Well Gary, as the old saying goes: "You ask a lot of questions for a guy from Wisconsin (or was it New Jersey?)". I can give you some factual information and I'll leave it up to you to decide if the rest is outright lies or just guesses.

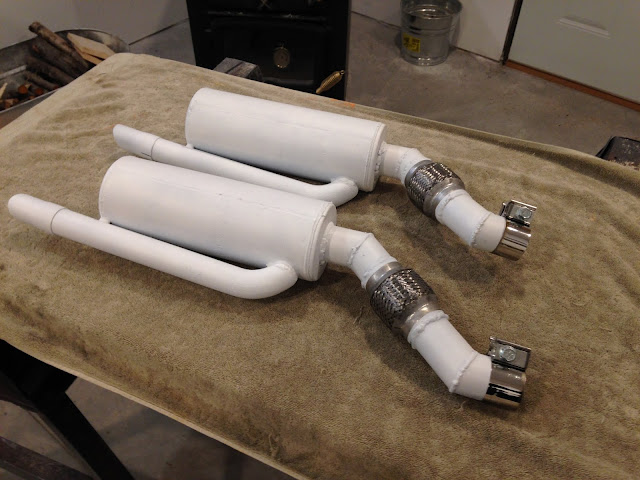
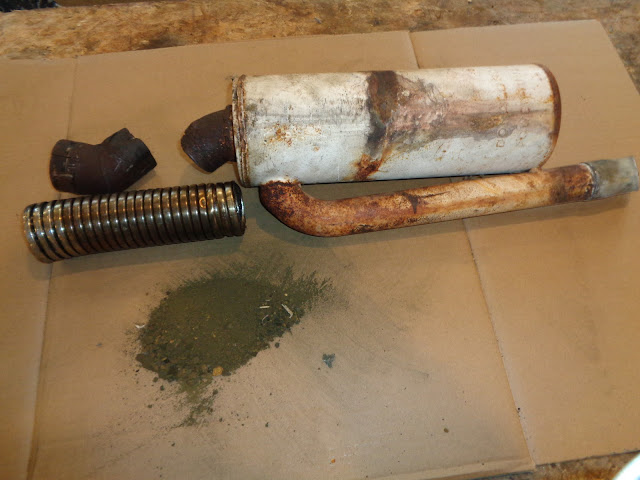
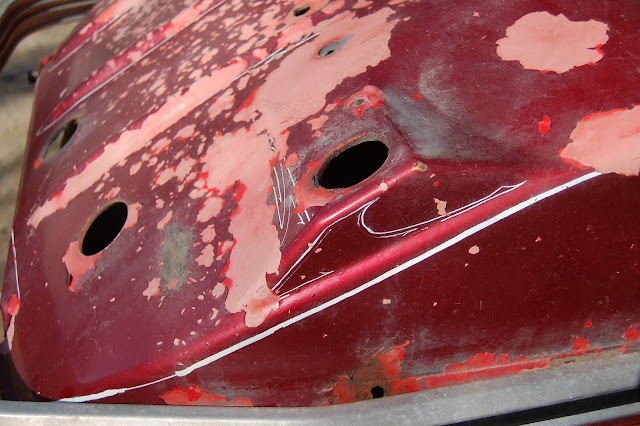
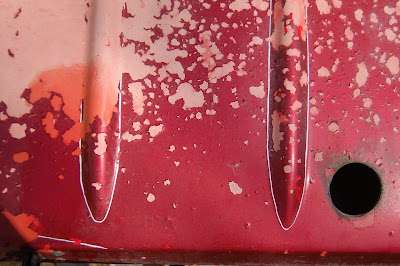
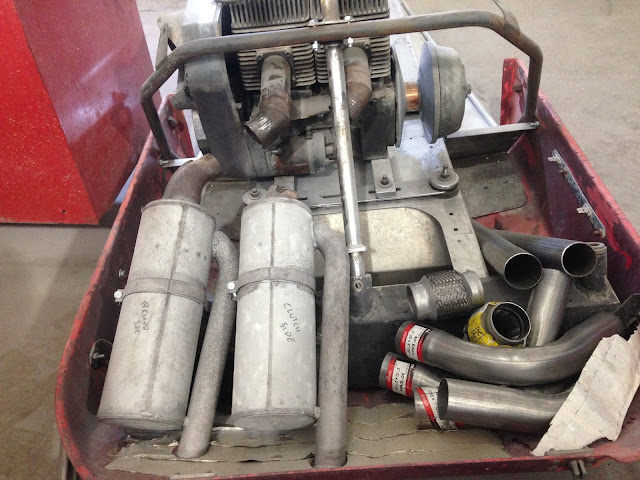
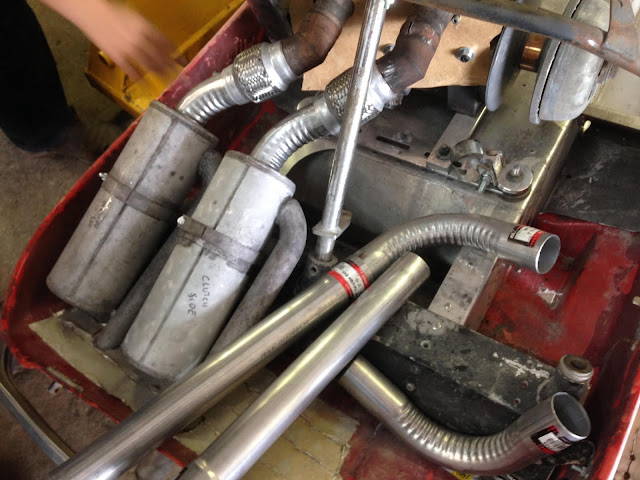
The mufflers on the SS models were not simply a doubled-up version of the other models that did not have twin mufflers. These mufflers were not only unique to the SS models but were only used for the 72 model year. Prior to and after 72, Chaparral used a single muffler for all stock models.

As to why two mufflers, I'm going to speculate that it was part performance, part image. After all, this was the era in which the muscle car was still going strong and no self-respecting street racer would be caught running single exhaust. The Donaldson mufflers were tuned to some extent but I"m not sure how precisely, as essentially the same muffler was used on the 400, 440, and 650 models, the only difference being the inlet pipe size. In any case, I think Chaparral was somewhat successful with the image thing because they look and sound pretty dang cool and set the SS version apart from the rest of the Chaparral herd.

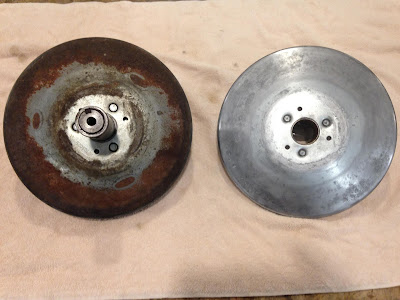
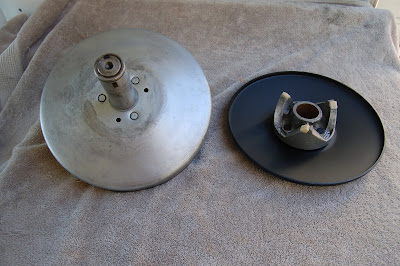
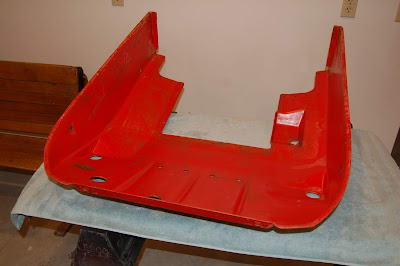
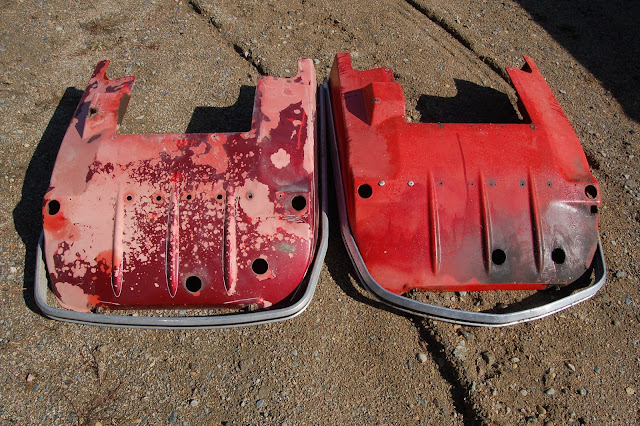
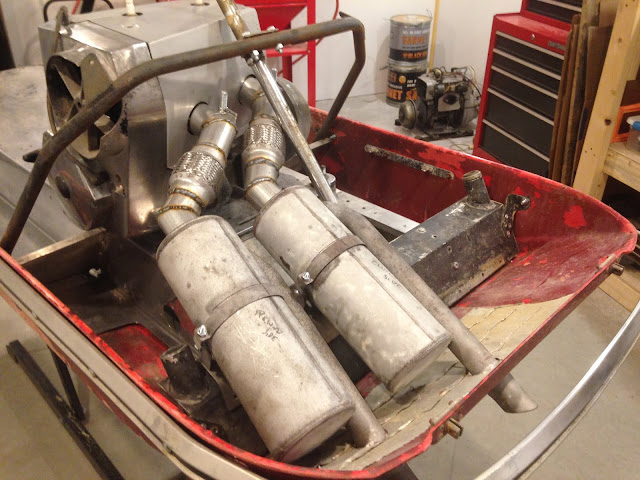
The latest photo is a little misleading because the driven clutch and chaincase is missing, which gives the impression that there was extra space on the other side of the steering shaft. Fact is, that when the driven clutch/chaincase assembly is installed space is at a premium on that side. My ultimate goal is to post some photos of things actually assembled before the next millennium so you can see how everything looks when complete.

If you've been having trouble sleeping, this response should probably do the trick.
 

gary_in_neenah

Super Moderator
Staff member
Sure, that makes sense. And if the twins were only used one year it may have been a sourcing issue as they were selling these machines as fast as they could build them in 1972. Keep us current as you move this along and thanks for the pictures.

Gary
 

skiroule

Well-known member
The local auto repair shop was finished with the exhaust work so I picked up the mock-up sled today. As much as I like to do a lot of things myself, looking at the work they did is a reminder than some things are best left to skilled people.

I think they did an awesome job of creating a custom exhaust fabrication for this sled. The beauty of this setup is that each pipe/muffler is a single welded assembly that can be connected/disconnected at the head pipes via the sleeve connectors – gives the exhaust a much cleaner look. The next move is to tear down the mock-up and paint the pipes/mufflers but I'll leave the stainless flex connectors as they are. Think it will look pretty cool.

IMG_0653%255B1%255D.JPG


The completion of the exhaust fabrication should motivate me to really kick the project in gear but here’s the problem – there’s still a couple of months to maybe land another one of these. It’s a nice distraction to have and there will be a lot of cold days that can be spent in the shop later.

DSCN3332.JPG


I do plan to maintain some momentum though so that when the bad weather hits this fall I have some idea of where I’m at on the project.
 
D

Deleted member 10829

Guest
That did turn out nice! Beautiful walleye! You will have plenty of time this winter to work on the sled as you say, but then it will be ice fishing and sledding time too. So much time and so little to do! ;) Jealous!!
 

skiroule

Well-known member
So much time and so little to do! ;) Jealous!!

It's funny, I thought I would have trouble de-programming myself when I left the rat race but I've found the adjustment surprisingly easy. One thing I've noticed is the absence of a sense of urgency. Time for a second cup of coffee in the morning? No problem.

I did start working a couple days a week at the local hardware store last fall, mostly to get me out and moving around and the discount is pretty good. Throw in some fishing, maintaining a cabin and house (lots of mowing!), a little sled work, and more fishing, and the days seem to fly by.

Started cleaning up the secondary faces - a few decades of exposed metal and the result is a lot of rust and pitting. Can't do anything about the pitting but faces should stay lrust-free once they see occasional use. Hoping to get it all re-assembled soon.

IMG_0648.JPG
DSC_0115.JPG
 

skiroule

Well-known member
Re-acquainted myself with the shop for a brief time time this week - got the exhaust off and a first coat of hi-temp paint applied. It will definitely be bright. Will give things another shot before installation. Also got the driven clutch re-wound and assembled (that was a handful).

IMG_0687%255B1%255D.JPG


Snow flurries off and on all day today and had to build a fire in the shop. Took it as a sign that winter is on the way.
 

skiroule

Well-known member
It might be a stretch but I’m calling it progress. Stripped the top coat of paint off the outside and inside the pan tonight. I’m thinking the color mottling is due to the undercoat being exposed to sunlight (for years) where the top coat of paint flaked off. Pretty sure they just sprayed over a stock pan finish on this sled but I don’t really know how they achieved the original finish, as fiberglass paint stripper has no effect on it. Quite a bit of sanding, patching, and filling to go before painting but it’s a start.

DSC_0205.JPG
DSC_0209.JPG
 
Top