Make-A-Wish Sled II

D

Deleted member 10829

Guest
Kelly,

I want to thank both you and Adam for all you have done for this project as you guys have done the real work on this, we just buy tickets. A special thanks to you Kelly, for the extra effort to post all of these updates and making this thread so much fun to follow! You, my friend, are a good man.

Mark
 

skiroule

Well-known member
Thanks Mark, your check is in the mail.

But seriously, thanks and be sure to stop in and check out the sled. In fact, anyone that gets up Mosquito way should swing in and take a look. Besides, where else can you get a genuine Mosquito burger?

I’m hoping the updates do tell the build story and show that, within the limits of our resources, we did our best to build a sled that would be worthy of the raffle and would appeal to people. Hopefully the updates might also provide some useful information for someone considering a sled restoration project, even if it is not this particular model.

Speaking of which…..

I’m not sure how this happens, maybe it’s a factor of time or just carelessness but these dashes often have starter rope groves. I found a product called Evercoat Multi-Fix that is awesome for repairing these things. It is a two part epoxy repair material that works on multiple “plastic-like” substrates and can be sanded/primed/painted when cured. This is a dash I had started to repair for the sled but didn’t want the third hole in the center panel so I repaired the original candidate, which actually had worse grooving but was correct for the sled.

Dash_Repair_2_zps26068c82.jpg


I also found a satin finish clear lacquer sold by the Eastwood Co. called Diamond Finish that is excellent for knocking down the gloss when painting things that should have a finish somewhere between flat and high gloss. I use it for a lot of stuff now, dashes, tanks, pans, etc. When finished off, painted, and clear coated, the dash looks pretty close to factory new (notice that the sled still had the 76 tach at this time).

DSC_0097_zps49e1d0a4.jpg
 

kirk600

Active member
I just purchased 5 tickets.

the money is going to a good cause, so I thank you for the chance to help

Kirk600
 

skiroule

Well-known member
Thanks Hardwater and way to go Kirk!

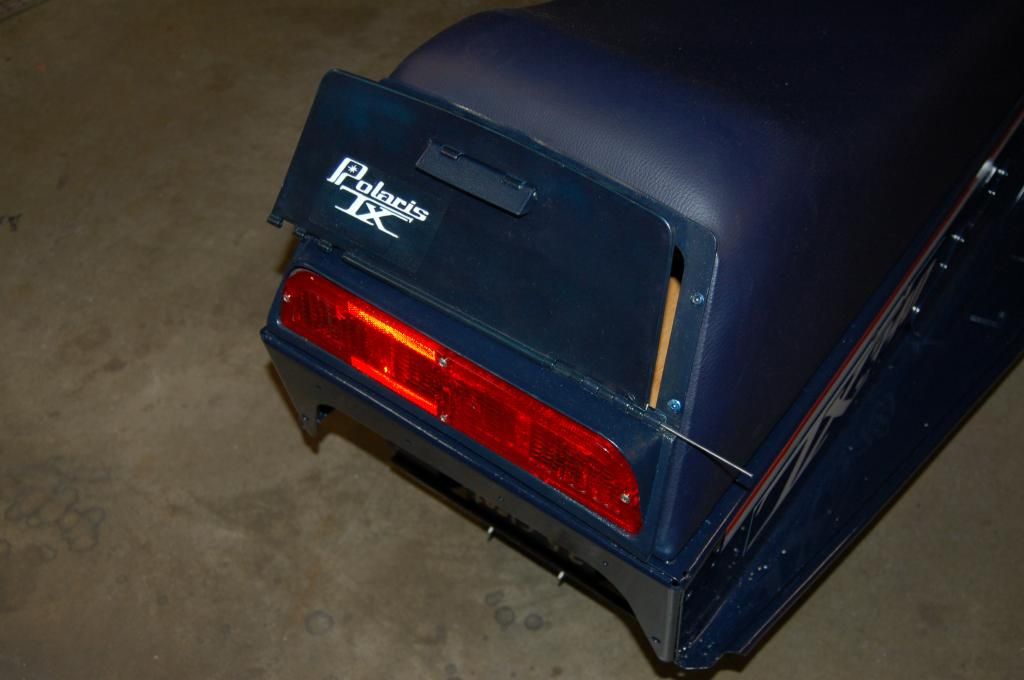
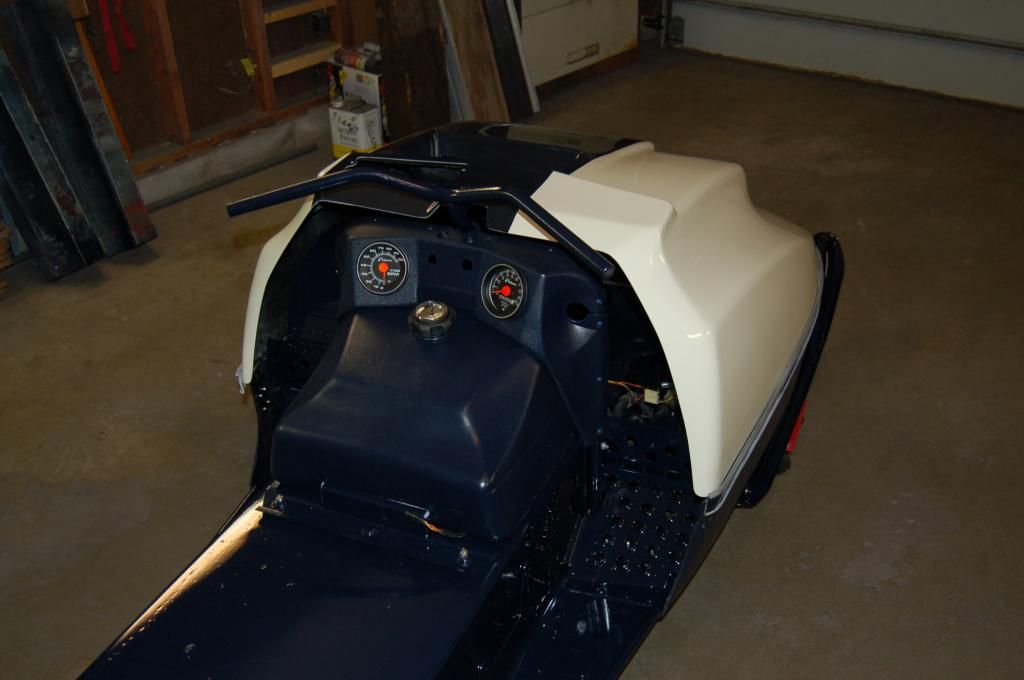
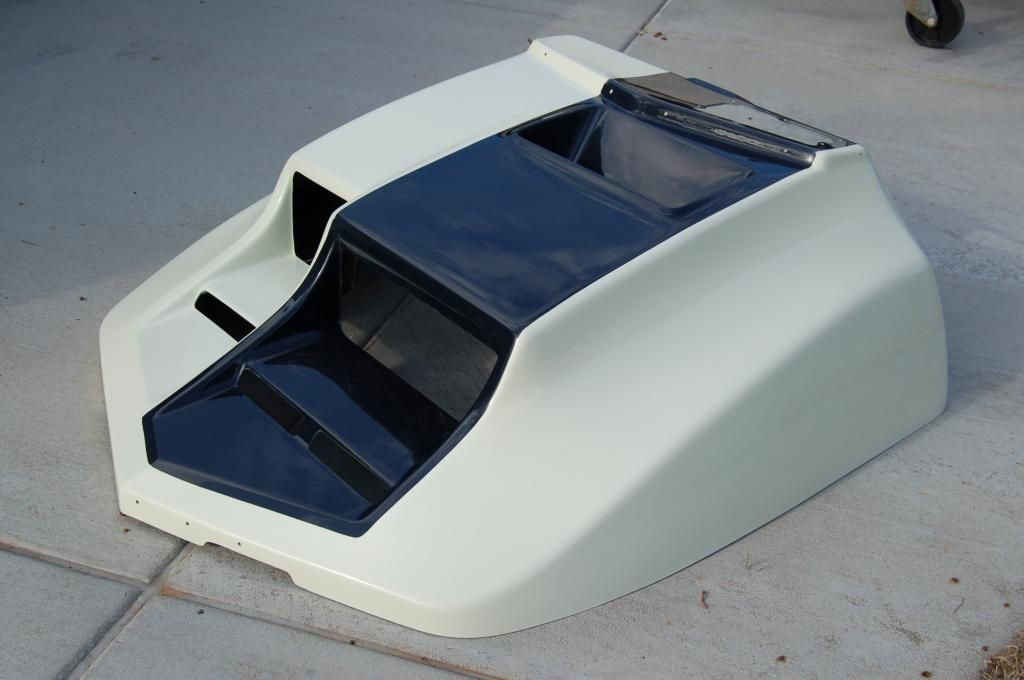
Both hoods on the restoration candidates were junk and the one donor hood I had wasn’t all that good either. Fortunately for me, I’m only a couple of hours away from Recreational Engineering , in Eden Valley MN, a company that I consider to be the best reproduction TX hood source in the country. The hoods come with the correct paint scheme for the year, all holes pre-drilled (in the right place), and all openings cut/routered.

DSC_0163_zps1e78f4e3.jpg


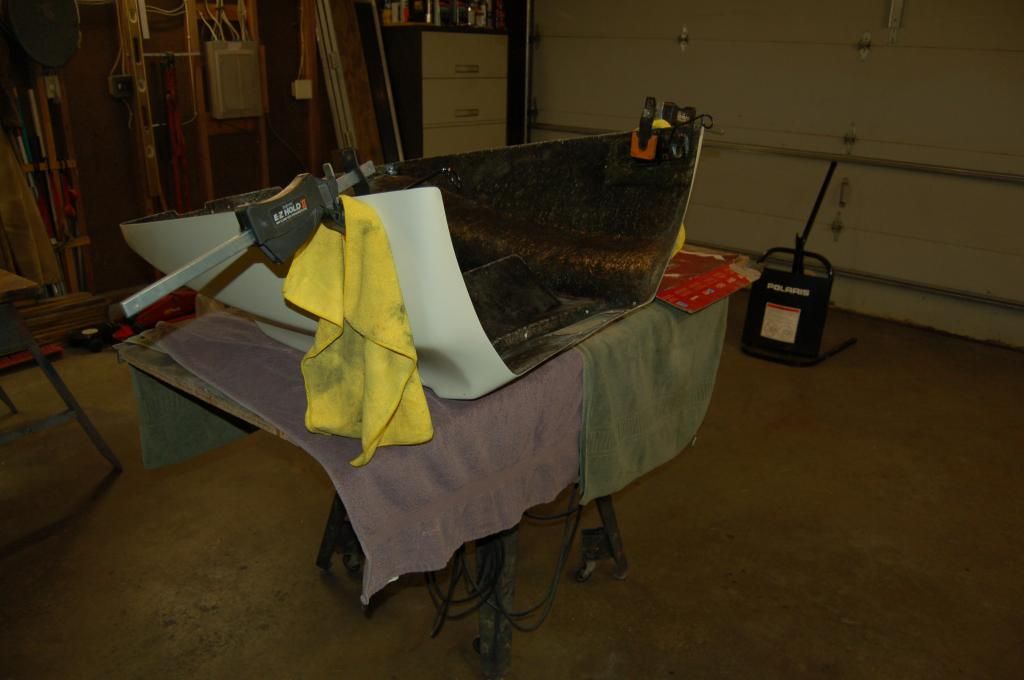
I do glass in the hood latches because that’s the way they came from the factory and it avoids putting rivets in the hood, which gives the hood a much cleaner look.

DSC_0193_zps7d8c7c55.jpg


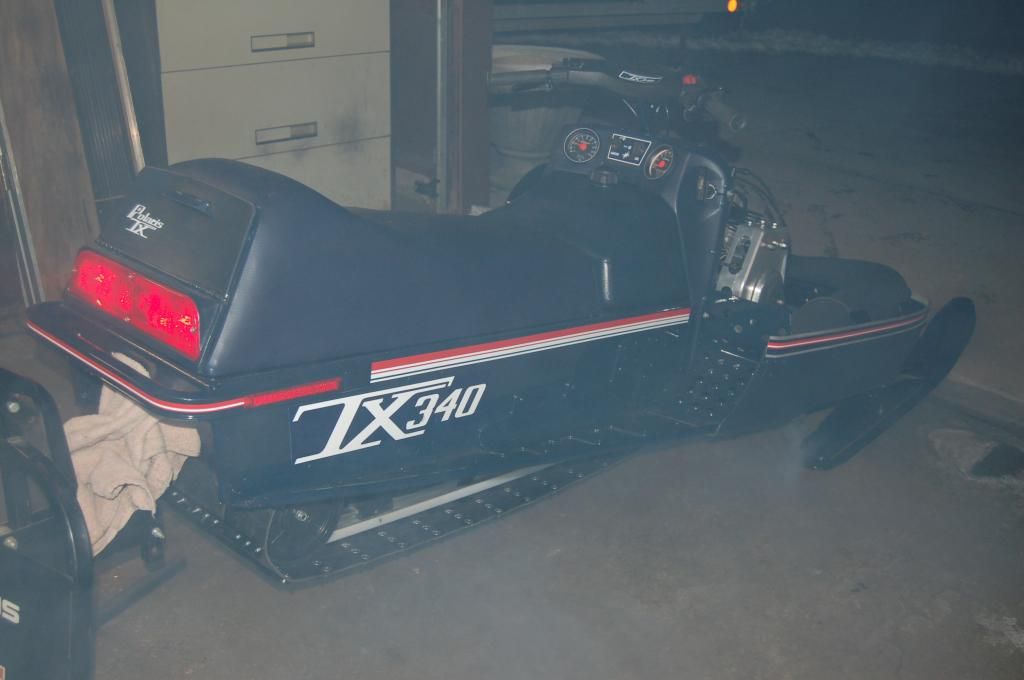
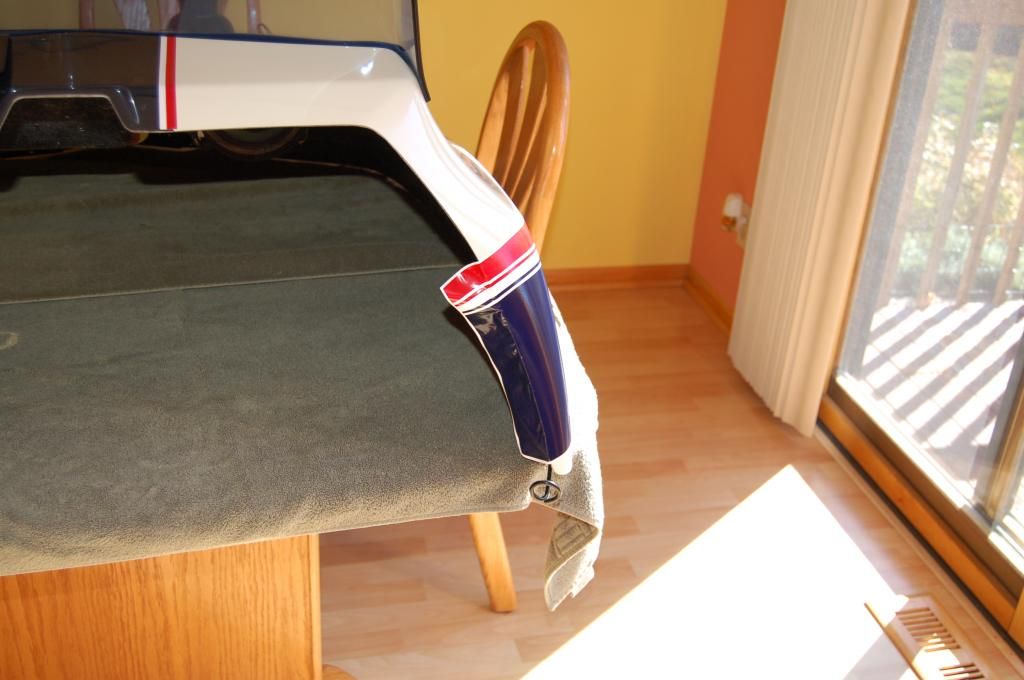
As for the graphics, I think Intech Graphics up in British Columbia is the only way to go. They use high quality 3M material for their decals and the reproductions are dead-on. Their decals are also very forgiving to apply: Spray a little soapy water on the surface on which the decal is to be applied, remove the decal backing, spray the adhesive side of the decal, apply, position, and squeegee out the excess water/air bubbles - done.

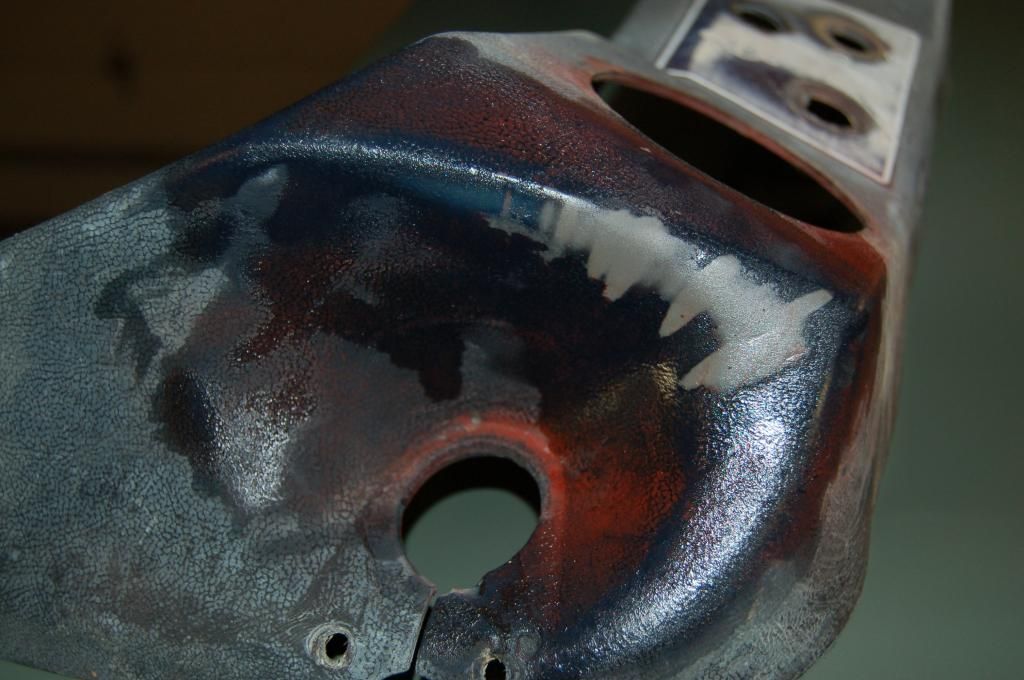
Where it gets a little tricky is when the decal must cover a compound curve, which is the case with the 77 side decals. It can be done but it takes patience and concentration (I’m a little lacking on both). The trick is to heat that area of the decal slightly with a hair dryer, stretch, apply a little more soapy spray, heat again, stretch, and so on. This continues until all of the wrinkles are worked out and the decal fits the curve. In this photo you can see how much I’ve stretched the decal to get a correct fit (it was even with the hood edge when I started). Once it’s dry, the excess is just trimmed off.

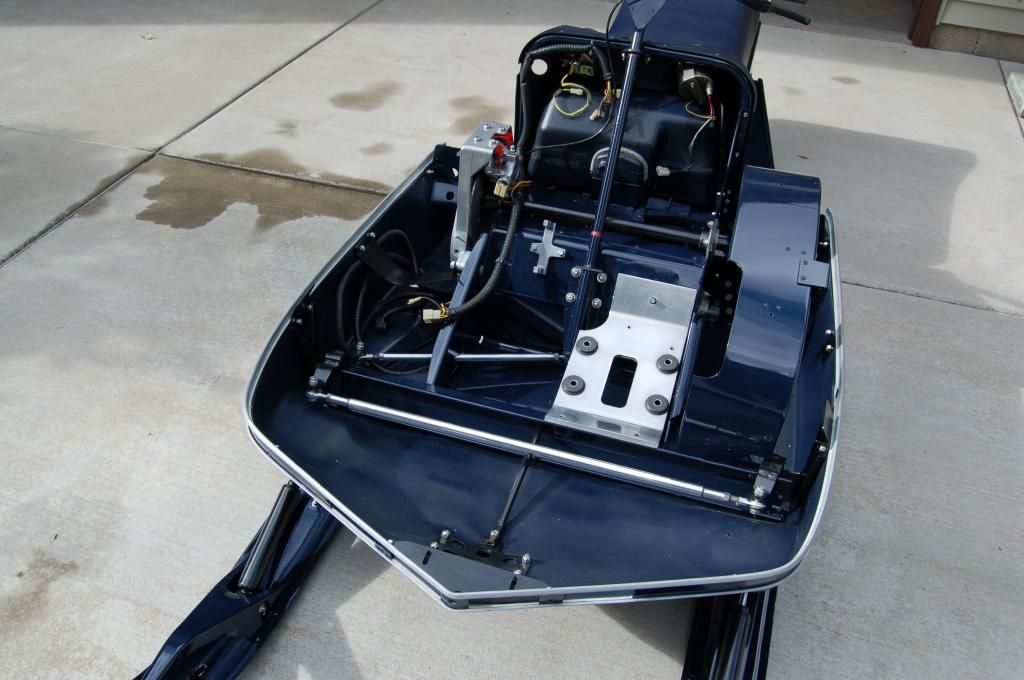
And yes, that is the dining room table.

DSC_0256_zps4200f354.jpg
 
D

Deleted member 10829

Guest
It's one thing to use up the whole garage but now the dining room table? LOL You have a very understanding wife or are the divorce papers being drawn up? ;)
 

skiroule

Well-known member
Nah, she's crazy about me. Just this morning she said: "It's really great having you around on weekends." I thought she was serious.
 

skiroule

Well-known member
Just finished cleaning up the 440 and doing a little maintenance so I was in the mood to add a segment.

While I would like to claim that I was trying for a “period look” in the video by introducing some imperfection in the quality, it was really just a thread that was stuck in my helmet vent. My apologies for the film quality but my filming budget was cut to the bone – no re-takes.


- - - Updated - - -

Always forget to add: Upgrade the play to 720pHD
 

jr37

Well-known member
Man, Kelly, is there anything you can't do? Restore an old sled to perfection and work with new technology to produce a movie. I bet you can cook and clean to. :p

All kidding aside, the sled looks fantastic. Can't wait to see you trio next season.
 
D

Deleted member 10829

Guest
Very nice Kelly! I'd love to see you guys coming down the trail. Very cool.
 

skiroule

Well-known member
Good one Jon, I do cook and clean but under cross examination I’ll deny it.

One thing I neglected to mention was that it’s probably been awhile since John has been on a short track (much less a cleated short track) and we gave him all of about 5 minutes to get the hang of riding one again and then it was game on. With Adam riding the Big Dog, he pretty much set the pace. My 340 is getting a little tired (original motor) and on more than one occasion I had er’ pinned to the bars and was losing ground.

To his credit, even though he professes to have “no special skills” it wasn’t long before John had the sled on rails. With these sleds it’s a subtle touch. He did well.

P.S. the trio that Jon is referring to is a 79 250 that I stumbled across. If I can bring it on home, I'll have the full 79 set (250/340/440). To tell the truth, I'm pretty excited about it.
 

snoluver1

Active member
Yeah, sorry about that pace thing Kelly. I was having so much fun I kinda forgot about the other 2 guys with me! Lol;) It's technically all your fault though. Your the one that gave me the keys!
 
Last edited:

skiroule

Well-known member
I could see where that could happen. Don’t say I didn’t warn you about these sleds. I’m sure you noticed in the video that as soon as we gave John a chance to lead on the Make-A-Wish sled, he was gone in a heartbeat. If I hadn’t shortchanged him on gas, we’d have never caught him.

I need to say a BIG thank you to Lori from the Wildlife Refuge Cabins for making a billboard/sign to use for displaying the sled. This is a great addition and will help people that aren’t familiar with the Ride-In (hard to believe) know what it is about. Thanks Lori!!!!

Thought I would post a few shots of the seat refurb. I had done a couple of Don Soukup seat cover installs before so I was familiar with the process. These are vacuum/heat formed seat covers so they have no seams and are very easy to install. Plus, they are a perfect match for the original.

The problem with the original seat was that there was some pretty severe deterioration of the foam and some areas that needed patching. This was beyond my ability so I took the new wood and trunk, foam, and seat cover over to see Denny at Mark’s Upholstery on Concord St. in good ol’ South St. Paul. He not only did a full restoration of the foam and the patching but as long as it was there I just had him put the cover on as well. It came out beautiful.

Seat_4_zps3c28050f.jpg


Seat_1_zps1b9ac812.jpg


DSC_0156_zps3322ab10.jpg


I really wanted to salvage the trunk door shown in the previous photos because it was a TX door but it was pretty faded out. This was where another Bradzoo tip came in. He told me that I could bring back the color by using a heat gun and it really works. It’s almost like painting when you get the hang of it. This is what it looks like after the heat treatment. This is the same door and it is not painted.

DSC_0197_zpsdc5f2f28.jpg


Once I finished painting the lettering with a paint pen (very cool little device), it was ready to install it. People often make fun of us engineers but sometimes we bring it on ourselves. This was my first attempt at installing it. Even I had to laugh myself on this one. A real genius at work warning.

DSC_0214_zpsfac90977.jpg
 

northmnsledder

New member
Man, Kelly, is there anything you can't do? Restore an old sled to perfection and work with new technology to produce a movie. I bet you can cook and clean to. :p

All kidding aside, the sled looks fantastic. Can't wait to see you trio next season.

I can vouch for his cooking! He's kind of like a boy scout in that he is always prepared for nearly every situation.

But the sled work is incredible.
 

skiroule

Well-known member
There are actually several good cooks in our core riding group. We are never lacking for excellent food and there is nothing like a great meal after a day of riding.

Hope everyone is having an enjoyable Christmas!

I was rummaging through the remaining photos for something to post tonight and decided that these were right for the occasion. These were taken the night I fired up the sled for the first time and I can tell you it was a good feeling to see and smell vintage engine smoke. I have to confess, I inhaled.

DSC_0160_zps150c3dc8.jpg


DSC_0163_zps43c25d20.jpg
 

skiroule

Well-known member
You obviously picked up on my somewhat sarcastic "Slick Willy" comment. One thing about ol' Bill, he was never boring.

37 years of grime on a motor plate.

DSCN2376_zpsf35f9783.jpg


A little scrubbing and polishing and it's ready for the motor.

DSC_0190_zps1a762c17.jpg


This is only loosely related but I thought it was a cool photo. This was taken just south of Lac La Belle in early December on a moonlight ride I took the night before we did the final tuning on the raffle sled. Perfect night: cool, completely still, and a full moon. Not a sound to be heard. A pretty special night.

Moonlight_Ride_2_zpsa2b66d66.jpg
 
D

Deleted member 10829

Guest
That is one cool picture! That jump in the background looks very tempting. It looks like someone had been checking it out on foot. :)
 

mjkaliszak

New member
Menbers:
I have an extra trail sticker, up for grabs. I don't want anything for it ( can mail it to a member ) all I ask that some one that might want it could make a small $25 donation to the JD Make a wish sled II or anything ( worthy of a donation ) connected w/ this forum as a small thanks.

PM me if interested, I will leave it up for 1st dibb's to the JD community.

mjk1
 

mjkaliszak

New member
Sticker has been taken by garyl62 , with a close second by tomx.

Just an update, Gary please send into so I can mail out today.

Thanks
Mike
 
Top